


1. If you are installing the NetWare Requester on a workstation, select
Edit
CONFIG.SYS and Copy All Files...
. If the NetWare Requester is already
installed on the workstation and only a driver update is needed, then select
Only Edit CONFIG.SYS...
.
2. On the next panel, specify the name of the adapter driver: IBMTRPO.SYS.
3. When you get to the panel labeled Copy ODI LAN Driver files, select
Copy
only the default driver
.
4. Follow the instructions on the panels to continue installation.
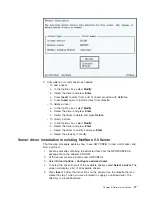
5. When Installation Complete appears in the Requester window, go to the
Configuration menu and select
This workstation...
.
6. Select
Edit
to accept the default location for the NET.CFG file.
7. In the edit box titled Current NET.CFG File Contents, type the following lines:
link driver IBMTRPO
SLOT 10001
link support
BUFFERS 84096
Notes:
a. See “Appendix F. Novell NetWare DOS ODI driver parameters” on page 77
for a complete list of parameters that you can specify in the NET.CFG file.
b. To enable source routing, changes will have to be made to the
CONFIG.SYS file. Refer to Novell’s
Workstation for OS/2
manual for
instructions on how to enable source routing.
c. The lines in the NetWare Requester section of the CONFIG.SYS file must
be in a certain order. Do not reorder the lines in this section of
CONFIG.SYS. Refer to the Novell manuals for more information.
8. Select
Save
to complete the NetWare Requester installation.
9. Reboot the computer to apply the changes.
Note:
To make changes in the NetWare Requester configuration, double-click
the Novell icon on the desktop. Double-click the Install icon in the Novell
window. Go to the Configuration and select
This workstation...
. Make
sure that the correct NET.CFG is shown in the next dialog box and select
Edit
. Edit the NET.CFG file in the edit box titled Current NET.CFG File
Contents. When the changes are complete, select
Save
and reboot the
computer to apply the changes.
10. Check for the following conditions to determine whether the adapter is working
correctly and whether installation has been completed successfully:
v
The device driver files loaded successfully. There are no error messages.
v
The adapter LEDs indicate normal operation: Green ON, Amber OFF.
If you experience problems, see “Chapter 4. Problem solving” on page 37.
DOS NDIS 2
Use the following procedure to install the DOS NDIS 2 device driver:
1. Insert the CD-ROM or the NDIS Drivers diskette into the appropriate drive.
2. Use your operating system documentation to install the driver (IBMTRP.DOS).
This driver is located in the \dos subdirectory on both diskette and the CD-ROM.
3. Modify the parameters, if needed. See “Appendix B. NDIS 2 device driver
parameters” on page 53.
Chapter 3. Software installation
21
Содержание 16/4 Token-Ring
Страница 1: ...16 4 Token Ring PCI Management Adapter User s Guide ...
Страница 6: ...vi IBM 16 4 Token Ring PCI Management Adapter ...
Страница 12: ...4 IBM 16 4 Token Ring PCI Management Adapter ...
Страница 44: ...36 IBM 16 4 Token Ring PCI Management Adapter ...
Страница 56: ...48 IBM 16 4 Token Ring PCI Management Adapter ...
Страница 60: ...52 IBM 16 4 Token Ring PCI Management Adapter ...
Страница 78: ...70 IBM 16 4 Token Ring PCI Management Adapter ...
Страница 84: ...76 IBM 16 4 Token Ring PCI Management Adapter ...
Страница 101: ...The label on documentation must also include the words Reprinted by permission of IBM Appendix G Notices 93 ...
Страница 104: ...96 IBM 16 4 Token Ring PCI Management Adapter ...


