background image


4. Operation 

TSα  Series User Manual 77 


Input 

Output 

No 

Display 

Description 

No

Display 

Description 


OD1 

PitchChg 

Pitch Change 


OD2 

Flee 

Traverse (Flee) in Mold 


OD3 

MSlowDown 

Main Arm Slow Descent 


OD4 

Nipper 

Nipper (Internal. External) 


OD5 

SSlowDown 

Sub 

Arm 

Slow 

Descent(Down) 


OD6

ExNipCls 

External Nipper Close


OD7


IF0  ReadyCut 

Ready to Cutting 

OF0

CutStart 

Cutting Start 

IF1  RdyStack 

Ready to Stacking 

OF1

StackingOK 

Stacking Complete 

IF2   


OF2

(Waiting device)

(Waiting device) 

IF3   


OF3

(Waiting device)

(Waiting device) 

IF4   


OF4

(Waiting device)

(Waiting device) 

IF5   


OF5

(Waiting device)

(Waiting device) 


Interlock Input 

Interlock Output 

No 

Display 

Description 

No

Display 

Description 

IE0 

AutoInject 

Auto Injection 

OE0

ConveyOn 

Conveyor On 

IE1 

MoldOpen 

Mold Open Complete 

OE1

TakeoutOk 

Take Out Complete 

IE2 

SafeDoor 

Safety Door Open 

OE2

MoldOpen 

Mold Open 

IE3 

FullAuto 

Fully Automatic 

OE3

MoldClose 

Mold Close 

IE4 

Reject 

Part Reject 

OE4

EjectorSig 

Ejector Signal 

IE5 

EjtFwdOk 

Ejector Forward Complete 


IE6 


IE7 

ImmEmg 

IMM Emergency 


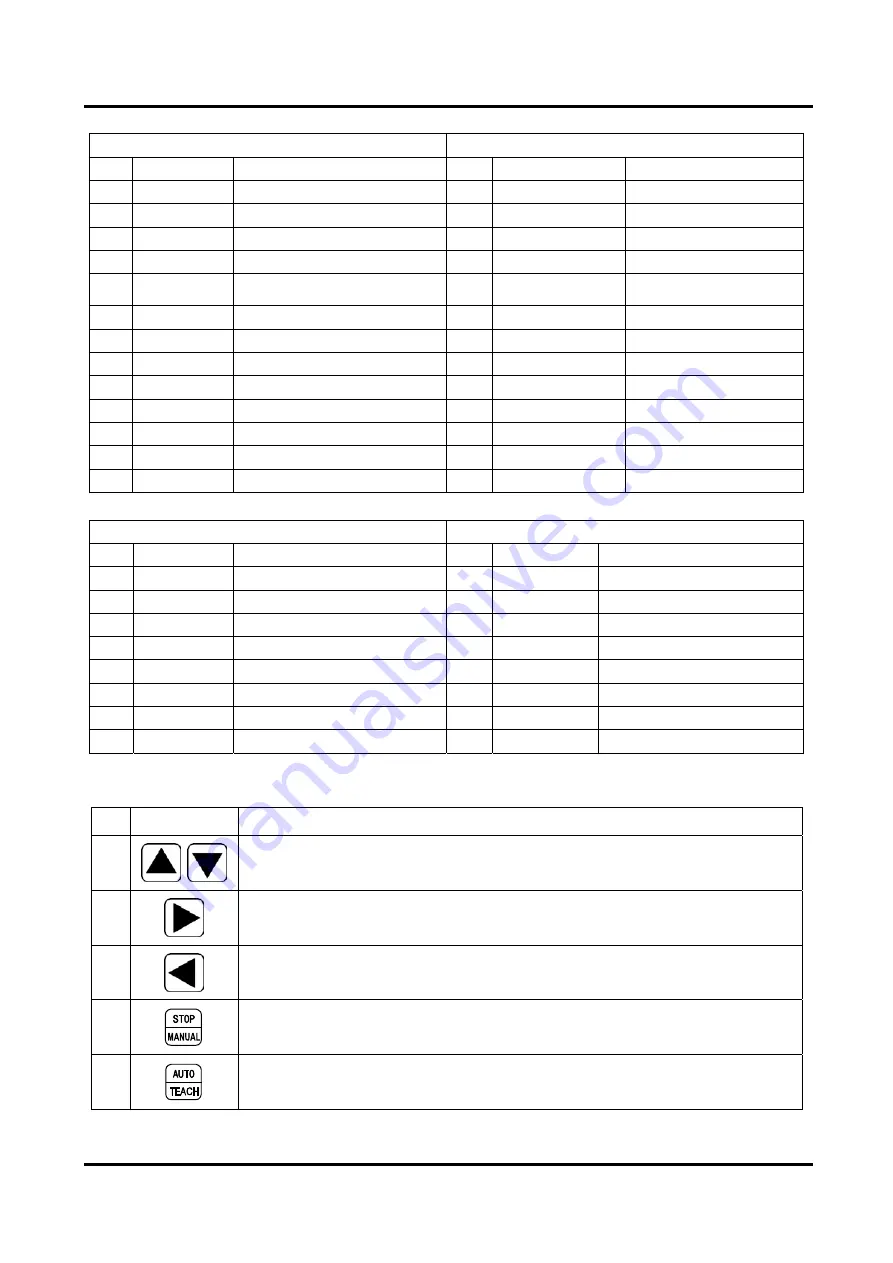
(2) Button Function 

NO 

Button 

Description 


Displays 3 information in one page and move to next page. 


Change Input Information screen to Output Information screen. 


Change Output Information screen to Input Information screen. 


Press Stop Button to change to Manual Mode. 


Press Auto Button to change to Auto Mode. 


Содержание TS-200DI

Страница 1: ...ly prior to installing operating or Per performing maintenance on this equipment User Manual TS Take out Robot TS 200SI DI TS 300SI DI TS 200SI DI TS 350S D TS 450S D TS 550S D TS 650S D TS 850S D TS...

Страница 2: ......

Страница 3: ...hout notice z HY Robotics Co Ltd assume no responsibility for any errors or omissions in this document z Any recommendation about manual amendment is always welcomed z The content include in this manu...

Страница 4: ...int or procedure or gives a tip for easier operation If the actions indicated in a DANGER are not compiled with death or serious damage of major equipment could results If the actions indicated in a W...

Страница 5: ...ages can be used as a guide to help you install your robot The customer must have the installation plan for the selected site verified to be adequate by a structural engineer or a similarly qualified...

Страница 6: ...e z Do not place any heavy obstacle or object on the robot body and controller It may damage the robot surface as well as deform the structure of robot and it may fall directly to the person z Do not...

Страница 7: ...ol box or the outside surface of the robot emits abnormal heat When there is any abnormal noise from the robot When any water or foreign obstacle is inside of the robot z Stop the robot immediately wh...

Страница 8: ...c line It may be cause of leaks z Make sure the operation environment Motion area Safety Guard should be proper for operation of machine equipments z Operate the robot with only healthy good and norma...

Страница 9: ...than clean compressed air z Regulate the air pressure as specified z If don t operate the robot for several days or long period of the time due to plant shutoff or vacation Turn OFF the control power...

Страница 10: ...electric shock may happen z Only a qualified person is allowed to open the cover or panel of the take out robot z Assign one qualified person who will control safety of the robot and need to be traine...

Страница 11: ...cable tie to organize power cable for safety Damaged cable could be the cause of fire or electric shock z Using unspecified Extension cable cause abnormal symptoms including heat and fire z Only quali...

Страница 12: ...x z Power off when connect or disconnect any connector of robot z Lockout Tagout before opening the control box z Connect the earth terminal of the plug to a class D grounding terminal WARNING...

Страница 13: ...fety Signs There are safety signs on the robot like below figures Respect and follow the messages on these signs when operating or performing maintenance on the robot Do not peel off these labels or s...

Страница 14: ...xii...

Страница 15: ...xiii...

Страница 16: ...urn Cylinder 15 2 4 Down Stroke Adjustment 17 2 5 Speed Control for Down Kick Rotation 18 3 START UP STOP 21 3 1 STEP FOR START UP 23 3 2 Start Up 24 3 3 Stop Operation 25 3 4 Emergency Stop EMO Stop...

Страница 17: ...ice Option 93 5 Follow Up 95 5 1 Motion Pattern Selection 97 5 2 Start Up 98 5 3 Move to Origin 98 5 4 Set Position 99 5 5 Speed Setting 102 5 6 Timer Setting 103 5 7 Mold Create 104 5 8 Step Run 105...

Страница 18: ...16 B 1 TS 200DI dimension 118 B 2 TS 300DI dimension 119 C Safe guarded space 120 C 2 TS 200DI 120 C 2 TS 300DI 121 H Air Chart 122...

Страница 19: ......

Страница 20: ......

Страница 21: ...1 Introduction...

Страница 22: ......

Страница 23: ...roduction TS Series User Manual 3 1 1 Robot Assembly This Robot is consisted of z Robot Body z Interlock and Control Box z Handy Controller Control Box Handy Controller Robot Body Injection Molding Ma...

Страница 24: ...d backward Traverse For traverse movement Main Arm For Up Down Movement Sub Arm Taking out sprue Sub Arm Grip Jig Unit Control Box Servo Controller etc are installed Regulator Reulator and air filter...

Страница 25: ...o switch between Auto and Manual Mode To use the function on the bottom half of a key Hold down the S Shift key and then press the function key z Arrow Key Up Down Left Right Up Down key move cursor t...

Страница 26: ...to USE Socket when robot is not in use Operate IMM only move the Plug to Not Use socket Relay Interlock for IMM Robot Operation Exchange with new oneonce per year Not Use Use Molding Machine Interloc...

Страница 27: ...1 Introduction TS Series User Manual 7 1 5 Each Axis Main Arm Kick Return Main Arm Up Down EOAT Rotation Sub Arm Up Down Sub Arm Kick Return Sub Arm Grip Vacuum Chuck Nipper Traverse...

Страница 28: ......

Страница 29: ...2 Before Operation...

Страница 30: ......

Страница 31: ...ot arm is retracted Beware that the robot may move suddenly as the system is pressurized 2 Turn Cock counterclockwise 3 Pull Up the adjusting knob and adjust the pressure to 5 9 105 Pa Gauge or 6 kg c...

Страница 32: ...kpa k P a P 1 P 2 z STEP 3 Press more than 1 seconds Set up finished and LED will display current Vacuum pressure k P a P 1 P 2 Lock and Unlock for Vacuum Sensor value Locking Vacuum Sensor Value will...

Страница 33: ...ation Check that the parts verification is working properly Check Suction cups Weekly or as often as needed Check EOAT mounting screw including gripper Check EOAT screw for tightness Tighten as requir...

Страница 34: ...2 Before Operation 14 TS Series User Manual Inspect each axis cylinder make sure operation and the cushion is working properly Inspect body for any damage during mold set up or other operation...

Страница 35: ...Kick shock absorber block and bolts z STEP 1 Turn off Power and depressurized system with air regulator or disconnect air z STEP 2 Loosen the bolts z STEP 3 Adjust Block location as figures Bolts This...

Страница 36: ...ts of block z STEP 5 Loosen the bolts z STEP 6 Adjust main arm location and find return position for application Tighten bolts as needed z STEP 7 Push Block to the kick cylinder guide Till the end of...

Страница 37: ...ull Safety Latch Pin Release Arm will allow it Down by gravity z STEP 3 Loosen the bolt and find proper location of EOAT for parts with pushing Shock absorber with Stopper And Tighten the bolt Precisi...

Страница 38: ...z STEP 2 HY Logo will displays and move to Servo Origin screen z STEP 3 Press will move each axis arm to servo origin point And then screen will display Manual Mode screen TOP Ver1 0 TS Ver2 00 Befor...

Страница 39: ...rform step 4 Follow same step to adjust speed sub arm kick speed control Speed Control for Down Up z STEP 6 There are two different speed setting One is in mold High Speed the other one is outside of...

Страница 40: ...Manual Set Slow Down Speed first and then set down speed Valve Description Main Arm Down Sub Arm Down In Mold Descent Speed Main Arm Up Sub Arm Up Ascent Speed Main Arm Slow Down Sub Arm Slow Down Out...

Страница 41: ...3 START UP STOP...

Страница 42: ......

Страница 43: ...3 Start up Stop TS Series User Manual 23 3 1 STEP FOR START UP Follow step for Auto Mode Power ON Origin Manual Mode Auto Mode...

Страница 44: ...move to Auto Message screen z STEP 5 Press and move to Auto Mode z STEP 6 Robot arm will move initial position and start Auto Mode Down Kick ChuckOn Before operate Servo Origin make sure the robot arm...

Страница 45: ...It will not stop in the middle of step If robot runs any step it will finish the step and stop before next step Due to Pneumatic Operation Pressure z STEP 2 Turn Off Power z STEP 3 Disconnect Air Pre...

Страница 46: ...bot will move to waiting position and stop Operation Alarm and buzzer will be on and Error message will appear in the handy controller z STEP 1 Eliminate Emergency Stop Situation Rotate ROBOT EMO butt...

Страница 47: ...4 OPERATION...

Страница 48: ......

Страница 49: ...T11 Conveyor Total Q ty Reject Q ty Multi Point Release Counter Setting Arm Selection Take Out Method Outside Waiting Motion Pattern Main Arm Down Sub Arm Down Chuck Rotation Method Main Arm Release...

Страница 50: ...ser Manual 4 2 Initial Screen Power on displays Logo and Robot Name type Robot Initialization and Move Origin Point TS Ver 2 00 Selecting Outside Waiting Option will initiate Robot move to the selecte...

Страница 51: ...finish origin point searching Order of Origin No In Mold Outside of Mold 1 Kick Return Up 2 Up EOAT Rotation Return 3 EOAT Rotation Return EOAT Swivel Return Option 4 EOAT Swivel Return Option Kick Re...

Страница 52: ...lete 8 Main Kick Return Complete 23 Sub Arm Up 9 EOAT Rotation 24 Sub Arm Up Complete 10 Rotation Complete 25 Sub Arm Kick 11 EOAT Rotation Return 26 Sub Arm Kick Complete 12 Rotation Return Complete...

Страница 53: ...ss Auto Button LCD displays Auto Mode screen 8 Press Auto Button with Shift LCD display Number input screen to set speed and position with numeric number input 9 Press Up Arrow with Shift Button LCD d...

Страница 54: ...n Chuck swing return 19 Press Descent Button for Sub Arm Move Sub Arm Down Press again Move Sub Arm up 20 Press Kick Button Move Sub Arm Kick Press again Move Sub Arm Kick Return 21 Press Gripper Grip...

Страница 55: ...tion smoothly with Injection Molding Machine Operation T0 T3 T1 T2 T6 T5 T4 T7 T8 T10 T11 Conveyor T9 Timers will not be saved separately with Mold Files For examples setting T0 as a 0 2 Seconds will...

Страница 56: ...2 0 KicRt Kick Return Delay T3 0 5 SOpen Sub Arm Release T4 0 3 MOpen Main Arm Release T5 0 3 Up Ascent Up Delay T6 0 5 NiCls Nipper Close T7 0 5 CutDl Cutting Delay Robot Nipper External Nipper T8 0...

Страница 57: ...ion NO Button Description 1 key moves up and down to select each Timer 2 Numeric Key Input delay time 3 Press the Enter Button to save the change 4 Cancel the Input 5 Stop Auto Mode and Back to Manual...

Страница 58: ...ove to the T1 Chuck z STEP 3 Press input 0 3 sec z STEP 4 Press the to save the change z STEP 5 Press Move to Manual Mode T0 Kick 0 0 0 0 T1 Chuck 0 0 0 0 T2 KicRt 0 0 0 0 Timer T0 Kick 0 0 0 0 T1 Chu...

Страница 59: ...duction Quantity y Robot Operation Cycle after Reset C1 DetFai Detection Failure Quantity C2 MulRel Current Multi Release Off number and Total Multi Release Off number 2 Button Function NO Button Desc...

Страница 60: ...key it displays Counter screen z STEP 2 Press for 2 seconds Total will be 0 Reset z STEP 3 Press displays Manual Mode 30 Manual 0 30 30 Manual 0 30 Counter can be changed during Auto Mode but can not...

Страница 61: ...Motion Mode 1 description Robot motion pattern can be decided by selecting of Each Motion Mode The below icons uses for robot motion in this book Origin Chuck Chuck Off Vacuum Vacuum Cutting ArmSet M...

Страница 62: ...Default setting is M S Display Description Motion M S Default Select Main and Sub for Both Arm opeartion M Arm Select Main for Main Arm Operation Taking Out Parts S Arm Select Sub for Sub Arm Operati...

Страница 63: ...g Default setting is Vacuum Display Description Motion Vacuum Default Take out Parts with Vacuum Operation Chuck Take out Parts with Chuck Operation Vac Chu Take out Parts with Vacuum and Chuck Operat...

Страница 64: ...and robot will move to IMM after mold is completely open This is for minimizing crash with Robot EOAT and Attachments of Mold Like Hose Cylinder Core etc Need to set waiting position outside of the r...

Страница 65: ...Chuck 3 Kick Return and Out Main and Sub arm set together Default setting is LType Display Description Motion LType Default Main and Sub Arm operate 1 Descent 2 Kick 3 Chuck or Vacuum 4 Kick Return 5...

Страница 66: ...Down Main Arm Descent position can be set up at either nozzle side or clamp side Default setting is Nozzle Display Description Motion Nozzle Default Main arm descent down at nozzle side Clamp Main arm...

Страница 67: ...Down Sub Arm Descent position can be set up at either nozzle side or clamp side Default setting is Clamp Display Description Motion Clamp Default Sub arm descent down at clamp side Nozzle Sub arm des...

Страница 68: ...before traverse movement to prevent EOAT unit from crash with Safety Door After Kick NoKick No Kick No Kick Before Traverse Movement EOAT unit rotates before Kick motion and traverse movement to preve...

Страница 69: ...4 Operation TS Series User Manual 49 AfterT After T After Traverse After Traverse and Kick EOAT Rotate NoRot No EOAT Rotation...

Страница 70: ...etting is Off Display Description Motion Off Default Traverse and Descent Down and Main Arm Release Off the Products Default NoDown Traverse and Release Products without Descent Down InMold Products A...

Страница 71: ...g Default setting is Off Display Description Motion Off Default Traverse and Release Off the Runner Sub Arm TrvOff Sub Arm Release Off while traversing ReOff Sub Arm Release Off while traversing retur...

Страница 72: ...operation can be controlled by Robot Ejector Kick operation number can be changed Default Number is 1 time Alarm Buzzer Use Set Alarm Buzzer function in Use or Not in Use Default setting is Use Displ...

Страница 73: ...fault number of point is 1 3 Main Arm Release Position Traverse Kick Up Down Pitch 2 1 Cycle 3Cycle 2Cycle 1Cycle MulOff NoUse Pitch 0mm Cycle 1 Pitch Number of Cycle should be in the distance of Prod...

Страница 74: ...tion Default setting is NoUse If Use Number of Cavity is 2 3 Travers Kick Up Down 2 1 Cycle Pitch OrdOff NoUse Pitch 0mm Number 1 Main Arm Release Position Order Point Off Pitch x Number should be low...

Страница 75: ...ovement to set position Default setting is NoUse Position can be set in the range of No Down Range Display Description Motion NoUse Default No mold close Delay function Mold will close after robot arm...

Страница 76: ...setting is NoUse Name Description Motion NoUse Default Not in Use Cylin Option After Chuck or Suction the parts operate cylinder and move to up or down position and take out parts from mold Need speci...

Страница 77: ...can be added with cylinder to change the pitch distance of the release off Default setting is NoUse Display Description Motion NoUse Default No Use Use Installed EOAT cylinder can change pitch distanc...

Страница 78: ...ot in Use Swivel Robot EOAT swivel in mold and Ascent Up and Swivel Return This feature can be added when the parts is too parallel too long so that Part can not move up because of tie bar distance Li...

Страница 79: ...ond will not occur any error Default setting is 0 sec 19 Robot Nipper Option Nipper Valve required RoNipp Robot Nipper Robot cut sprue or runner with attached nipper on EOAT Display Description Jig Mo...

Страница 80: ...o Nipper Cutting machine Default setting is NoUse Display Description Motion NoUse Default Not In Use InCut Nipper attached in Traverse Axis cut sprue and runner Need Nipper Cutting Attachments ExCut1...

Страница 81: ...tion NO Button Description 1 Pressing Up and Down arrow key will scroll icon and select line 2 Press Right and Left arrow key will change Mode Setting and Blink icon 3 Numeric Key For Input Numeric Nu...

Страница 82: ...STEP 2 Press moves to Method Item z STEP 3 Press changes the mode from Vacuum to Chuck z STEP 4 Press saves selected mode z STEP 4 Press finish setting the mode and move to Manual Mode ArmSet M S Meth...

Страница 83: ...Description Search Mold Number 2 Button Function in Mold Number screen NO Button Description 1 Numeric Key Input Mold Number 2 Change to Manual Mode 3 Cancel the Input Number 4 Change to Mold Manager...

Страница 84: ...an create any motion pattern and mode which can be created by user and move to New Mold screen and save with Mold Number and name 1 6 Basic Motion Pattern which is in system 7 99 User can create motio...

Страница 85: ...New Mold NO Button Description 1 Numeric Key Pressing the numeric key while blinking Mold Number will Input Number 2 Pressing Enter to save Mold Number and Name 3 Press to scroll the cursor on the mo...

Страница 86: ...de to select Press to change mode and press to set z STEP 5 Set Mold Number to 16 Press clear the mold number press and press to input 16 Press to save It will stop the blinking of the mold number z S...

Страница 87: ...lect Character It will displays A Z 0 9 _ z STEP 8 Press to save data z STEP 9 Press will create mold name save and move to Manual Mode 06 A NewMold 06 A NewMold Press will move cursor to left side an...

Страница 88: ...File that created before 2 Button function in Mold Delete Mode NO Button Description 1 Delete Mold Selected file and move to Manual Mode 2 Cancel operation and Move to Manual Mode 51 PHONE D e l e t e...

Страница 89: ...z STEP 3 Select mold file to delete with pressing or z STEP 4 Press displays Mold Number Name Delete z STEP 5 Press will delete selected file and moves to Manual Mode MoldMgr 50 SONATA 51 PHONE 52 MO...

Страница 90: ...e similar operation that want to create and setting 01 Sub_L 02 Sub_U type Motion 01 Sub_L Sub Arm Only L type Item Mode ArmSet SubArm Method OutWait NoUse Motion Ltype MArmDn SArmDn Clamp EOATRot MAr...

Страница 91: ...od Chuck OutWait NoUse Motion LType MArmDn Nozzle SArmDn EOATRot BeforeT MArmOff Off SArmOff EjtCtl Use Alarm Use 04 Main_U Main Arm Only U type Item Mode ArmSet MainArm Method Chuck OutWait NoUse Mot...

Страница 92: ...Motion LType MArmDn Nozzle SArmDn Clamp EOATRot BeforeT MArmOff Off SArmOff TrvOff EjtCtl Use Alarm Use 06 MS_U Main and Sub Arm U type Item Mode ArmSet M S Method Vacuum OutWait NoUse Motion UType MA...

Страница 93: ...Mold Number 5 which is similar with Example except Main Arm Down z STEP 2 Press and move to Mold Number screen z STEP 3 Pressing will input 5 and will move to Mold Manager screen z STEP 4 Cursor is lo...

Страница 94: ...s to EOATRot EOAT Rotation and Press change Main Arm Down to BeforeT EOAT Rotation Before Traverse z STEP 7 Press to move to Manual Mode screen Method Vacuum MArmDn Nozzle SArmDn Clamp EOATRot BeforeT...

Страница 95: ...ys at the first step 2 Button Function NO Button Description 1 Press Down Arrow Key will Operate Step Operation Press and hole 2 3 second operate 1 cycle 2 Move to Manual Mode 3 Step Operation z STEP...

Страница 96: ...uum Confirm OB1 Vacuum Vacuum Multi Release1 IB2 OB2 MArmGrip Main Arm Grip IB3 SArmGripOk Sub Arm Grip Confirm OB3 SArmGrip Sub Arm Grip IB4 SArmDownOk Sub Arm Down Confirm OB4 SArmDown Sub Arm Up Do...

Страница 97: ...vice Waiting device Interlock Input Interlock Output No Display Description No Display Description IE0 AutoInject Auto Injection OE0 ConveyOn Conveyor On IE1 MoldOpen Mold Open Complete OE1 TakeoutOk...

Страница 98: ...P2 Nipper ON Sprue or Runner cutting position in Traverse Axis P3 Main Arm Release Position Release Off position for Parts P4 Waiting Position This position is for waiting outside of the mold until mo...

Страница 99: ...tion NO Button Description 1 Pressing Up and Down arrow key scroll the key and line 2 Change Number Input screen to Speed Input screen 3 Numeric Key Input Position Number 4 Cancel the Input 5 Press th...

Страница 100: ...z STEP 1 Hold and press move to Mold Number screen z STEP 2 Press to input 1000 Press to save Position data z STEP 3 Press to move to Manual Mode 30 Manual 0 30 P0SubOff 900mm P1RjtOff 1100mm P2NipOn...

Страница 101: ...uce Speed 2 Increase Speed 30 20 10 5 10mm 1mm 3 Move cursor to up or down item 4 Traverse Movement X 5 Traverse Return Movement X 6 Save the input value and Current and set value synchronized 7 Press...

Страница 102: ...ut screen z STEP 3 Press to select Reject Position z STEP 4 Press or move robot to Defective parts Release Off position z STEP 5 Press to save position data press to move Manual Mode screen P0SubOff 3...

Страница 103: ...MaiOff Speed When robot moves to Main Arm Release Off Position S4 Wait Speed When robot moves to Waiting Position S5 TakOut Speed When robot moves to Take out Position Chuck or Vacuum in Mold 2 Butto...

Страница 104: ...move to Number Input screen z STEP 2 Pressing changes Speed Input screen z STEP 3 Press to input 100 Press to save speed data z STEP 4 Press to move to Manual Mode 30 Manual 0 30 S0 SubOff 80 S1 Rejec...

Страница 105: ...rn EOAT Swivel Return Option 4 EOAT Swivel Return Option Kick Return 5 Traverse Return Traverse Return 2 Button Function NO Button Description 1 Stop Auto Mode and move to Manual Mode 2 Move to Mode s...

Страница 106: ...Mode 3 Change to the Auto Mode 3 Checking Error Log z STEP 1 Press and at the same time displays Error Log screen z STEP 2 Find error with pressing or button z STEP 3 To move to Manual Mode press To m...

Страница 107: ...on NO Button Description 1 Change to the Manual Mode 2 Change to the Auto Mode 3 Checking Version Information z STEP 1 Press and at the same time displays version z STEP 2 To move to Manual Mode press...

Страница 108: ...imize shock in the structure and increase life cycle time This time is between descent on and descent off 2 Button Function NO Button Description 1 Pressing Up and Down arrow key scroll icon and selec...

Страница 109: ...h Button Function NO Button Description 1 Press Clear button Stop Alarm and Buzzer Press again Clear button error message 3 Error Recovery z STEP 1 Pressing Stop Buzzer z STEP2 Pressing again will clo...

Страница 110: ...4 Operation 90 TS Series User Manual 4 10 Change Language Press and at the same time change Korean English Chinese...

Страница 111: ...gin point 4 Origin Set Press Enter will change current position to Origin Point NoUse default Not In Usa 5 Safety Use Use Ultra Sound Safety NoUse default Auto Input Signal from IMM is not required 6...

Страница 112: ...d file No default Enter will not delete Error Log 11 Error Log Delete Yes Enter will delete Error Log 13 14 Time Set Robot time by Hour Minute Seconds 15 16 Date Set Robot time by Year Month Date 17 F...

Страница 113: ...Bwd 2 Button Function NO Button Description 1 Pressing this once shows waiting device setup screen and pressing this once again makes it disappear 2 Selects Main or Sub Arm 3 Operate Robot arm body mo...

Страница 114: ......

Страница 115: ...5 Follow Up...

Страница 116: ......

Страница 117: ...l 97 5 1 Motion Pattern Selection Down Kick Chuck ON Ejector Forward Kick Return Up Sub Off Position Sub Arm Off Main Arm Release Position EOAT Rotation 2nd Descent Main Arm Release 2nd Ascent EOAT Ro...

Страница 118: ...STEP 3 Press will move each axis arm to servo origin point And then screen will display Manual Mode screen Move Robot Arm to SafeLocation Press to Move to Origin TS Ver 2 00 Before operate Servo Orig...

Страница 119: ...TEP 5 Move to Jog Input screen To set up Each position with Actual Robot movement moves to Jog Input screen with pressing and at the same time P0SubOff 0000mm P1RjtOff 0000mm P2NipOn 0000mm Number 0 3...

Страница 120: ...he defect parts separate position z STEP 8 Set Reject Position Press or move robot arm to the position for separating of defect Reject parts Press to save current value to setting value z STEP 9 Press...

Страница 121: ...13 Press save current value to set z STEP 14 Set Waiting Position Press move to waiting position setting screen z STEP 15 Press or move robot arm to desired out side waiting position Press save curren...

Страница 122: ...t screen z STEP 17 Press move to speed input screen Press three times move cursor to main arm off Release z STEP 18 Press in order Main arm Off Release speed is 100 Press to save Press move to Manual...

Страница 123: ...3sec Press to save data Press move to Manual Mode NO Default Display T0 0 sec Kick T1 0 sec Chuck T2 0 sec KicRt T3 0 5 sec S Off T4 0 3 sec M Off T5 0 3 sec UpDly T11 5 sec Conve T0 Kick 0 0 0 0 T1 C...

Страница 124: ...til display AfterT Press to save it z STEP 25 Set Mold Number to 30 Press to cancel Mold Number Press to input 30 Press to save data z STEP 26 Set Mold Name to AB Press cursor will move to first chara...

Страница 125: ...screen Pressing will operate motion step by step Press and moves to Manual Mode 5 9 Auto Mode z STEP 29 Press change to Auto Message screen Press again will start Auto Mode z STEP 30 To Stop Operation...

Страница 126: ......

Страница 127: ...6 Error...

Страница 128: ......

Страница 129: ...t 6 2 1 Communication Related NO Display Cause Recovery Method 16 SC CRC 17 SCCmdTmOv 18 NoCommand SC 19 NotExcCmd 20 CmdInMotion 21 IF CRC 22 IFCmdTmOv 23 NoCommandIF 24 IL CRC 25 ILCmdTmOv 26 NoComm...

Страница 130: ...r 1 Press and restart robot 2 Check each connector and Tighten screw of Error Drive and Controller 80 Servo Alarm 1 Motor Overload 2 Motor Overpower 3 Bad Encoder Connector 4 Motor Power 5 Crash 1 Con...

Страница 131: ...AT Rotation and Rotation Return Sensor confirm OK at the same time EOAT Chuck Rotation and Rotation Return Sensor 133 SwivelSensor Chuck Swivel and Swivel Return Sensor confirm OK at the same time Che...

Страница 132: ...r and Fix Problem in Manual Mode 2 Adjust location of Sensor 3 Replace Sensor 163 SArmGripFail 4 Gripper Motion Failure 5 Wrong Sensor Location 6 Bad Sensor 4 Open Safety Door and Fix Problem in Manua...

Страница 133: ...Area When Robot can not move due to out of operation range Move the robot arm to other direction 210 OverLimit Pallet setting is wrong Reset Number and Pitch 214 NoMoldOpen In Manual Mode activate Rob...

Страница 134: ......

Страница 135: ...Appendix...

Страница 136: ......

Страница 137: ...I Up to 350 ton 1500 1700 250 150 1050 1100 42 3 TS 150S 150 700 22 5 TS 150D Up to 150 ton 1300 150 100 700 700 29 5 TS 250S 150 800 24 5 TS 250D Up to 250 ton 1500 150 100 800 800 32 5 TS 350S 300 1...

Страница 138: ...Appendix 118 TS Series User Manual B External Dimension B 1 TS 200DI dimension Unit mm Type A B 200SI 645 58 200DI 515 188...

Страница 139: ...Appencix TS Series User Manual 119 B 2 TS 300DI dimension Unit mm Type A B 300SI 1005 58 300DI 875 188...

Страница 140: ...Appendix 120 TS Series User Manual C Safe guarded space C 2 TS 200DI Unit mm Type A B C D 200SI 645 58 815 145 200DI 683 20 883 190...

Страница 141: ...Appencix TS Series User Manual 121 C 2 TS 300DI Unit mm Type A B C D 300SI 1173 58 1273 235 300DI 1043 20 1243 280...

Страница 142: ...12 3 8 I Ball Valve 1 2 Service Elbow 1 2 PT3 8Blind ESC 12 3 8 I ESC 12 3 8 I EYB 12 12 EL12 1 4 PT3 8Blind PT1 4 Blind PT3 8 Blind EC 12 1 4 ESC 12 3 8 I EYB 12 12 EL12 1 4 ESC 6 1 8 O EL 6 1 8 EL 6...

Страница 143: ......

Страница 144: ...144BL 11LOT NAMDONG INDUSTRIAL COMPLEX 716 10 GOJAN DONG NAMDONG KU INCHON KOREA TEL 82 32 814 5040 FAX 82 32 811 9978 www hyrobot com...

Отзывы: