
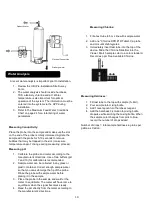

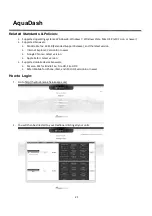


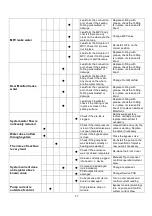
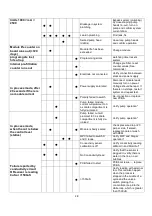
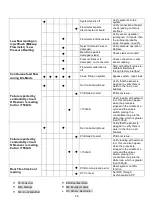
17
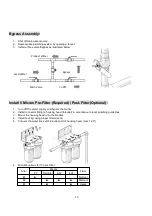
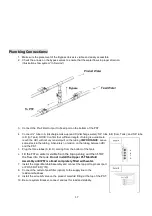
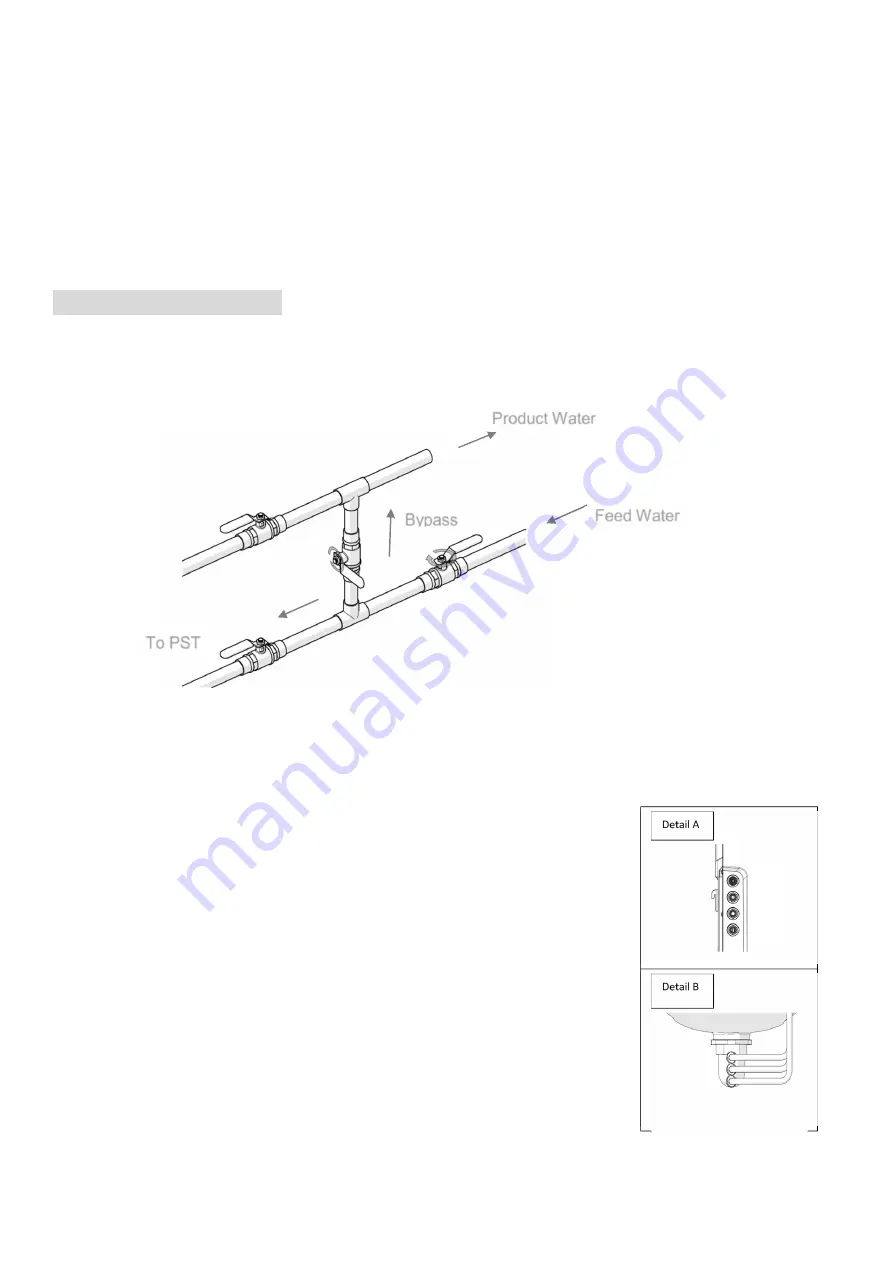
Plumbing Connections:
1. Make sure the placement of the Bypass Valves is visible and easily accessible.
2. Check the arrows on the bypass valves to ensure that the water flows in proper direction.
(Illustration show system “In Service”)
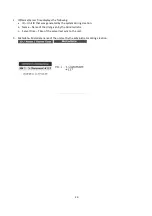
3. Connect the Pre-Filter Out port to Feed port on the bottom of the PST.
4. Connect ½” tube to A (discharge make-up) and C (discharge water); 5/8” tube to B (from Tank); and 5/8” tube
to D (to Tank).
NOTE: Confirm that sufficient length of tubing is available to
reach the HDI, without any tension/pull on the tubing.
IMPORTANCE
: Leave
some slack in the tubing. Absolutely no tension on the tubing between HDI
and the PST.
5.
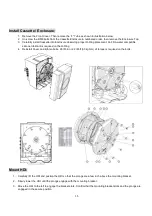
Plug the three tubes (A, B, D) coming from the bottom of the tank.
6.
Fill the PST so water is visible from the top opening; and then STOP
the flow into the tank.
Do not install the Upper PST Manifold
Assembly until PST is almost completely filled with water.
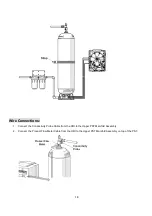
7. Install the Upper Manifold Assembly and connect the top port to product port
or POST-FILTER (“IN”).
8. Connect the outlet of post filter (option) to the supply line to the
residence/business.
9. Install the air-relief valve on the product manifold fitting at the top of the PST.
10. Be sure
system Bracket, connect and test for load and stability.
A
B
C
D
Bypass
To PST
Product Water
Feed Water
Содержание WP1 Series
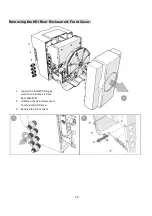
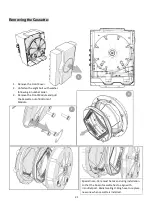
Страница 33: ...33 Removing the Manifold ...
Страница 34: ...34 Dimensional HDI Drawings Hydronovation Unit Inch ...
Страница 35: ...35 Dimensional HDI System Drawings Connection Unit Inch ...


