


Auto Blocker CAB-4000
19
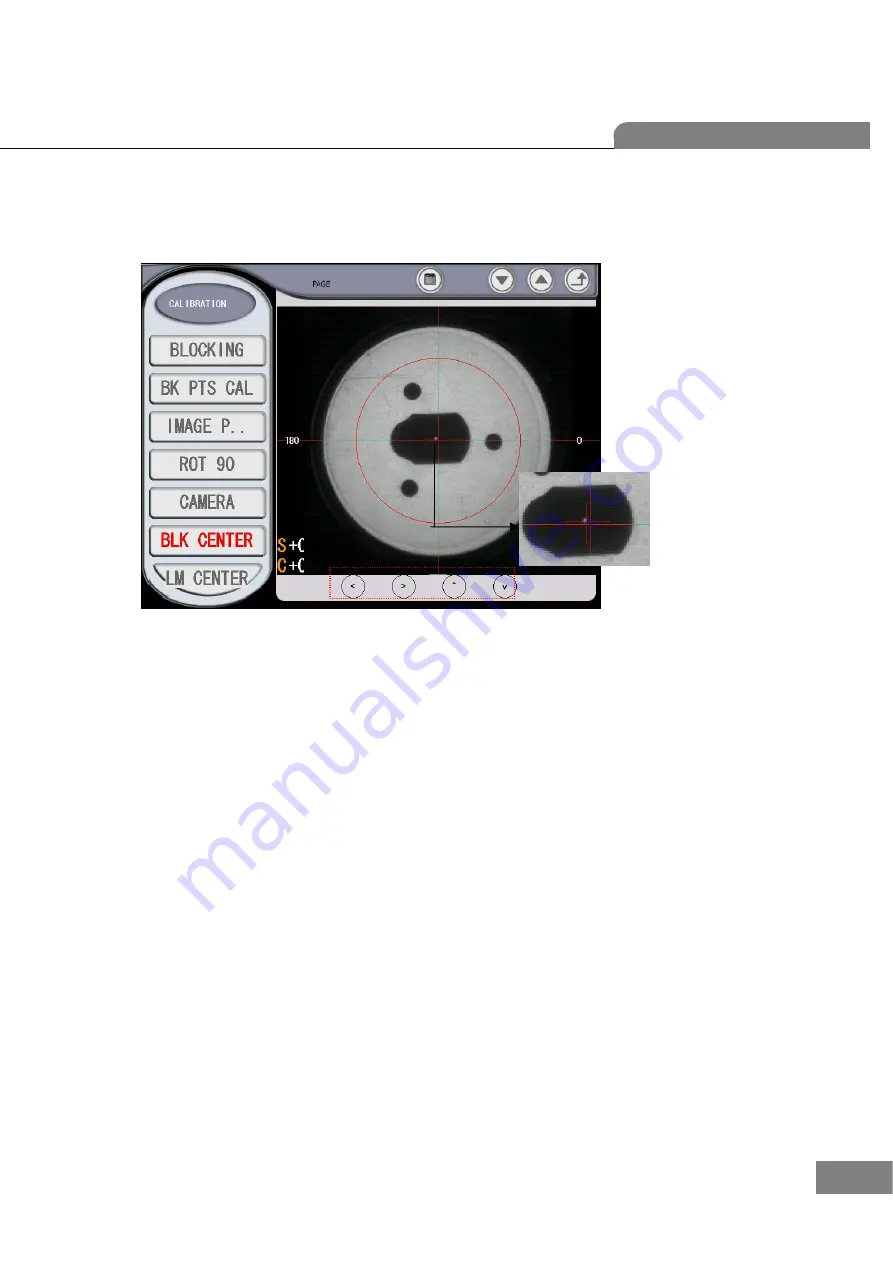
3.3 Blocking Position calibration
Although the cross marker of a optic center is correct at the display, if the blocked position is incorrect for lenses
marked with 3 dots, progressive lenses or bi-focal lenses, it is needed for you to calibrate the blocking position.
Step 1. Put an adaptor at the adaptor holder.
Step 2. Put the lens supporter for the Digital Scanning on the normal lens supporter.
Step 3. Click “BLK CENTER” button at “MENU > CALIBRATION > BLOCKER” page.
Step 4. If the red cross marker and a center hole of the adaptor aren’t coincided as you see in the above picture,
move the cross marker to locate the center of the hole using 4 arrow buttons at the bottom.
Step 5. If you moved the cross marker, press the save button at a top area to apply your calibration.
Step 6. If you repeat from Step 1 to Step 4, you can identify whether your calibration is done correctly or not.
Содержание Excelon CAB-4000
Страница 1: ......
Страница 2: ...Auto Blocker CAB 4000 1 Service Manual Auto Blocker CAB 4000...
Страница 6: ...Auto Blocker CAB 4000 5 Dimensions...
Страница 27: ...26 Auto Blocker 4 Repair Standard 4 1 Removing Side Cover Assembly P I C T U R E...
Страница 29: ...28 Auto Blocker 4 2 Removing Cover LCD Assy P I C T U R E...
Страница 31: ...30 Auto Blocker 4 3 Removing the Cover Front Assy P I C T U R E...
Страница 33: ...32 Auto Blocker 4 4 Removing the Module 1 Tracer Image Camera Inner cover P I C T U R E...
Страница 35: ...34 Auto Blocker 4 5 Removing the Module 2 Blocking Arm Lensmeter LED Projection Assy etc P I C T U R E...
Страница 37: ...36 Auto Blocker 4 6 Removing the SMPS GUI Board and Motor Board P I C T U R E...
Страница 39: ...38 Auto Blocker 4 7 Removing the Sensor within the Blocking Arm Modul P I C T U R E...
Страница 41: ...40 Auto Blocker 4 8 Removing the Blocking Theta Axis Assy...


