Coverstitch Sewing
The coverstitch can be used for covering, binding or top-stitching necklines and for hemming the bottom of T-shirts and
sweatsuits, etc., in addition to flat joining seams (plain seaming). The coverstitch is most suitable for stretchy fabrics. It can also
be used for woven fabrics.
Note: The free arm is convenient for sewing trousers legs and other small areas such as children’s garments (see page 11).
Machine Set Up
Deactivate the upper cutter (see page 15). The fabric should not be trimmed on this stitch.
Set the stitch finger lever to R (see page 16).
If inserted, remove needle A and needle B.
Install needles C, D and/or E depending on desired coverstitch.
Deactivate the upper looper (see page 16).
Remove Cutter Cover A and install Coverstitch Table B (see page 12). The markings on Coverstitch Table B indicate the distance,
in cm and inches, from the coverstitch middle needle. Use it as a guide when positioning the fabric edge.
Set the machine in Threading Position (page 16) and thread the machine.
Set the machine in Sewing Position (page 16) and close the front cover.
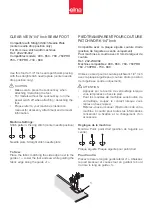
Start Sewing
Raise the presser foot.
Place fabric under the presser foot behind the needle.
Lower the presser foot.
Press the foot control to start sewing.
Note: When you start to sew from the middle of the fabric, place the fabric at the desired starting point of sewing.
Securing the Coverstitch Seam End
Chaining off is not possible after sewing coverstitch because it causes the seam to unravel when the looper thread is pulled out
at the end of sewing. Therefore, secure the seam end in the following manner.
When Sewing Through to the Edge of Fabric
1
2
3
1. Separate the thread ends.
2. Knot the needle threads (2 or 3 threads) together first.
3. Tie these threads with the looper threads.
Cut extra threads.
48
Содержание VIKING Amber Air S 600
Страница 1: ...User s Guide KEEPING THE WORLD SEWING ...
Страница 62: ......
Страница 64: ...4710487 26B 2021 KSIN Luxembourg II S a r l All rights reserved www husqvarnaviking com ...


