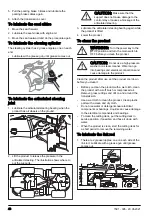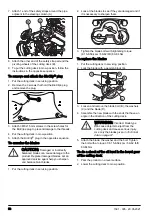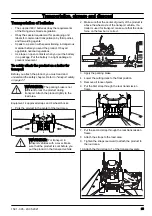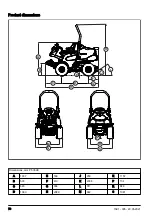
7. Attach 1 end of the safety straps around the pipe
adjacent to the steering column (A).
A
B
8. Attach the other end of the safety strap around the
pivoting wheels of the cutting deck (B).
9. To put the cutting deck in mow position, follow the
instructions in the opposite sequence.
To remove and attach the BioClip
®
plug
1. Put the cutting deck in servicing position.
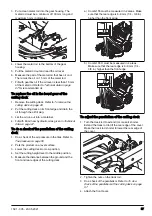
2. Remove the 3 screws that hold the BioClip
®
plug
and remove the plug.
3. Attach 3 M8x15 mm screws in the screw holes for
the BioClip
®
plug to prevent damage to the threads.
4. Put the cutting deck in mow position.
5. Attach the BioClip
®
plug in the opposite sequence.
To examine the blades
CAUTION:
Damaged or incorrectly
balanced blades can cause damage to the
product. Replace damaged blades. Let an
approved service agent help you sharpen
and balance blunt blades.
1. Put the cutting deck in servicing position.
2. Look at the blades to see if they are damaged and if
it is necessary to sharpen them.
3. Tighten the blade bolts with tightening torque
(8.15-8.56 kpm / 59-62 lbft) 80-84 Nm.
To replace the blades
1. Put the cutting deck in servicing position.
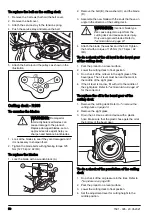
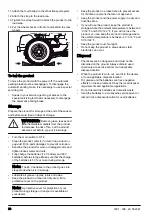
2. Lock the blade with a wooden block (A).
A
C
D
B
3. Loosen and remove the blade bolt (B), the washers
(C) and the blade (D).
4. Assemble the new blade with the ends that have an
angle in the direction of the cutting deck.
WARNING:
Incorrect blade type
can cause objects to eject from the
cutting deck and cause serious injury.
.
5. Attach the blade, the washer and the bolt. Tighten
the bolt with a torque of (8.15-8.56 kpm / 59-62 lbft)
80-84 Nm.
To do a check of the oil level in the bevel gear
of the cutting deck
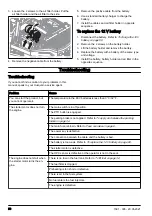
1. Park the product on a level surface.
2. Lower the cutting deck to mow position.
56
1591 - 005 - 20.05.2021

