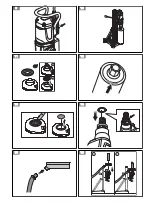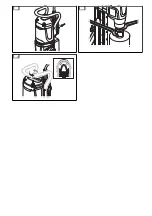
7. Put the slurry ring on the drill spindle (C). Install the
drill bit to the drill spindle (D). (Fig. 16)
8. Start the slurry collector.
9. Lift the drill bit to the ceiling. Attach the slurry ring to
the ceiling. (Fig. 17)
To connect and open the water supply
CAUTION: Make sure that the maximum
water pressure is not too high. Refer to
Technical data on page 17
.
CAUTION: Use only clean water to prevent
that dirt causes a blockage in the water
system.
CAUTION: Use only an approved water
supply coupling. Speak to your dealer for
more information.
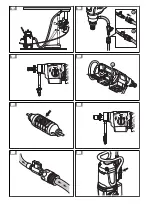
1. Connect the ball valve to the water supply (A). (Fig.
18)
2. Open the water system (B). Set the water pressure
to remove all waste material from the drill hole.
To decrease the temperature of the
motor
• Operate the product with no load for 2 minutes to
decrease the temperature of the motor.
To change gear
CAUTION: Change gear only when the
motor decreases in speed or stops. Do not
use force to change gear.
• Make sure that you always use the applicable speed
for the drill bit diameter. Refer to the rating plate on
the product or
Technical data on page 17
.
• Turn the gear selector to change gear. (Fig. 19)
To use Smartstart
™
The Smartstart
™
function decreases the speed of the
motor. This helps to make a starter hole.
1. Start the motor. Make sure that the drill does not
touch the material.
2. Push the Smartstart
™
button (A) one time. The
speed is decreased and the first green LED will flash
while the Smartstart
™
function is on. (Fig. 20)
3. Drill a starter hole in the material.
4. Push the Smartstart
™
button (A) again. The speed is
increased back to usual speed.
The speed is automatically increased back to usual
speed 1 minute after start of the Smartstart
™
function if
the Smartstart
™
button (A) is not pushed again.
Note: Only use the Smartstart
™
function to start a hole.
The power will be very much decreased if it is used
during usual operation.
To start the product
WARNING: Make sure that the drill bit can
rotate freely. It starts to rotate when the
motor starts.
WARNING: If this is the first time the product
is started for the day, make sure you make a
check of the PRCD. Refer to
To examine the
PRCD on page 11
.
1. Push the "RESET" button on the PRCD. (Fig. 21)
2. To set the operation speed, turn the drill spindle and
at the same time move the gear selector. Set the
gear selector in the correct position for the operation.
(Fig. 22)
3. Make sure that the water system is open. (Fig. 23)
4. Set the ON/OFF switch to "1". (Fig. 24)
To operate the product
WARNING: If the PRCD engages, remove
the drill bit from the hole before you push
"RESET".
WARNING: Dangerous accidents can occur
if the concrete core stays in the drill bit when
you remove the drill bit from the hole.
WARNING: When you use a drill stand,
operate the power tool by the insulated
grasping surfaces of the drill stand.
CAUTION: Make sure that no objects hit the
drill bit.
CAUTION: Do not use more force than
necessary. This only makes the operation
slow and causes overload to the motor.
1. Start the motor. Refer to
To start the product on
page 13
.
2. Let the motor speed increase to the maximum speed
before the drill bit touches the surface.
3. Push the drill bit into the surface with the feed lever.
4. If you drill through iron reinforcements, use more
initial pressure and a lower gear than if there were
no iron reinforcements.
5. Use very small pressure initially to keep the drill bit in
correct position.
1188 - 008 - 14.09.2020
13
Содержание 970445607
Страница 1: ...DM400 DM430 EN Operator s manual 6 20 ES MX Manual del usuario 21 38 FR CA Manuel d utilisation 39 57 ...
Страница 2: ...1 9 10 7 3 8 11 15 4 12 13 5 14 6 2 1 2 3 4 5 6 7 8 ...
Страница 3: ...9 10 11 A B 12 13 14 15 16 C D ...
Страница 4: ...17 18 A B 19 20 A 21 22 23 24 ...
Страница 5: ...25 26 27 ...

