020-9905 User Manual Q3 (Advanced 3 year old child) Rev G Page 31 of 82
© 2016 Humanetics Innovative Solutions
Assembly and Disassembly
Disassembly
Upper/Lower Torso
1.
The suit should be removed for proper access to the thorax assembly.
2.
Remove the cable cover at the back of the thoracic spine (020-4401).
3.
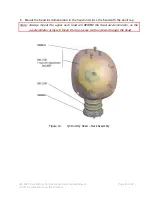
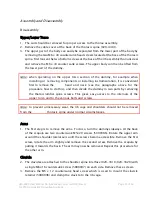
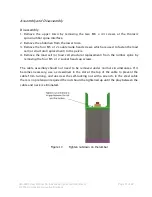
The upper part of the body can easily be separated from the lower part of the body by
removing the two M6 x 43 countersunk head screws located at the base of the thoracic
spine. First loosen the two bottom screws at the base of the rib assembly than unscrew
and remove the M6 x 43 counter sunk screws. The upper body can then be lifted from
the lower part of the dummy.
Note
: when operating on the upper torso section of the dummy, for example when
installing or removing components or installing instrumentation, it is convenient
first to remove the
head and neck (see the paragraphs above for the
procedure how to do this), and then divide the dummy in two parts by removing
the thorax/lumbar spine screws. This gives easy access to the internals of the
upper torso and to the various bolts and screws.
Note
: to prevent unnecessary wear, the rib cage and shoulders should not be removed
from the
thoracic spine under normal circumstances.
Arms
1.
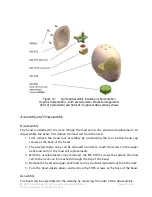
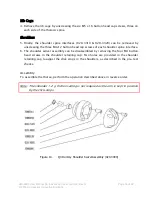
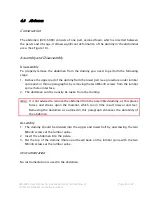
The first step is to remove the arms. To do so, turn the dummy sideways. At the back
of the scapula are two countersunk M5x20 screws (5000386). Rotate the upper arm
around the shoulder lateral axis until the screws become accessible. Remove the first
screw, rotate the arm slightly and remove the second screw. Remove the scapula by
pulling it towards the back. The arm may now be removed. Repeat this procedure for
the other arm.
Clavicle
2.
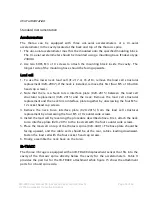
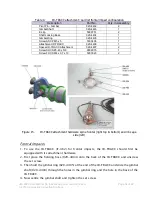
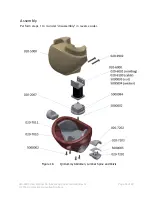
The clavicles are attached to the shoulder spine interface (020-3310/020-3320) with
a single M6x16 countersunk screw (5000097) on each side. Remove these screws.
3.
Remove the M5 x 12 countersunk head screw which is used to mount the clavicle
retainer (5000096) and clamp the clavicle to the rib cage.

