background image

Making a call from the call log

1

Open 

Dialler

.

2

Slide the list up and down to view all calls. Touch the name or number of the person that you
want to call.

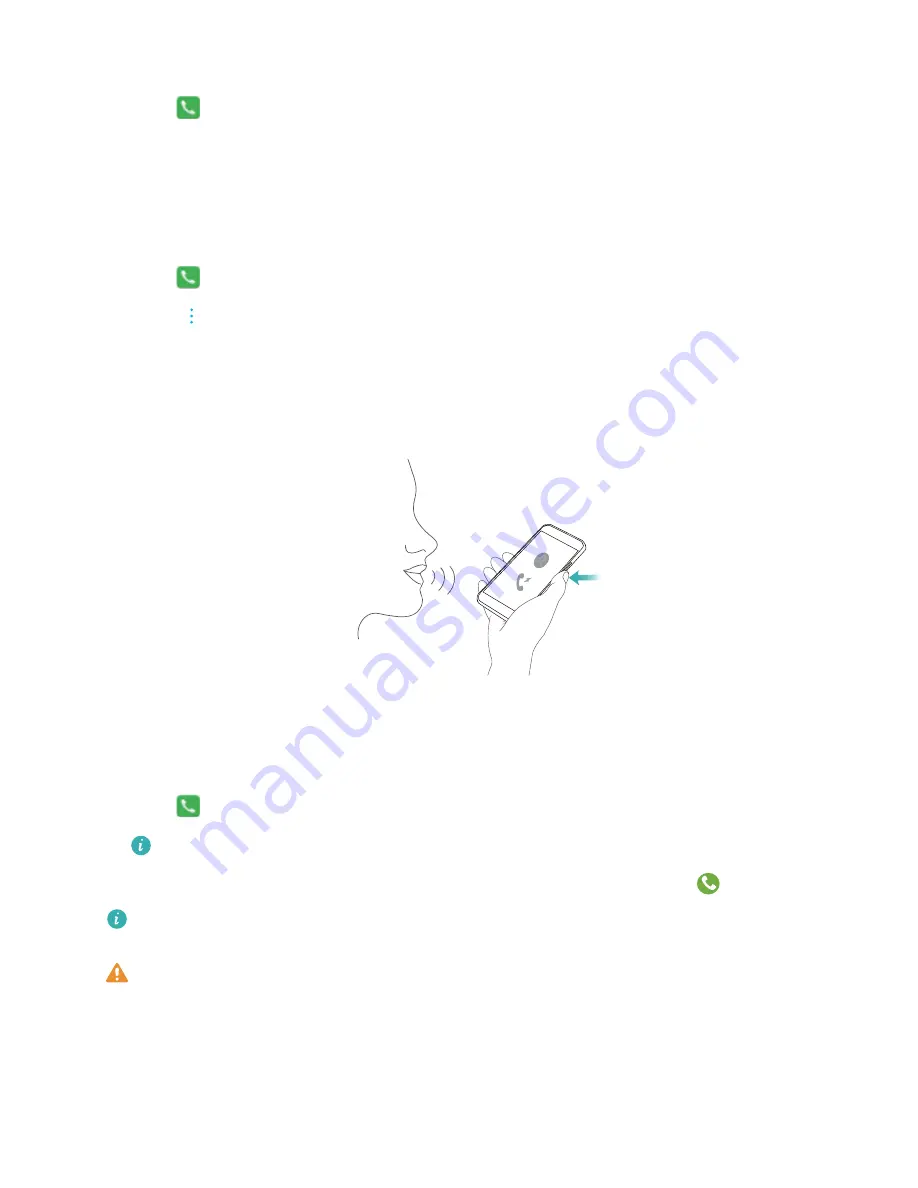
Calling contacts when the screen is off

Call people when the screen is switched off.

1

Open 

Dialler

.

2

Touch 

 > 

Settings

 > 

Quick calling

 and switch on 

Quick calling

.

Press and hold the volume down button for one second when the screen is off. When you hear
the alert sound, release the volume down button and say the name of the contact you want to
call. The device will dial their number.
 

Making an emergency call

In the event of an emergency, you can make emergency calls from your device, even without a
SIM card. However, you must be in an area with network coverage.

1

Open 

Dialler

.

You can also touch 

Emergency call

 from the lock screen.

2

Enter the emergency number for your location in the dialler, and then touch 

.

If you are in an area with good network reception, your device will automatically obtain your
location and display it on the screen.
The ability to make emergency calls depend on local regulations and network providers in
your area. Poor network coverage or environmental interference may prevent your call from
being connected. Never rely solely on your device for essential communication during
emergencies.

Calls and Messaging(Applicable to selected models)

29

Содержание MediaPad M3 Lite 10

Страница 1: ...User Guide MediaPad T3 ...

Страница 2: ...ing Wi Fi 16 Connecting to other devices using Bluetooth 16 Using Huawei Share to transfer files between two Huawei devices 17 Security and Backup Backing up and restoring data 18 File management 19 Contacts and Email Creating a contact card 22 Creating a new contact 22 Importing and exporting contacts 23 Managing contacts 24 Sharing contacts 25 Contact groups 25 Adding an email account 26 Sending...

Страница 3: ...oto 38 Editing Videos 40 Tablet Manager Optimising performance 42 Harassment filter 42 Battery management 42 Virus scanner 43 Tools Clock 44 Sound recorder 46 System Features and Settings Changing the system language 48 Changing the input method 48 Editing text 48 Airplane mode 49 Viewing memory and storage information 49 Setting the date and time 50 Enabling location access 50 Restoring factory s...

Страница 4: ...Legal Notice Contents iii ...

Страница 5: ...es in this guide may not be supported by certain devices or carriers Symbols and definitions Description Highlights important information and tips and provides additional information Reminder Indicates potential problems that may arise if proper care or attention is not given such as device damage or data loss Warning Warns you about potential hazards that could cause serious injury 1 ...

Страница 6: ...ms and conditions and touch NEXT 6 You can configure your device in two ways l Follow the onscreen instructions to restore a backup l Follow the onscreen instructions to copy data from another device or touch SET UP AS NEW PHONE OK to skip this step If you choose to skip this step you can still import data from another device later by touching Settings Advanced settings Data transmission 7 Touch G...

Страница 7: ...tching off automatically Using a charger to charge your device Connect your device to a socket using the factory provided charger and USB cable l If your device does not respond when you press the power button the battery is probably empty Charge your battery for at least 10 minutes use the charger that came with your device and then restart your device l Your device automatically conducts a safet...

Страница 8: ...If the battery is removable replace it with a genuine Huawei battery l Your device may become warm after prolonged use or when exposed to high ambient temperatures If your device becomes hot to the touch stop charging it and disable unnecessary features Place your device in a cool location and allow it to cool down to room temperature Avoid touching the surface of your device for prolonged periods...

Страница 9: ...displayed Dock bar Displays frequently used apps Navigation bar Displays virtual navigation keys Basic screen gestures Use simple touchscreen gestures to perform a variety of tasks such as launch apps scroll through lists and enlarge images Touch Touch an item once For example touch to select an option or open an app Double touch Touch the target area of the screen twice in quick succession For ex...

Страница 10: ...use this gesture to rearrange apps and widgets on the home screen Spread fingers apart Spread two fingers apart on the screen For example spread two fingers apart to zoom in on a picture or web page Pinch fingers together Pinch two fingers together on the screen For example pinch two fingers together to zoom out on an image Managing home screens You can customise home screens to your liking Adding...

Страница 11: ...Touch on a blank screen to delete it You cannot delete a home screen if it contains apps or widgets Moving home screens 1 On the home screen pinch two fingers together to open the home screen editor 2 Touch and hold the home screen you want to move and drag it to the desired location Screen and Display 7 ...

Страница 12: ...ry and time Status icons may vary according to your region or carrier Roaming Airplane mode enabled Bluetooth enabled Connected over Wi Fi Wi Fi network available Receiving location data from GPS Vibration mode enabled Silent mode enabled Alarm enabled Charging Battery full Battery low Headset inserted No SIM card found Notification icons Notification icons are displayed on the left hand side of t...

Страница 13: ...h to access the settings for the corresponding feature Some switches do not support touch and hold gestures Split screen mode About split screen mode Use split screen mode to use two apps at once Enabling split screen mode Split screen mode is not available for all apps Some apps may not function properly in split screen mode Using the Recent key to enable split screen mode Open an app that suppor...

Страница 14: ...split screen mode To exit split screen mode touch and select Using motion gestures Motion gestures make it easier to control your device Voice calls are not supported on Wi Fi only tablets Screen and Display 10 ...

Страница 15: ...d in the status bar Adjusting the colour temperature Eye comfort mode reduces the amount of blue light emitted from the screen which may give the screen a slightly yellow hue You can adjust the colour temperature to control the amount of blue light When Eye comfort is enabled swipe left or right on the colour temperature slider to make the screen hue cooler or warmer Enabling and disabling eye com...

Страница 16: ...re you go to bed 1 Open Settings 2 Touch Display Eye comfort 3 Switch on Schedule and configure the Start time and End time Display settings Changing the font size 1 Open Settings 2 Touch Display Font size and choose a font size Touch to decrease font size Touch to increase font size Drag slider to adjust font size Screen and Display 12 ...

Страница 17: ...pps will automatically adjust the screen orientation to make them easier to use 1 Open Settings 2 Touch Display and switch on Auto rotate screen Quickly enable auto rotation Swipe down from the status bar and open the shortcut switches tab and then touch Screen and Display 13 ...

Страница 18: ...data when not required so as to save battery power and reduce data usage Enabling data roaming Enable data roaming to access the Internet when you travel abroad You may incur roaming charges when data roaming is enabled Contact your network provider for details 1 Open Settings 2 Touch More Mobile network 3 Switch on Data roaming Sharing your mobile Internet with other devices Mobile data is not su...

Страница 19: ...SB tethering Depending on your computer s operating system you may need to install drivers on the computer or establish a network connection in order to use USB tethering Refer to your operating system instructions 1 Use a USB cable to connect your device to the computer 2 Open Settings 3 Touch More Tethering portable hotspot 4 Switch on USB tethering to share your mobile Internet Using Bluetooth ...

Страница 20: ...l If the Wi Fi network does not require a password your device will connect automatically l If the network is protected enter the password when prompted and touch Connect Connecting to a Wi Fi network using Wi Fi Protected Setup WPS WPS allows your device to connect to a WPS enabled router without entering a password 1 Go to Settings 2 Touch Wi Fi and switch on Wi Fi 3 Touch Advanced Wi Fi setting...

Страница 21: ...atically l If you disable Wi Fi or Bluetooth the Huawei Share switch will turn off automatically Using Huawei Share to transfer files Ensure that Huawei Share is supported on both devices Huawei Share must be enabled on the receiving device and the screen must be switched on 1 On your device select the file s you want to share Touch Share 2 Select the receiving device from those listed 3 On the re...

Страница 22: ...up files are saved to the HuaweiBackup folder in Files Backing up data to your phone s internal storage Back up data to your phone s internal storage to avoid losing your files Only back up smaller files 1 Open Backup 2 Touch Back up Internal storage Next 3 Select the data you want to back up and touch Back up When prompted enter a backup password No backup password is required for photos audio fi...

Страница 23: ...s not a Huawei device use manufacturer provided software to back up data to your computer and then proceed directly to step 4 2 Go to the backup screen in HiSuite Select the data that you want to back up and follow the onscreen instructions to back up the data Follow the onscreen instructions to set a password reminder to help you remember your password and prevent you from losing access to your f...

Страница 24: ...r folders Touch Delete Creating or extracting archives Compress files in a zip archive to free up space and share files more easily 1 Open Files 2 On the Local tab touch Internal storage 3 Touch and hold the file or folder you want to compress and then touch Compress 4 Choose the archive destination The selected files will be compressed into a zip file which will be named automatically To extract ...

Страница 25: ...d touch and hold the files you want to remove and then touch l Destroy a safe In Safe touch Settings Destroy Safe Follow the onscreen instructions to remove files from the safe and destroy it l Change the safe password In Safe touch Settings Change password Follow the onscreen instructions to change the password l Change the security question In Safe touch Settings Change security question Follow ...

Страница 26: ...r profile picture Enter your name company telephone number and other contact information and then touch Your device will automatically create a contact card with a QR code Share your contact card Touch Select the card format and sharing method and then follow the onscreen instructions Creating a new contact Creating a contact 1 Open Contacts 2 Touch If you are creating a contact for the first time...

Страница 27: ...ill be displayed when the contact calls you Other contact information such as company name and job title will also be displayed You can also add phone numbers email addresses and other contact information in to your contacts in Call log Messaging or Email Sharing your QR code Share your QR code with your friends so that they can add you to their contacts quickly On the contact details screen touch...

Страница 28: ...app to back up your contacts 1 Open Backup 2 Go to Backup Internal storage and then touch Next 3 Select Contacts Touch Back up and follow the onscreen instructions to set a password By default backup data is saved to the HuaweiBackup folder in Files Managing contacts Deleting contacts 1 Open Contacts 2 Touch Organise contacts Delete contacts by batch 3 Select the contacts you want to delete and th...

Страница 29: ... can scan QR codes you can also share a contact by scanning the contact s QR code Contact groups Creating a group 1 Open Contacts 2 Touch Groups and select 3 Enter the group name for example Family or Friends and touch OK 4 Touch Select the contacts you want to add to the group and touch Using smart groups Use smart groups to automatically group contacts by company location or contact frequency 1 ...

Страница 30: ...group from your device Adding an email account If you don t know your account settings please consult your email service provider Adding a personal email account 1 Open Email 2 Choose an email service provider or touch Others 3 Enter you email address and password and then touch Sign in 4 Follow the onscreen instructions to configure your account The system will automatically connect to the server...

Страница 31: ...dy Touch to add an attachment 6 Touch to send the email Your email service provider may have an attachment size limit If attachments exceed the limit you can send them in separate emails To save your email as a draft and send it later touch and then touch Save Replying to emails 1 Open Email 2 Open the email you want to reply to and touch To reply to all recipients of the original email touch 3 Af...

Страница 32: ... John Smith or JS Your device will search your contacts and call log and list the results above the dialer Hide dialer Backspace 3 Select the contact you want to call from the list 4 Touch to end the call To end a call using the power button go to Dialler touch Settings and then switch on Power button ends call Making a call from Contacts 1 Open Contacts 2 Touch the search bar and enter the name o...

Страница 33: ...l In the event of an emergency you can make emergency calls from your device even without a SIM card However you must be in an area with network coverage 1 Open Dialler You can also touch Emergency call from the lock screen 2 Enter the emergency number for your location in the dialler and then touch If you are in an area with good network reception your device will automatically obtain your locati...

Страница 34: ... the call l Touch to reject the call and send an SMS l Touch to configure a callback reminder If you receive a call when you are entering text or using full screen mode for example when you are viewing an image or playing a game the incoming call will be displayed at the top of the screen in a floating window Touch to answer the call or to decline the call Sending a message You can add a range of ...

Страница 35: ... a message 1 Open Messaging 2 Touch a message to view the message content Your device will automatically highlight phone numbers web addresses email addresses times and other information Touch highlighted information to access a range of shortcuts You can also l Save message attachments Touch and hold the attachment that you want to save then touch Save l Call the sender Touch at the top of the me...

Страница 36: ... feature ensure that you have added birthday information to your contacts For more information see Creating a contact 1 Open Calendar 2 Touch and select Contacts birthdays Once you have enabled this feature Calendar will automatically import birthday information from your contacts and send you birthday reminders Creating an event Add events and set reminders to help you plan ahead 1 Open Calendar ...

Страница 37: ... a note In the list of notes open the note that you want to share and touch Choose your sharing method and follow the onscreen instructions Deleting a note You can delete a note in three ways l In the list of notes swipe left on the note that you want to delete and touch l Touch and hold a note to activate the note management interface Select the notes that you want to delete and touch l Touch the...

Страница 38: ...l Swipe down on the home screen to display the search bar and then enter one or more keywords Calendar and Notepad 34 ...

Страница 39: ...rder Toggle between play and pause Add to favourites Next song Previous song Add to playlist Drag left or right to switch between playlist or lyrics screens Searching for music Searching for music on your internal storage or microSD card Sort your music by category or search with a keyword to find your music files quickly 1 Open Music 2 Touch All songs 3 Touch to search for and view music stored o...

Страница 40: ... video During playback you can l Adjust the playback speed Touch 1 0X and drag the speed slider l Adjust the screen brightness Swipe up or down on the left hand side of the screen Swipe up to increase the brightness or swipe down to decrease the brightness l Adjust the volume Swipe up or down on the right hand side of the screen Swipe up to increase the volume or swipe down to decrease the volume ...

Страница 41: ...ft on the screen to access the camera settings 3 Touch Audio control and switch on Audio control 4 You can then l Say Cheese to take photos Set the camera so that it will take a photo when you issue a voice command The camera will only take photos when default voice command Cheese is detected You cannot configure custom voice commands l Take photos when your voice reaches a certain decibel level S...

Страница 42: ...s with audio notes are indicated by the icon in Gallery When viewing a photo with an audio note touch to play the audio note Sharing photos and videos Use the sharing feature in Gallery to share photos and videos Sharing photos and videos stored on your phone s internal storage or microSD card 1 Open Gallery 2 Touch and hold file to open the file selection interface and then select the files you w...

Страница 43: ...ve after rotation l Crop an image Touch to select the crop ratio Drag the dotted edges to crop the image to the desired size Crop proportions Crop selection Crop grid corner l Add a filter Touch and select the desired filter l Accentuate colours Touch Select an area of the image to accentuate the color All other areas will be displayed as black and white Camera and Gallery 39 ...

Страница 44: ...age You can choose from various skin and eye enhancement effects l Apply mosaic effects Touch and select the desired mosaic effect l Draw graffiti Touch to select the brush and colour l Add a watermark Touch to add a watermark and personalise your photo You can choose from time location weather activity and other watermarks l Add a label Touch and then select the desired label type and font You ca...

Страница 45: ... you want to edit and touch 3 On the video editing screen drag the sliders to select the portion of the video that you want to keep You can touch to preview the video 4 Touch to crop and save the video To change the resolution select a resolution on the video editing screen Videos with higher resolution occupy more space of your device Camera and Gallery 41 ...

Страница 46: ...hitelist blacklisted keywords and spam settings Configure filter rules Configure filter notifications Messages from strangers that contain blacklisted keywords will be blocked Calls and messages from blacklisted numbers will be blocked Calls and messages from whitelisted numbers will not be blocked Battery management Viewing battery usage statistics Use Tablet Manager to view detailed battery usag...

Страница 47: ...f battery draining apps are running in the background If you don t want to receive these notifications touch and switch off Power intensive prompt l Reduce the screen resolution Switch on Low resolution power saving to reduce the screen resolution and lower power consumption l Automatically close power intensive apps Touch and switch on Close excessively power intensive apps Virus scanner Tablet M...

Страница 48: ...ck screen l Mute an alarm Press the volume down button l Snooze for 10 minutes Press the power button The alarm will go off again after 10 minutes To turn off the alarm swipe down from the top of the screen to open the notification panel and then touch the alarm notification l Enable alarms when your device is powered off Select Keep alarm active will ring in Alarms will still go off when your dev...

Страница 49: ...your home time zone on the lock screen 1 Open Clock 2 Under World clock touch Date time 3 Switch on Dual clocks Touch Home city and select your home time zone from the list of cities Current network time zone Home time zone Only one clock is displayed when the local time zone is the same as the home time zone Stopwatch 1 Open Clock 2 Go to the Stopwatch tab and touch to start the stopwatch Tools 4...

Страница 50: ... start recording 3 Touch Pause or Resume to pause or resume the recording Add a tag Add a Quick tag or Photo tag for easy reference 4 Touch Stop and enter the name Then touch Save l Your phone will not ring if you receive a call during a recording l When the Recorder app is recording sound in the background use the controller in the notification panel to Pause Resume or Stop the recording Playing ...

Страница 51: ...When the Recorder app is recording sound in the background use the controller in the notification panel to play pause or cancel a recording Tools 47 ...

Страница 52: ... desired input method To add an input method open Settings Touch Advanced settings Language input Default keyboard Configure input methods and switch on the desired input method Editing text Select cut copy paste and share text l Selecting text Touch and hold the text until appears Drag and to select a section of text or touch Select all to select all text l Copying text Select the text you want t...

Страница 53: ...g methods to enable or disable airplane mode l Use the shortcut switch Swipe down from the status bar to open the notification panel Touch to display all shortcut switches and then switch on l Go to Settings Open Settings and toggle the Airplane mode switch When airplane mode is enabled the airplane mode icon will display in the status bar Viewing memory and storage information View storage and me...

Страница 54: ...itch on the 24 hour format to display the time in 24 hour format By default the time is displayed in 12 hour format Enabling location access Enable location based services to ensure that map navigation and weather apps can access your location information Configuring the location settings Features may vary depending on your network provider 1 Open Settings 2 Touch Security privacy Location service...

Страница 55: ...tablet to restore your device to its factory settings OTA updates Update your device s system to the latest version to enhance performance This feature requires an Internet connection Connect to a Wi Fi network to avoid incurring unnecessary data charges l Using unauthorised third party software to update your device may render your device unusable or put your personal information at risk For opti...

Страница 56: ...l number and system version information 1 Open Settings 2 Touch About tablet to view your model number version number EMUI version and Android version Accessibility features Enabling TalkBack TalkBack provides audible prompts and captions to help visually impaired users When TalkBack is enabled your device will issue audible prompts for all content that you touch select or enable Audible prompts a...

Страница 57: ... After you have enabled TalkBack use gestures to Browse the screen Swipe up or down with two fingers to scroll through menu lists Swipe left or right to move between screens Select an item Touch an item with one finger to select it it will not open Your phone will read out the content of the selected item Open an item Double touch any part of the screen using one finger to confirm your selection f...

Страница 58: ...To Speech TTS output requires TalkBack to be enabled 1 Open Settings 2 Touch Advanced settings Accessibility Switch on Text to speech output and then select the desired speech synthesis engine and voice speed Colour correction Colour correction mode adjusts colours to make it easier for colour vision impaired users to distinguish between different parts of the screen Enable this mode with caution ...

Страница 59: ...nternet do not visit websites that might pose a security risk to avoid your personal information from being stolen l If you use services such as the portable Wi Fi hotspot or Bluetooth set passwords for these services to prevent unauthorised access Turn these services off when they are not in use l Install device security software and regularly scan for viruses l Be sure to obtain third party appl...

Страница 60: ...scribed herein rely on the software installed or the capacities and settings of the local network and therefore may not be activated or may be limited by local network operators or network service providers Therefore the descriptions herein may not exactly match the purchased product or its accessories Huawei reserves the right to change or modify any information or specifications contained in thi...

Страница 61: ...with such matters DISCLAIMER ALL CONTENTS OF THIS DOCUMENT ARE PROVIDED AS IS EXCEPT AS REQUIRED BY APPLICABLE LAWS NO WARRANTIES OF ANY KIND EITHER EXPRESS OR IMPLIED INCLUDING BUT NOT LIMITED TO THE IMPLIED WARRANTIES OF MERCHANTABILITY AND FITNESS FOR A PARTICULAR PURPOSE ARE MADE IN RELATION TO THE ACCURACY RELIABILITY OR CONTENTS OF THIS DOCUMENT TO THE MAXIMUM EXTENT PERMITTED BY APPLICABLE ...

Страница 62: ... size and screen layout may vary All statements information and recommendations in this guide do not constitute a warranty of any kind express or implied Please visit http consumer huawei com en support hotline for recent updated hotline and email address in your country or region 903651_01 ...

Отзывы: