background image

Contents 

1 Warnings and Precautions ....................................................... 1


2 Connecting the Cables and Getting Started ........................... 4


2.1 Connecting The Cables .............................................................4


2.2 Getting Started ...........................................................................4


3 Setting the Network-Access Parameters ................................ 6


3.1 Accessing the Network Through the Embedded PPP Dial-Up 
Software on the Device....................................................................6


3.2 Accessing the Network Through the PPP Dial-Up Software on 
Your Computer .................................................................................7


4 Configuring the Wireless Network Connection ...................... 9


5 Configuring the Device........................................................... 11


5.1 Changing the Administrator Password Used for Logging In to 
the Web-Based Configuration Utility ..............................................11


5.2 Enabling or Disabling the Wireless Network Function.............12


5.3 Changing the Wireless Network Name and the Access 
Password .......................................................................................12


5.4 Changing the IP Address Used for Logging In to the Web-Based 
Configuration Utility ........................................................................13


5.5 Restoring Default Settings .......................................................13


6 FAQs......................................................................................... 15


7 Appendix.................................................................................. 22


7.1 Indicators..................................................................................22


7.2 Interfaces and Buttons .............................................................23


7.3 Default Settings........................................................................24


7.4 Technical Specifications ...........................................................24


Содержание HG530

Страница 1: ...HUAWEI HG530 Home Gateway User Guide ...

Страница 2: ...uring the Wireless Network Connection 9 5 Configuring the Device 11 5 1 Changing the Administrator Password Used for Logging In to the Web Based Configuration Utility 11 5 2 Enabling or Disabling the Wireless Network Function 12 5 3 Changing the Wireless Network Name and the Access Password 12 5 4 Changing the IP Address Used for Logging In to the Web Based Configuration Utility 13 5 5 Restoring D...

Страница 3: ...eople Environmental Requirements for Using the Device z Before connecting and disconnecting cables stop using the device and then disconnect it from the power supply Ensure that your hands are dry during operation z Keep the device far from sources of heat and fire such as a heater or a candle z Keep the device far from electronic appliances that generate strong magnetic or electric fields such as...

Страница 4: ...ake the device into operating rooms intensive care units ICUs or coronary care units CCUs Areas with Inflammables and Explosives z Do not use the device where inflammables or explosives are stored for example in a gas station oil depot or chemical plant Otherwise explosions or fires may occur In addition follow the instructions indicated in text or symbols z Do not store or transport the device in...

Страница 5: ... device emits any smoke or unusual sound or smell stop using the device immediately power it off remove all the cables connected to it and then contact an authorized service center z Do not trample pull or overbend any cable Otherwise the cable may get damaged causing malfunction of the device z Before cleaning the device stop using it power it off and then remove all the cables connected to it z ...

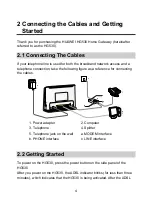
Страница 6: ...onnection take the following figure as a reference for connecting the cables 1 Power adapter 2 Computer 3 Telephone 4 Splitter 5 Telephone jack on the wall a MODEM interface b PHONE interface c LINE interface 2 2 Getting Started To power on the HG530 press the power button on the side panel of the HG530 After you power on the HG530 the ADSL indicator blinks for less than three minutes which indica...

Страница 7: ...5 indicator stops blinking the Power and ADSL indicators turn solid on which indicates that the HG530 is working properly ...

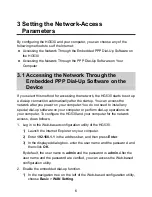
Страница 8: ...our computer You do not need to install any special dial up software on your computer or perform dial up operations on your computer To configure the HG530 and your computer for the network access do as follows 1 Log in to the Web based configuration utility of the HG530 1 Launch the Internet Explorer on your computer 2 Enter 192 168 1 1 in the address bar and then press Enter 3 In the displayed d...

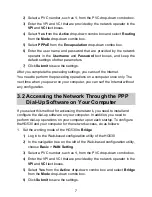
Страница 9: ...an surf the Internet without any configuration 3 2 Accessing the Network Through the PPP Dial Up Software on Your Computer If you select this method for accessing the network you need to install and configure the dial up software on your computer In addition you need to perform dial up operations on your computer upon each startup To configure theHG530 and your computer for the network access do a...

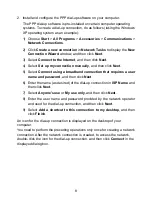
Страница 10: ...using a broadband connection that requires a user name and password and then click Next 6 Enter the name as desired of the dial up connection in ISP Name and then click Next 7 Select Anyone s use or My use only and then click Next 8 Enter the user name and password provided by the network operator and used for the dial up connection and then click Next 9 Select Add a shortcut to this connection to...

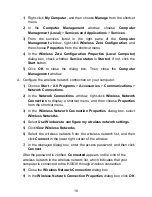
Страница 11: ...also configure the wireless network connection through the wireless configuration software provided by Windows XP To configure the wireless network connection do as follows taking the Windows XP operating system as an example 1 Log in to the Web based configuration utility 2 Set the wireless network name and access password of the HG530 To set the wireless network name and the access password do a...

Страница 12: ...tions Network Connections 2 In the Network Connections window right click Wireless Network Connection to display a shortcut menu and then choose Properties from the shortcut menu 3 In the Wireless Network Connection Properties dialog box select Wireless Networks 4 Select Use Windows to configure my wireless network settings 5 Click View Wireless Networks 6 Select the wireless network from the wire...

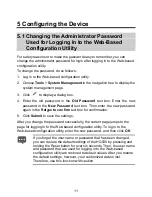
Страница 13: ...he New Password text box Then enter the new password again in the Retype to confirm text box for confirmation 5 Click Submit to save the settings After you change the password successfully the current page jumps to the page for logging in to the Web based configuration utility To log in to the Web based configuration utility enter the new password and then click OK If you forget the user name or p...

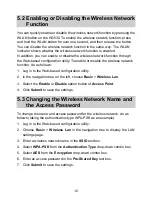
Страница 14: ... Log in to the Web based configuration utility 2 In the navigation tree on the left choose Basic Wireless Lan 3 Select the Enable or Disable option button of Access Point 4 Click Submit to save the settings 5 3 Changing the Wireless Network Name and the Access Password To change the name and access password for the wireless network do as follows taking the authentication type WPA PSK as an example...

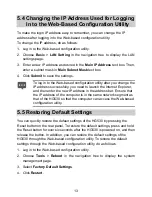
Страница 15: ...xplorer and then enter the new IP address in the address bar Ensure that the IP address of the computer is in the same network segment as that of the HG530 so that the computer can access the Web based configuration utility 5 5 Restoring Default Settings You can quickly restore the default settings of the HG530 by pressing the Reset button on the rear panel To restore the default settings press an...

Страница 16: ...14 After the preceding operations the current page jumps to the login page You can log in to the Web based configuration utility by entering the default user name and password ...

Страница 17: ...ress Take a computer that runs Windows XP as an example To configure the computer to use a static IP address do as follows 1 In the Control Panel window double click Network Connections to display the Network Connections window 2 In the Network Connections window right click the working Local Area Connection and choose Properties 3 In the This connection uses the following items group box of the L...

Страница 18: ...witch of the terminal is turned on 2 Ensure that electricity comes from the socket and that the input power of the socket meets the requirements described on the label of the terminal power adapter If the voltage is unsteady for example if the voltage is too high or too low do not use the terminal Wait until the voltage restores to its normal level and then use the terminal 3 Ensure that the termi...

Страница 19: ... and choose Manage 2 In the navigation tree of the Computer Management window choose Device Manager 3 In the right pane of the Computer Management window click Network adapters to view the information about the network adapter of the computer If no network adapter is detected or if a question mark or an exclamation mark is displayed next to the icon of the network adapter you can infer that the dr...

Страница 20: ...cess If the terminal still cannot access other Web sites contact your network service provider What can I do if the terminal cannot access the Internet through a wireless network adapter 1 Ensure that the cables of the terminal are properly connected 2 Check whether the WLAN indicator of the terminal is on If the WLAN indicator is off you can infer that the wireless local area network WLAN functio...

Страница 21: ...re that the terminal is connected to the WLAN 7 Check whether you can use the PPP dialing software to dial successfully 8 Try to access multiple Web sites to check whether the terminal can access other Web sites If the terminal cannot access other Web sites either restore the default settings of the terminal If the problem persists contact your network service provider What can I do if sometimes t...

Страница 22: ... In the Wireless Network Connection Properties dialog box click the Wireless Networks tab 4 In the Preferred Networks group box select the latest wireless network connection saved on your computer Then click Remove 5 Delete all the other wireless network connections from the Preferred Networks group box 6 Click OK 2 Create a wireless network connection that is not encrypted What can I do if I cann...

Страница 23: ... What can I do if noises exist during telephone calls 1 Ensure that a splitter is installed A splitter helps to protect the call quality of the digital subscriber line DSL from being affected due to the interference of other type of signals 2 Ensure that telephone lines are properly connected Especially ensure that the telephone line connecting to the splitter is properly connected 3 Replace telep...

Страница 24: ...d On The HG530 is activated ADSL Off The HG530 is powered off Blinking z The HG530 works in routing mode z The WAN connection is set up z Data is being transmitted On z The HG530 works in routing mode z The WAN connection is set up z No data is being transmitted Internet Off z The HG530 works in bridge mode or in routing mode z No WAN connection is set up ...

Страница 25: ...etwork function is disabled Blinking Data is being transmitted through the Ethernet interface On The Ethernet connection is set up LAN1 LAN4 Off The Ethernet connection is not set up 7 2 Interfaces and Buttons Number Interface or Button Description 1 WLAN It is used to enable or disable wireless network function quickly 2 ON OFF It is the power switch and is used to power on or power off the HG530...

Страница 26: ... interface on the computer 9 ADSL It is used to connect to the MODEM interface on the splitter 7 3 Default Settings Parameter Setting Subnet mask of the LAN interface 192 168 1 1 IP address of the LAN interface 255 255 255 0 User name used for logging in to the Web based configuration utility admin Password used for logging in to the Web based configuration utility admin DHCP server function Enabl...

Страница 27: ...DSL standards z G 992 1 G dmt Annex A z G 994 1 G hs z ANSI T1 413 Issue 2 ADSL2 standards z G 992 3 G dmt bis Annex A z G 992 3 G dmt bis Annex L ADSL2 standard G 992 5 G dmt bitplus Annex A Standards WLAN standards 802 11b 802 11g and 802 11n 2 4 GHz G dmt T1 413 z Maximum downlink rate 8 Mbit s z Maximum uplink rate 896 kbit s DSL transmission rates G 992 5 ADSL2 z Maximum downlink rate 24 Mbit...

Страница 28: ...r transmitted in any form or by any means without prior written consent of Huawei Technologies Co Ltd The product described in this manual may include copyrighted software of Huawei Technologies Co Ltd and possible licensors Customers shall not in any manner reproduce distribute modify decompile disassemble decrypt extract reverse engineer lease assign or sublicense the said software unless such r...

Страница 29: ... TO THE IMPLIED WARRANTIES OF MERCHANTABILITY AND FITNESS FOR A PARTICULAR PURPOSE ARE MADE IN RELATION TO THE ACCURACY RELIABILITY OR CONTENTS OF THIS MANUAL TO THE MAXIMUM EXTENT PERMITTED BY APPLICABLE LAW IN NO CASE SHALL HUAWEI TECHNOLOGIES CO LTD BE LIABLE FOR ANY SPECIAL INCIDENTAL INDIRECT OR CONSEQUENTIAL DAMAGES OR LOST PROFITS BUSINESS REVENUE DATA GOODWILL OR ANTICIPATED SAVINGS Import...

Отзывы: