31
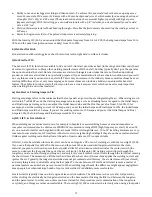
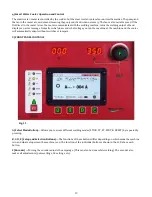
Fig. 67
Once you let go of the momentary switch button, the arc
extinguishes and the post-gas flow timer engages (
Fig.
67
; 12.0 seconds in this instance).
PRO TIP: TIG RESET welding can be done in AC or DC,
in every wave form, and with (where applicable) or
without pulse. If you plug a foot pedal in with TIG
RESET activated, the machine deactivates the remote
control’s amperage adjustment feature (the remote
control symbol blinks in the LCD when the amperage
adjustment feature of the remote control is
deactivated). However, the on/off switch in the foot
pedal can now be used instead of a torch mounted
momentary switch.
10) JOB Mode
The JOB Mode function, which is active in all welding
modes, allows you to store and recall up to 30 JOBs
(welding parameter settings).
How to Store JOBs
1) Press the JOB button
D
to pull up the JOB LIST page.
2) Use the ↑ button
D
, the ↓ button
E
, or the encoder
F
to select the program in which you want to save the
welding parameter settings.
3) Press and hold the SAVE button
C
for about three (3)
seconds until you hear a double beep. If you hear a
triple beep and see “THIS JOB IS PROTECTED, DO
YOU WANT TO OVERWRITE IT?” in the display,
either press button
E
to proceed or button
D
to
cancel.
4) After saving the JOB, the LCD reverts back to the
main page where you can see the JOB number above
button
C
.
NOTE: An * symbol next to the JOB means the JOB is
in use, and a flashing * symbol next to the JOB means
the JOB is modified from the original.
To leave the current JOB and return the Invertig into the
regular welding mode, quickly press and release the JOB
button
D
, and then press and hold the Select Mode
button
A
for approximately five (5) seconds. You should
hear five (5) short beeps and one longer beep, after
which the * symbol next to the JOB you were using
clears. Wait an additional six (6) seconds, and the
Invertig will be back in the regular welding mode.
How to Load Stored JOBs
1) Press the JOB button
D
to pull up the JOB LIST page.
2) Use the ↑ button
D
, the ↓ button
E
, or the encoder
F
to select the JOB you want to recall.
3) Press and hold the RECALL button
B
for about three
(3) seconds until you hear a double beep.
4) After recalling the JOB, the LCD reverts back to the
main page where you can see the JOB number above
button
D
.
ATTENTION: THE PARAMETERS SAVED IN JOBS 1
THROUGH 12 ARE PROTECTED. WHEN YOU RECALL
JOBS 1 THROUGH 12, THEY WILL BE BLOCKED,
WHICH MEANS YOU CANNOT ACCIDENTALLY ALTER
OR MODIFY THEM. IN ORDER TO INTENTIONALLY
MODIFY A SAVED AND PROTECTED JOB, DO THE
FOLLOWING:
Quickly press and release the JOB button
D
, and then
press and hold the Select Mode button
A
for about
five (5) seconds; you will hear five (5) short beeps
and one (1) long beep, and the * symbol next to the
JOB you are using disappears. After an additional six
(6) seconds, the machine will be back in the regular
welding mode.
Make the desired adjustments and modifications to
the program.
Follow the steps from the
How to Store JOBs
instructions to overwrite the protected parameters
with the new parameters.
Each set of parameters (JOB) saved in slots 1
through 3 needs to have a pre-gas flow time of at
least 0.3 seconds or higher.
Important Things to Know about the JOB Mode
You can delete the preprogrammed JOBs, as well as Jobs
you saved on the machine. To delete all save JOBs, press
and release the JOB button
D
, and then press and hold
the Select Mode button
A
and button
E
at the same time
for approximately five (5) seconds. After hearing five (5)
beeps, all JOBs, including preprogrammed demo JOBs,
will be permanently erased from the machine’s memory.
When saving a JOB, please note that the machine saves
everything, which means not just amperage, but also pre
-gas flow, post-gas flow, t1 (slope up), t2 (slope down),
pulse settings, AC settings and wave forms where
applicable, etc. For different JOBs, these settings can and
will be different, and, as you recall each JOB, the JOBs
will load with the exact settings used when you saved
them.
Содержание Invertig 313
Страница 6: ...6 Fig 1 ...
Страница 33: ...33 12 WIRING DIAGRAM Invertig 400 AC DC ONLY ...
Страница 34: ...34 13 EXPLODED VIEW INVERTIG 400 AC DC ONLY ...


