
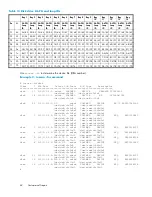


Enter the following command to allow HP-UX to ignore the disk authentication for the replacement disk.
fcmsutil /dev/
device_file
replace_dsk –l
disk_loop_ID
For example, if you are replacing the disk drive installed in bay 5 in an enclosure with an ID 2 attached
to HBA td1, enter:
fcmsutil /dev/td1 replace_dsk -l 58
where 58 is the loop ID of the disk drive.
IMPORTANT:
You must run the
fcmsutil replace_dsk
command on all HBAs that can access the disk drive. It is
possible to reboot the HP-UX server to access the newly replaced disk.
CAUTION:
Spinning media can make the disk drive dif
fi
cult to handle. To avoid damaging the disk drive, wait
approximately 30 seconds for the media to stop rotating before removing the drive from the enclosure.
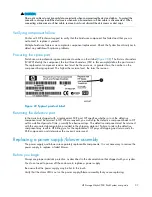
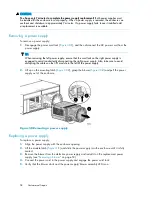
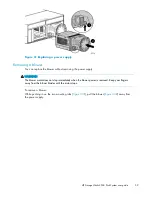
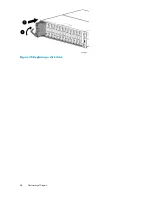
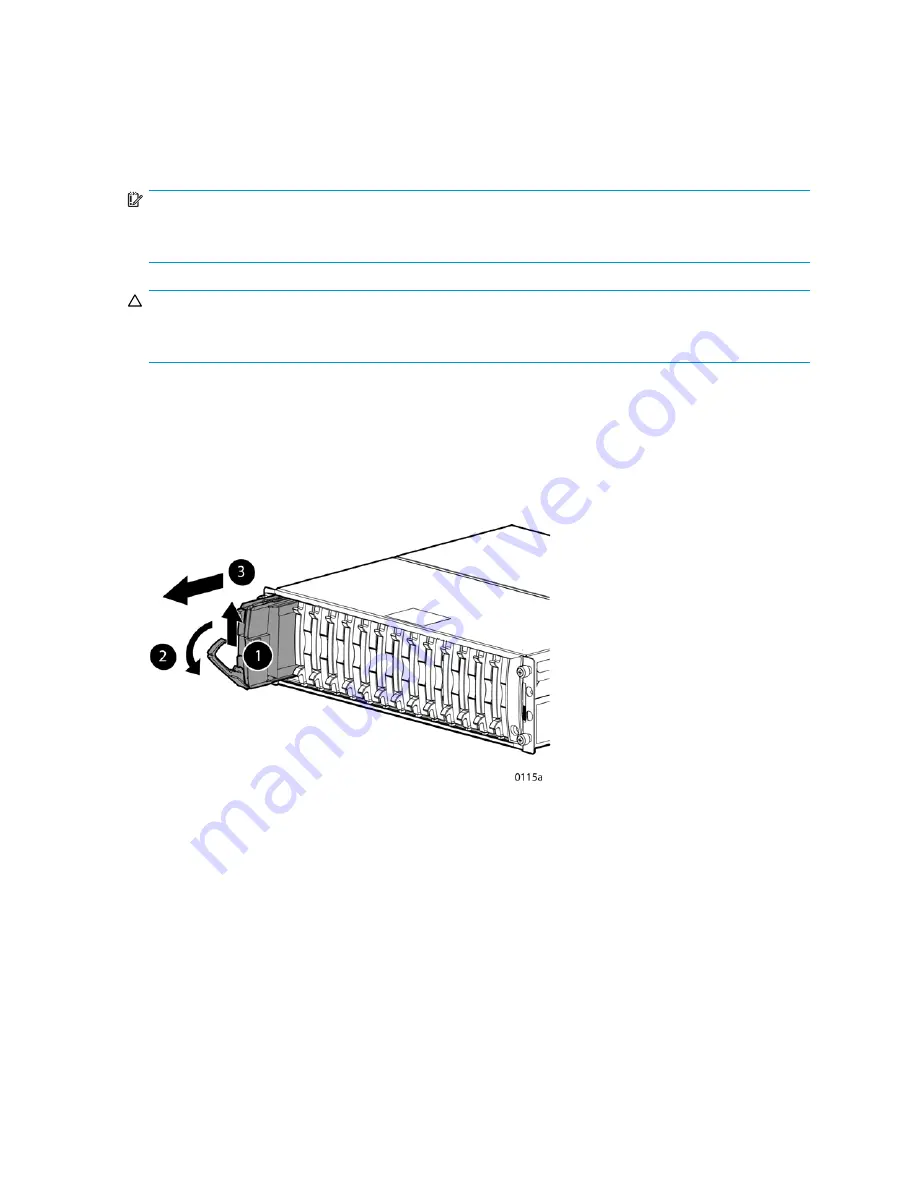
To remove a disk drive:
1.
Push the ejector button (
Figure 34
-1) and pull the release lever (
Figure 34
-2) down to the full
open position.
2.
Pull the disk drive part way out of the enclosure (
Figure 34
-3) and wait for the media to stop
spinning.
3.
Remove the disk drive from the enclosure (
Figure 34
-3).
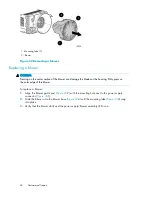
Figure 34 Removing a disk drive
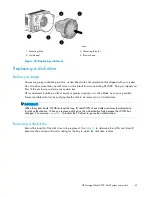
Replacing a disk drive
To replace a disk drive:
1.
Push the ejector button on the disk drive, and pull the release lever down to the full open position.
2.
Align the drive with the bay, and slide the drive into the enclosure as far as it will go (
Figure 35
-1).
3.
Close the release lever until it engages the ejector button, and the disk drive plugs into the
backplane (
Figure 35
-2).
4.
Press in
fi
rmly on the disk drive to ensure that it is seated properly.
5.
Verify that the drive activity indicator remains on for at least 10 seconds.
HP StorageWorks 2500 Disk System user guide
63
Содержание StorageWorks 2500
Страница 1: ...HP StorageWorks 2500 Disk System user guide Part number 5697 6800 Second edition June 2007 ...
Страница 8: ...8 ...
Страница 12: ...12 About this guide ...
Страница 44: ...44 Using the EMU ...
Страница 54: ...54 Troubleshooting ...
Страница 64: ...Figure 35 Replacing a disk drive 64 Customer self repair ...
Страница 68: ...68 Specifications ...
Страница 78: ...78 Regulatory notices ...
Страница 88: ...88 EMU generated error condition reports ...


