


Rear I/O cover and bottom trim
The rear I/O cover and bottom trim is located below the stand on the bottom rear of the computer. It is
secured with two screws.
To remove the rear I/O cover and bottom trim:
1.
Prepare the computer for disassembly (see
Preparing to disassemble the computer on page 22
).
2.
Remove the access panel (see
Access panel on page 28
).
3.
Remove the rear port cover (see
Rear port cover on page 23
).
4.
Remove the stand (see
Attaching and removing a stand on page 24
).
5.
Remove the serial/PS2 board (see
Serial/PS2 board on page 52
).
6.
Remove the top trim (see
Top trim on page 34
).
7.
Remove the left trim (see
Left trim on page 62
).
8.
Remove the right trim (see
Right trim on page 60
).
9.
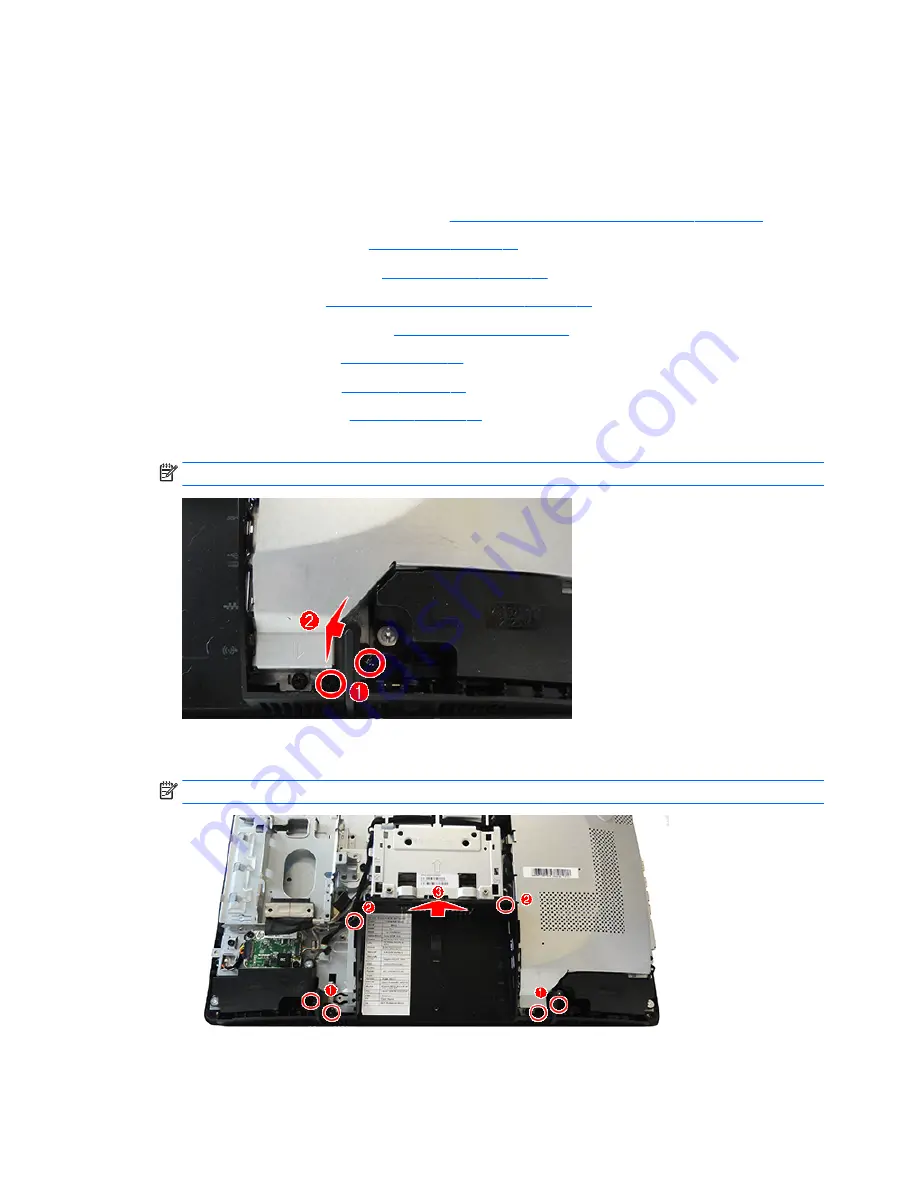
Remove the two screws (1) that secure each foot to the computer, and then remove the feet (2).
NOTE:
The left foot is shown in the following image.
10.
Remove the two screws (2) that secure the rear I/O panel and bottom trim, and then rotate it off the
computer (3).
NOTE:
Callout (1) in the following image shows the location of the screws that secure the feet.
To replace the rear I/O panel, reverse the removal procedures.
64
Chapter 4 Removal and Replacement Procedures
Содержание proone 400 g2
Страница 4: ...iv About This Book ...
Страница 10: ...x ...
Страница 73: ...9 Rotate the trim off the computer To install the left trim reverse the removal procedures Left trim 63 ...


