Removal and replacement procedures 58
5.
Disconnect the power cables:
5a. Disconnect the SATA ODD power cable and ODD cable.
IMPORTANT:
Slide the ODD out of chassis before disconnecting the four hard drive power
cables
5b. Disconnect the four hard drive power cables.
IMPORTANT:
Pull out the system tray by following the procedure steps described in the
” section.
5c. Disconnect the power cable from the system tray.
6.
Remove the standard power supply unit out of the chassis:
6a. Unfasten the three screws on the back of chassis to release the power supply unit.
6b. Pull the standard power supply unit out of the chassis.
IMPORTANT:
Reinstall the ODD by following the procedures described in the “
section.
Содержание ProLiant MicroServer
Страница 12: ...Customer self repair 12 ...
Страница 13: ...Customer self repair 13 ...
Страница 14: ...Customer self repair 14 ...
Страница 15: ...Customer self repair 15 ...
Страница 16: ...Illustrated parts catalog 16 Illustrated parts catalog Mechanical components ...
Страница 20: ...Illustrated parts catalog 20 ...
Страница 21: ...Illustrated parts catalog 21 System components ...
Страница 38: ...Removal and replacement procedures 38 6 Perform the post installation procedure ...
Страница 50: ...Removal and replacement procedures 50 5 Perform the post installation procedure ...
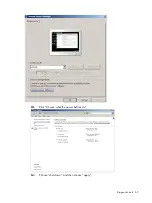
Страница 63: ...Diagnostic tools 63 iii Click Choose what the power buttons do iv Choose shut down and then choose apply ...
Страница 65: ...Diagnostic tools 65 3 Click Next 4 Select I accept the terms of the license agreement and click Next ...
Страница 66: ...Diagnostic tools 66 5 Click Browse to select folder and then click Next 6 Click Next ...
Страница 67: ...Diagnostic tools 67 7 Click Install 8 Click Finish ...
Страница 69: ...Diagnostic tools 69 11 Select if remember the passwords 12 Click in front of Physical Drive View ...
Страница 70: ...Diagnostic tools 70 13 Click options Enable or Disable to change Write cache and NCQ status ...


