


Removal and replacement procedures 52
ProLiant MicroServer Remote Access Card
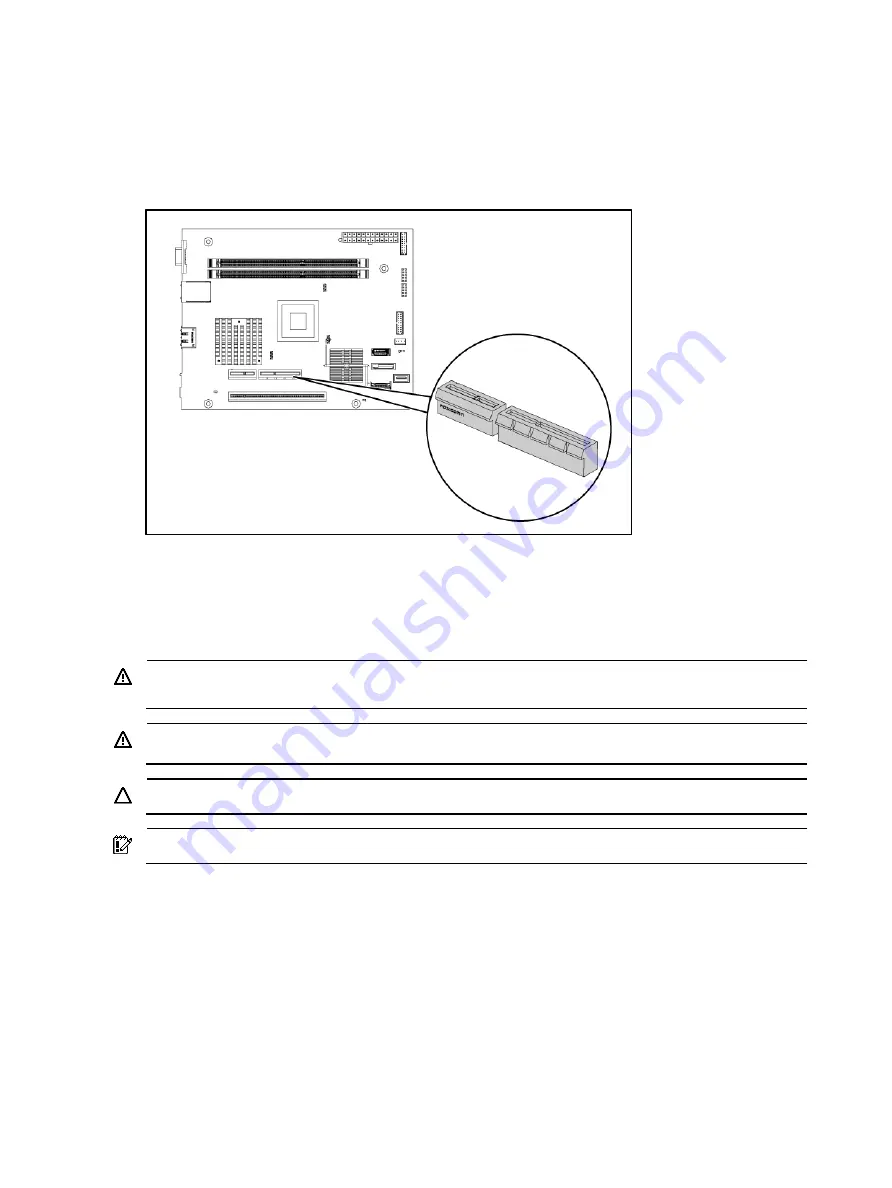
This document provides instructions for installing the remote access card in your HP ProLiant
MicroServer. This option allows users to perform server access tasks remotely over a LAN or the
Internet. The connector is shown in the figure below.
Installation guidelines
The procedures in this document are intended for individuals who are qualified in the servicing of
computer equipment and trained in recognizing hazards in products with hazardous energy levels.
WARNING:
Failure to properly turn off the server before you open the server or before you start
removing or installing hardware components may cause serious damage as well as bodily harm.
WARNING:
To reduce the risk of personal injury from hot surfaces, allow the chassis and any
installed hardware component to cool before touching them.
CAUTION:
Observe ESD safety precautions when handling any hardware component.
IMPORTANT:
Observe the pre-installation procedure before installing the IPMI card.
Pre-installation procedure
1.
Perform data backup.
2.
Turn off the server and all the peripherals connected to it.
3.
Unplug all cables from the power outlets to avoid exposure to high energy levels that may cause
burns when parts are short circuited by metal objects such as tools or jewelry. If necessary, label
each cable to expedite reassembly.
4.
Disconnect telecommunication cables to avoid exposure to shock hazard from ringing voltages.
5.
Follow the ESD safety precautions listed in
your
HP ProLiant MicroServer’s Maintenance and
Service Guide
when handling any hardware component.
Содержание ProLiant MicroServer
Страница 12: ...Customer self repair 12 ...
Страница 13: ...Customer self repair 13 ...
Страница 14: ...Customer self repair 14 ...
Страница 15: ...Customer self repair 15 ...
Страница 16: ...Illustrated parts catalog 16 Illustrated parts catalog Mechanical components ...
Страница 20: ...Illustrated parts catalog 20 ...
Страница 21: ...Illustrated parts catalog 21 System components ...
Страница 38: ...Removal and replacement procedures 38 6 Perform the post installation procedure ...
Страница 50: ...Removal and replacement procedures 50 5 Perform the post installation procedure ...
Страница 63: ...Diagnostic tools 63 iii Click Choose what the power buttons do iv Choose shut down and then choose apply ...
Страница 65: ...Diagnostic tools 65 3 Click Next 4 Select I accept the terms of the license agreement and click Next ...
Страница 66: ...Diagnostic tools 66 5 Click Browse to select folder and then click Next 6 Click Next ...
Страница 67: ...Diagnostic tools 67 7 Click Install 8 Click Finish ...
Страница 69: ...Diagnostic tools 69 11 Select if remember the passwords 12 Click in front of Physical Drive View ...
Страница 70: ...Diagnostic tools 70 13 Click options Enable or Disable to change Write cache and NCQ status ...


