


Removal and replacement procedures 42
System board configuration
Refer to the following sections for instructions about how to remove or replace the processor, the
memory modules, the expansion cards, and the system battery. Procedures for installing MicroServer
remote access card option kits are also provided.
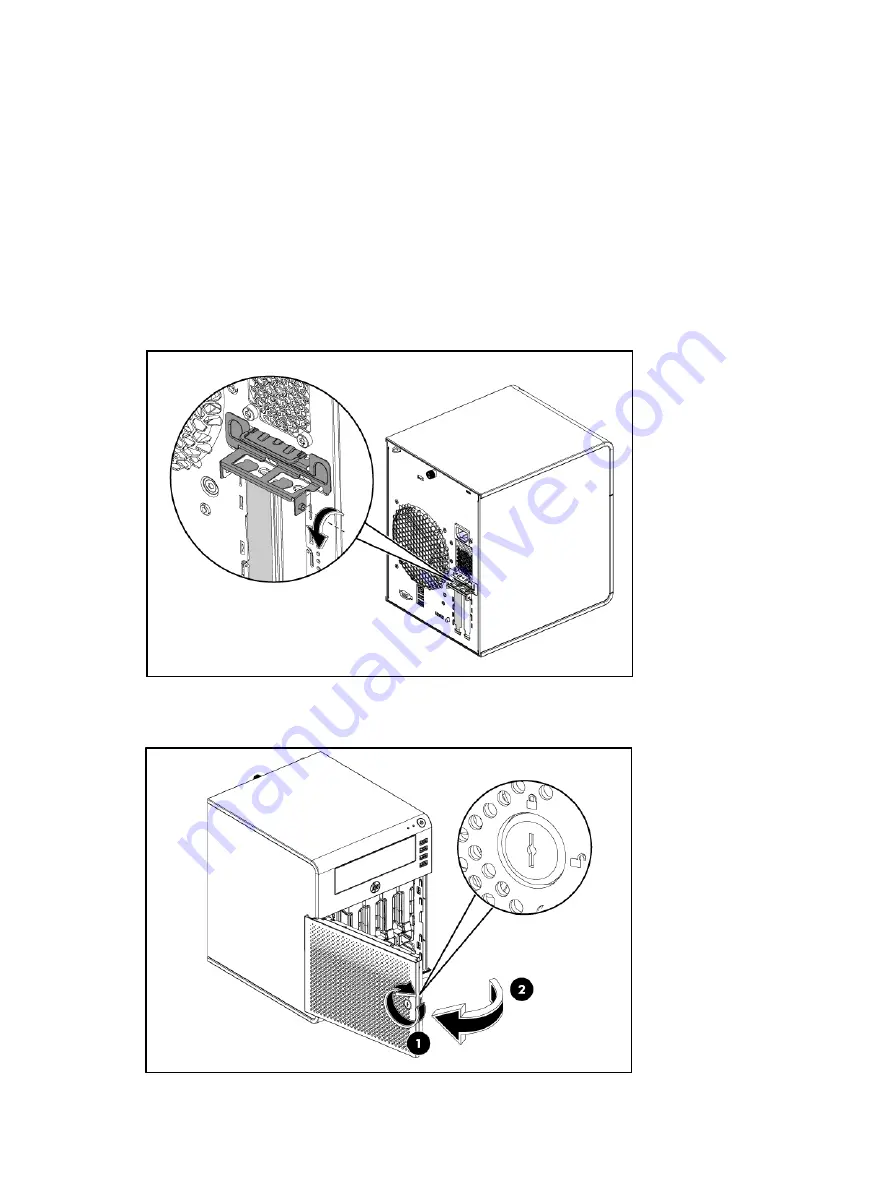
Remove the system board
If PCI card is installed then follow below two steps to release the PCI card, if not, go to step 1:
•
Rotate the PCI holder as described in below figure to release the PCI bracket.
•
Check the bracket to ensure there are no screws secured before removing the tray.
1.
Use the HP ProLiant MicroServer Key to unlock the panel door.
2.
Open the panel door of the server. If necessary, remove any components or cables that prevent
access to the slot.
3.
Unlock the cable clamp as shown in step 3.
Содержание ProLiant MicroServer
Страница 12: ...Customer self repair 12 ...
Страница 13: ...Customer self repair 13 ...
Страница 14: ...Customer self repair 14 ...
Страница 15: ...Customer self repair 15 ...
Страница 16: ...Illustrated parts catalog 16 Illustrated parts catalog Mechanical components ...
Страница 20: ...Illustrated parts catalog 20 ...
Страница 21: ...Illustrated parts catalog 21 System components ...
Страница 38: ...Removal and replacement procedures 38 6 Perform the post installation procedure ...
Страница 50: ...Removal and replacement procedures 50 5 Perform the post installation procedure ...
Страница 63: ...Diagnostic tools 63 iii Click Choose what the power buttons do iv Choose shut down and then choose apply ...
Страница 65: ...Diagnostic tools 65 3 Click Next 4 Select I accept the terms of the license agreement and click Next ...
Страница 66: ...Diagnostic tools 66 5 Click Browse to select folder and then click Next 6 Click Next ...
Страница 67: ...Diagnostic tools 67 7 Click Install 8 Click Finish ...
Страница 69: ...Diagnostic tools 69 11 Select if remember the passwords 12 Click in front of Physical Drive View ...
Страница 70: ...Diagnostic tools 70 13 Click options Enable or Disable to change Write cache and NCQ status ...


