Restoring factory settings in Setup Utility
NOTE:
Restoring defaults will not change the hard drive mode.
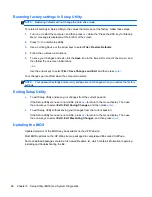
To return all settings in Setup Utility to the values that were set at the factory, follow these steps:
1.
Turn on or restart the computer, and then press
esc
while the “Press the ESC key for Startup
Menu” message is displayed at the bottom of the screen.
2.
Press
f10
to enter Setup Utility.
3.
Use a pointing device or the arrow keys to select
File > Restore Defaults
.
4.
Follow the on-screen instructions.
5.
To save your changes and exit, click the
Save
icon in the lower-left corner of the screen, and
then follow the on-screen instructions.
– or –
Use the arrow keys to select
File > Save Changes and Exit
, and then press
enter
.
Your changes go into effect when the computer restarts.
NOTE:
Your password settings and security settings are not changed when you restore the factory
settings.
Exiting Setup Utility
●
To exit Setup Utility and save your changes from the current session:
If the Setup Utility menus are not visible, press
esc
to return to the menu display. Then use
the arrow keys to select
Exit > Exit Saving Changes
, and then press
enter
.
●
To exit Setup Utility without saving your changes from the current session:
If the Setup Utility menus are not visible, press
esc
to return to the menu display. Then use
the arrow keys to select
Exit > Exit Discarding Changes
, and then press
enter
.
Updating the BIOS
Updated versions of the BIOS may be available on the HP Web site.
Most BIOS updates on the HP Web site are packaged in compressed files called
SoftPaqs
.
Some download packages contain a file named Readme.txt, which contains information regarding
installing and troubleshooting the file.
98
Chapter 5 Setup Utility (BIOS) and System Diagnostics
Содержание Pavilion g4
Страница 1: ...HP G4 Notebook PC Maintenance and Service Guide ...
Страница 4: ...iv Safety warning notice ...
Страница 8: ...viii ...
Страница 23: ...Front Component Description Speakers 2 Produce sound Front 15 ...
Страница 26: ...3 Illustrated parts catalog 18 Chapter 3 Illustrated parts catalog ...
Страница 28: ...Computer major components 20 Chapter 3 Illustrated parts catalog ...
Страница 103: ...Reverse this procedure to reassemble and install the display assembly Component replacement procedures 95 ...
Страница 132: ......

