Installing Hardware Options
HP ProLiant ML530 Generation 2 Server Setup and Installation Guide
3-57
HP CONFIDENTIAL
Writer: Richard O. Heath File Name: d-ch3 Installing Hardware Options.doc
Codename: Seattle Slew Part Number: 225579-002 Last Saved On: 1/8/03 3:00 PM
3.
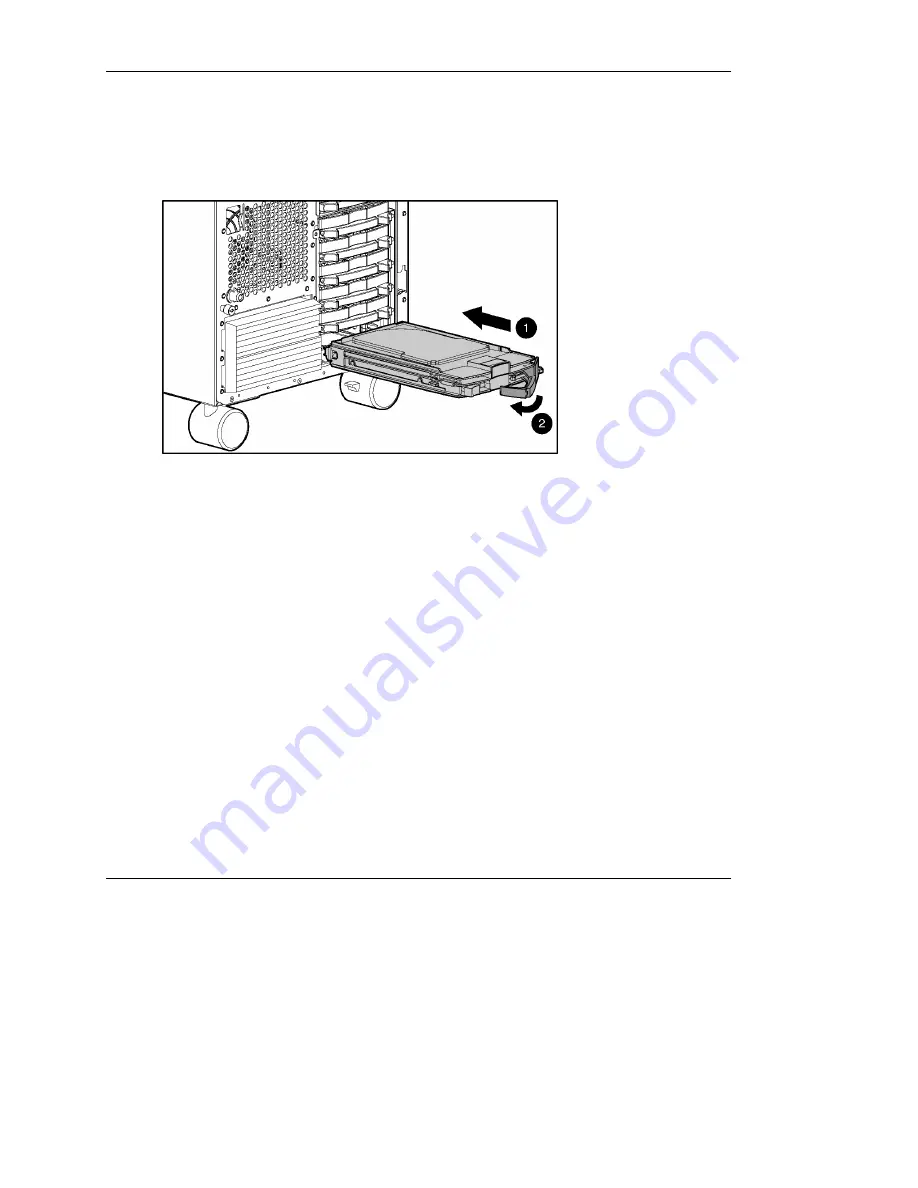
Align the new hot-plug hard drive with the drive bay, then slide the hard drive
into the bay until seated (1).
4.
Push in the drive ejector lever until it locks the hard drive in place (2).
Figure 3-45: Installing a hot-plug hard drive
5.
Repeat steps 2 through 4 to install additional hard drives.
6.
Be sure that the hot-plug hard drive activity LEDs on the front of the system are
illuminated green, indicating that the system is functioning properly. For detailed
information on LEDs, see Appendix C, “System LEDs and Switches.”
7.
If any of the LEDs indicates an error, see Appendix D, “Troubleshooting,” or
refer to the troubleshooting guide for instructions.
8.
If you have a tower-model server, close the front bezel door.
9.
Run the ROM-Based Setup Utility or Smart Array Controller Utility to configure
the new hard drives.
Installing a Hot-Plug Universal Tape Drive into a Drive Bay
To install a hot-plug universal tape drive into a drive cage:
1.
For tower-model servers only, open the front bezel door to access the drive cages
on the front of the server. See “Opening the Front Bezel Door” in this chapter.


