●
On Windows Vista, Windows 7, and the Windows 8 series, click Personalize > Display
Settings.
●
On Windows XP, click Properties > Settings.
2.
In the Display drop-down menu, click the attached monitor, and then:
●
On Windows Vista, Windows 7, and the Windows 8 series, select the This is my main
monitor check box.
●
On Windows XP, select the Use this device as the primary monitor check box.
3.
On some PCs and notebooks, the primary display must be disabled as part of the same settings
change. To do this, clear the Extend the desktop onto this monitor check box for the primary
display.
4.
Click OK to close the settings screen.
The attached monitor stays primary if the PC enters hibernate or suspend mode or is rebooted. If the
attached monitor is unplugged, the notebook or desktop display becomes primary again.
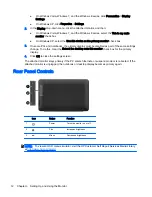
Rear Panel Controls
Icon
Button
Function
1
Power
Turns the monitor on or off
2
Plus
Increases brightness
3
Minus
Decreases brightness
NOTE:
To view an OSD menu simulator, visit the HP Customer Self Repair Services Media Library
at
http://www.hp.com/go/sml
.
12 Chapter 3 Setting Up and Using the Monitor


