


125
Changing Your Workstation’s Hardware Configuration
Installing Storage Devices
3
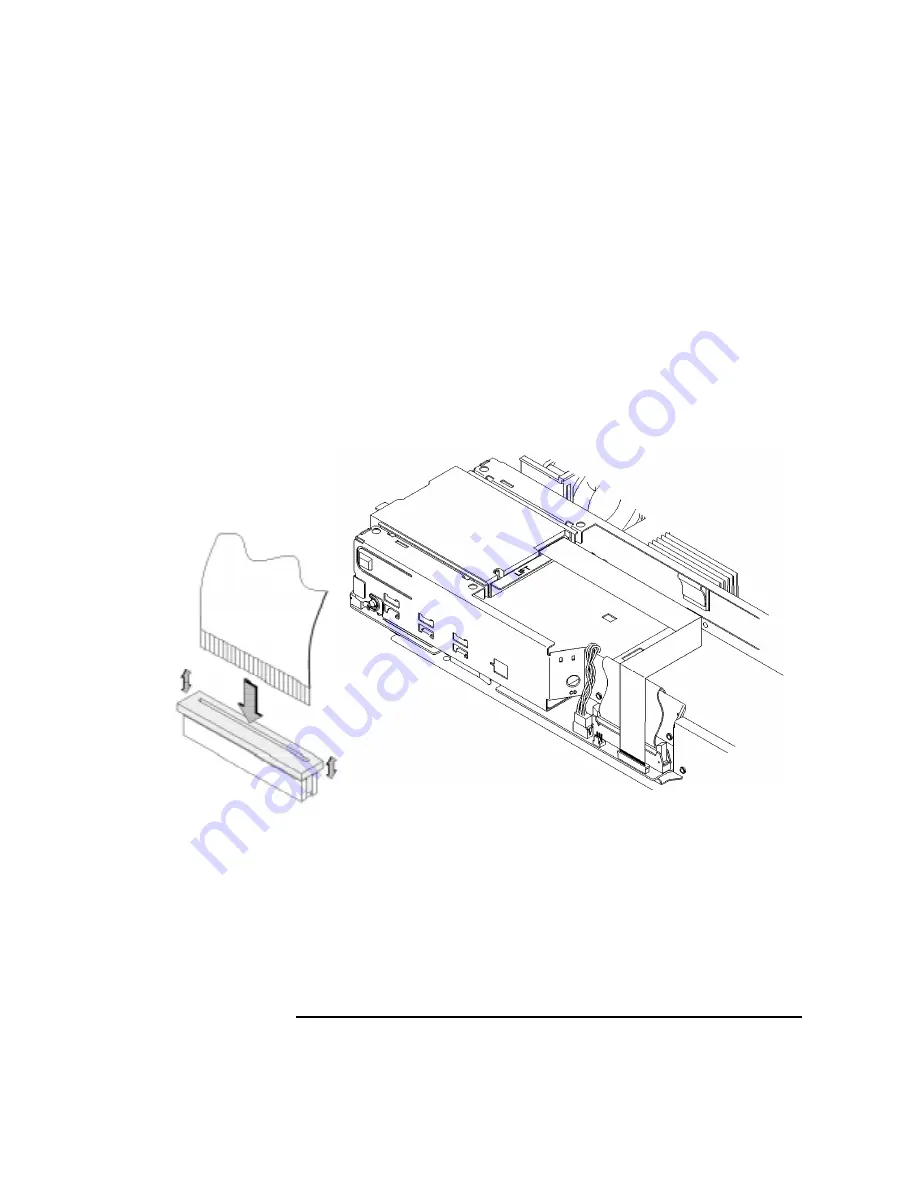
Connect the floppy data cable to the floppy drive and the system board as shown
in, Figure 32.
When connecting the floppy data cable, use the following procedure, as shown
in Figure 32:
a
Lift the locking ring on the connector to the up, or unlocked position.
b
While holding the locking ring in the unlocked position, insert the cable into
the connector.
c
Press down on the locking ring evenly on both ends until it snaps into the
down, or locked, position.
Figure 32
Connecting the Floppy Drive Data Cable
4
Proceed to the section entitled Replacing the Storage Tray Cover on page 132.
Содержание B132L+
Страница 1: ...Model B132L B132L B160L B180L Owner s Guide HP Part No A4190 90023 Edition E0997 Printed in U S A ...
Страница 15: ...1 Preface ...
Страница 20: ...6 ...
Страница 21: ...7 1 System Overview ...
Страница 40: ...26 System Overview Networking Overview ...
Страница 41: ...27 2 Using Your CD ROM Drive ...
Страница 60: ...46 Using Your CD ROM Drive Troubleshooting ...
Страница 61: ...47 3 Using Your Digital Data Storage DDS Tape Drive ...
Страница 77: ...63 4 Using Your 3 5 Inch Floppy Disk Drive ...
Страница 89: ...75 5 Solving Problems ...
Страница 105: ...91 A Safety and Regulatory Statements ...
Страница 107: ...93 Safety and Regulatory Statements Declaration of Conformity 1 Declaration of Conformity 1 ...
Страница 108: ...94 Safety and Regulatory Statements Declaration of Conformity 2 Declaration of Conformity 2 ...
Страница 111: ...97 Safety and Regulatory Statements Emissions Regulations VCCI Class 2 ITE ...
Страница 117: ...103 Safety and Regulatory Statements Warnings and Cautions Warnings and Cautions ...
Страница 118: ...104 Safety and Regulatory Statements Warnings and Cautions ...
Страница 119: ...105 B Changing Your Workstation s Hardware Configuration ...
Страница 159: ...145 Changing Your Workstation s Hardware Configuration Removing Cache Boards Figure 49 Removing a Cache Board ...
Страница 184: ...170 Changing Your Workstation s Hardware Configuration Changing Your Monitor Type ...
Страница 185: ...171 C SCSI Connections ...
Страница 206: ...192 SCSI Connections Connecting to the SCSI Ports ...
Страница 207: ...193 D The Boot Console Interface ...
Страница 221: ...207 The Boot Console Interface Displaying and Setting Paths Main Menu Enter command path pri sescsi 6 0 ...
Страница 240: ...226 The Boot Console Interface Displaying PIM Information ...
Страница 252: ...238 Glossary ...