GB
19
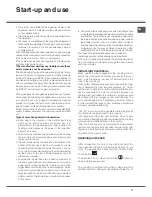
Starting Timer countdown.
The countdown starts 10 seconds after the last ope-
ration over the
INCREASE (+)/ REDUCE(-) TIME but-
tons
. If any power is selected, a beep sounds and
the timer display stops blinking. The same happens
to the led heater.
The last minute will be displayed in seconds.
! When the timer is in countdown the user can
change the time at any time by touching the
INCRE-
ASE / REDUCE TIME buttons
. Then the countdown
stops and the timer changes to time selection status
waiting a time selection.
End of Timer countdown.
When the time set on the timer has elapsed the timed
heater is switched off, the timer display and the timed
heater led starts blinking and a timer alarm beep sounds
for one minute. The timer alarm can be cancelled by the
user at any time, even during the first minute of the alarm
. When the timer is in alarm status, by pressing any key
of the touch control the timer is switched off.
! To cancel the operation of the timer, select the time
value of “00”pressing the(+) and(-) TIME buttons at the
same time.
! When all the cooking zones are not powered, and one
of them is temporized at zero power level, the key-lock
function is activated after 1 minute.
Control panel lock
When the hob is switched on, it is possible to lock the oven
controls in order to avoid accidental changes being made to
the settings (by children, during cleaning, etc.).
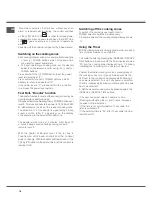
Press the
button to lock the control panel: -the icon
will illuminate and an audible beep sound will be emmited.
To use any of the controls (e.g. to stop cooking), you
must switch off this function. Press the
button for a
few moments, the icon will stop illuminating and the lock
function will be removed.
All the keys on the cooking zone selection wil be locked
if :the cooktop is off,,
if the Control Panel Lock is activated or
if an error on a cooktop occurs..
Switching off the hob
Press the button
to switch off the appliance - do not
rely solely on the pan sensor.
If the control panel lock has been activated, the controls
will continue to be locked even after the hob is switched
on again. In order to switch the hob on again, you must
first remove the lock function.
Practical advice on using the appliance
!
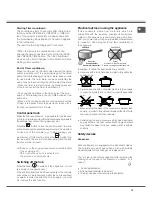
Use cookware made from materials which are
compatible with the induction principle (ferromagnetic
material). We especially recommend pans made from:
cast iron, coated steel or special stainless steel adapted
for induction. Use a magnet to test the compatibility of
the cookware.
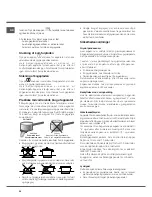
*
SUITABLE
UNSUITABLE
Cast iron
Enamelled steel
Special stainless steel
Copper,
Aluminium, Glass, Earthenware,
Ceramic, non magnetic Stainless steel
In addition, to obtain the best results from your hob:
• Use pans with a thick, flat base in order to fully utilise the
cooking zone.
• Always use pans with a diameter which is large enough
to cover the hotplate fully, in order to use all the available
heat.
• Make sure that the base of the cookware is always clean
and dry, in order to fully utilise and extend the life of both
the cooking zones and the cookware.
• Avoid using the same cookware which has been used
on gas burners: the heat concentration on gas burners
may distort the base of the pan, causing it not to adhere
correctly.
Safety devices
Pan sensor
Each cooking zone is equipped with a pan sensor device.
The hotplate only emits heat when a pan with suitable
measurements for the cooking zone is placed on it.
The “u” sign on the display appears if after selecting the
cooking zone the pan is not placed on a heater , or in
case of:
• An incompatible pan
• A pan whose diameter is too small
• The pan has been removed from the hotplate.


