10
2. Check the Refrigeration Circuit
Visually check that the refrigerant lines do not rub or touch other lines or surfaces and
that the condenser fan blade turns freely.
3. Position the Appliance and Lock the Front Casters
The front casters on the appliance are lockable. After positioning the appliance in its final
location, lock the front casters.
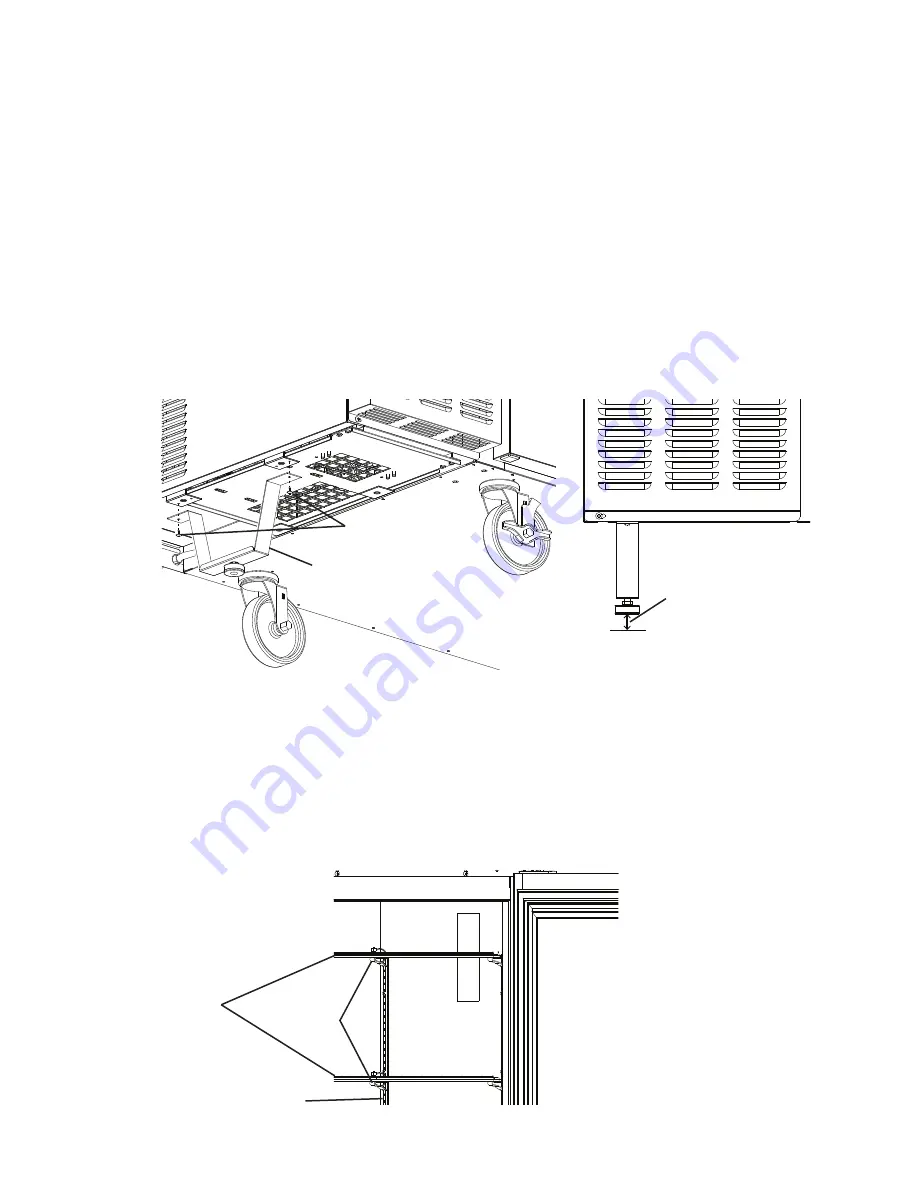
4. For PR46(-D) Models, Install the Anti-Tip Bracket
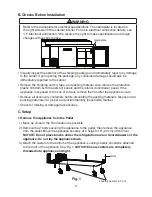
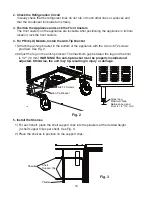
1) Attach the anti-tip bracket to the bottom of the appliance with the two 4×8 T2 screws
provided. See Fig. 2.
2) Adjust the leg on the anti-tip bracket. The maximum gap between the leg and the floor
is 1/2" (13 mm)
WARNING! The anti-tip bracket must be properly installed and
adjusted. Otherwise, the unit may tip, resulting in injury or damage.
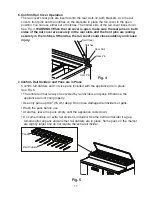
Fig. 3
Shelf
Support Clip
Pilaster
Shelves
5. Install the Shelves
1) For each shelf, place the shelf support clips into the pilasters at the desired height
(4 shelf support clips per shelf). See Fig. 3.
2) Place the shelves in position on the support clips.
Fig. 2
Anti-Tip Bracket
4×8 T2 Screws
Adjust Leg
Maximum Gap
Between Leg and
Floor is 1/2" (13 mm)


