14
Upper Hinge
Bracket
Door
Fig. 11
Screw
Washer
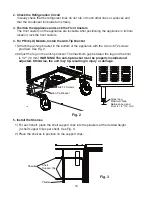
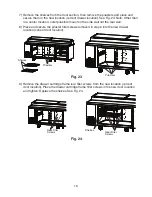
Upper Hinge Bracket Removal and Spring Cartridge Relocation
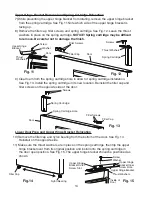
7) While preventing the upper hinge bracket from rotating, remove the upper hinge bracket
from the spring cartridge. See Fig. 11. Note which side of the upper hinge bracket is
facing up.
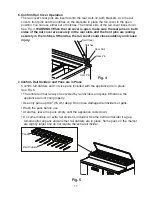
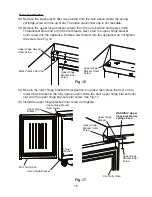
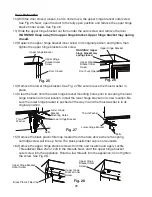
8) Remove the filler cap, filler screws, and spring cartridge. See Fig. 12. Leave the thrust
washers in place on the spring cartridge.
NOTICE!
Spring cartridge may be difficult
to remove. Be careful not to damage the finish.
Filler Cap
Door
Spring Cartridge
Filler Screws
Thrust Washers
Screws
Fig. 12
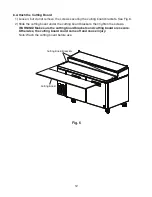
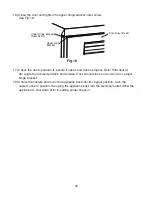
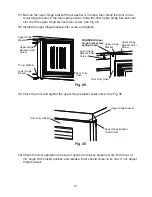
9) Clear foam from the spring cartridge hole to allow for spring cartridge installation.
See Fig. 13. Install the spring cartridge in its new location. Reinstall the filler cap and
filler screws on the opposite side of the door.
Filler Screws
Filler Cap
Door
Spring Cartridge
Screws
Fig. 13
Lower Door Prep and Upper Hinge Bracket Relocation
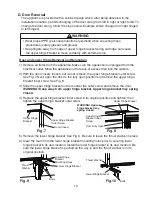
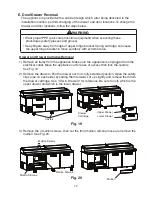
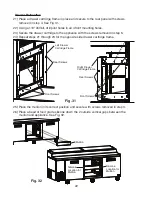
10) Remove the filler cap and nylon bearing from the bottom of the door. See Fig. 14.
Reinstall on the opposite side.
11) Make sure the thrust washers are in place on the spring cartridge, then flip the upper
hinge bracket over from its original position and install onto the spring cartridge in
the door open position. See Fig. 15. The upper hinge bracket should be positioned as
shown.
Upper Hinge Bracket
Inside of
Door
Screw
Washer
Fig. 14
Fig. 15
Filler Cap
Nylon Bearing
Thrust Washers
Upper Hinge
Bracket Inner
Screw Hole
Spring Cartridge Hole
Upper Hinge
Bracket Outer
Screw Slot
Thrust
Washers


