


WEBVISION™
9
95-7769—01
Exporting Alarms
You can export alarms on WebVision.
To export alarms:
1.
Click the
Alarms
tab. The
View Alarms
page appears.
2.
Click
Export All Alarms
to download all the alarms at
once.
3.
A .csv file is displayed.
4.
Click
Open
to open the file and click
Save
to save the
file on your computer.
To E-Mail alarms:
1.
Select the alarms you would want to e-mail by clicking
the corresponding check boxes.
2.
Click
. An
Enter Email Addresses
box is
displayed. Enter a list of e-mail addresses to which the
selected alarms must be E-Mailed. The list must be
separated by a semicolon (;).
3.
Click
Ok
. The selected alarms are E-Mailed to those
recipients.
Alarm Configuration and Use
To add new alarms:
1.
Click the
Alarms
tab. The
View Alarms
page appears.
2.
Click the
Alarm Setup
tab on
View Alarms
page. The
Alarm Setup
page appears.
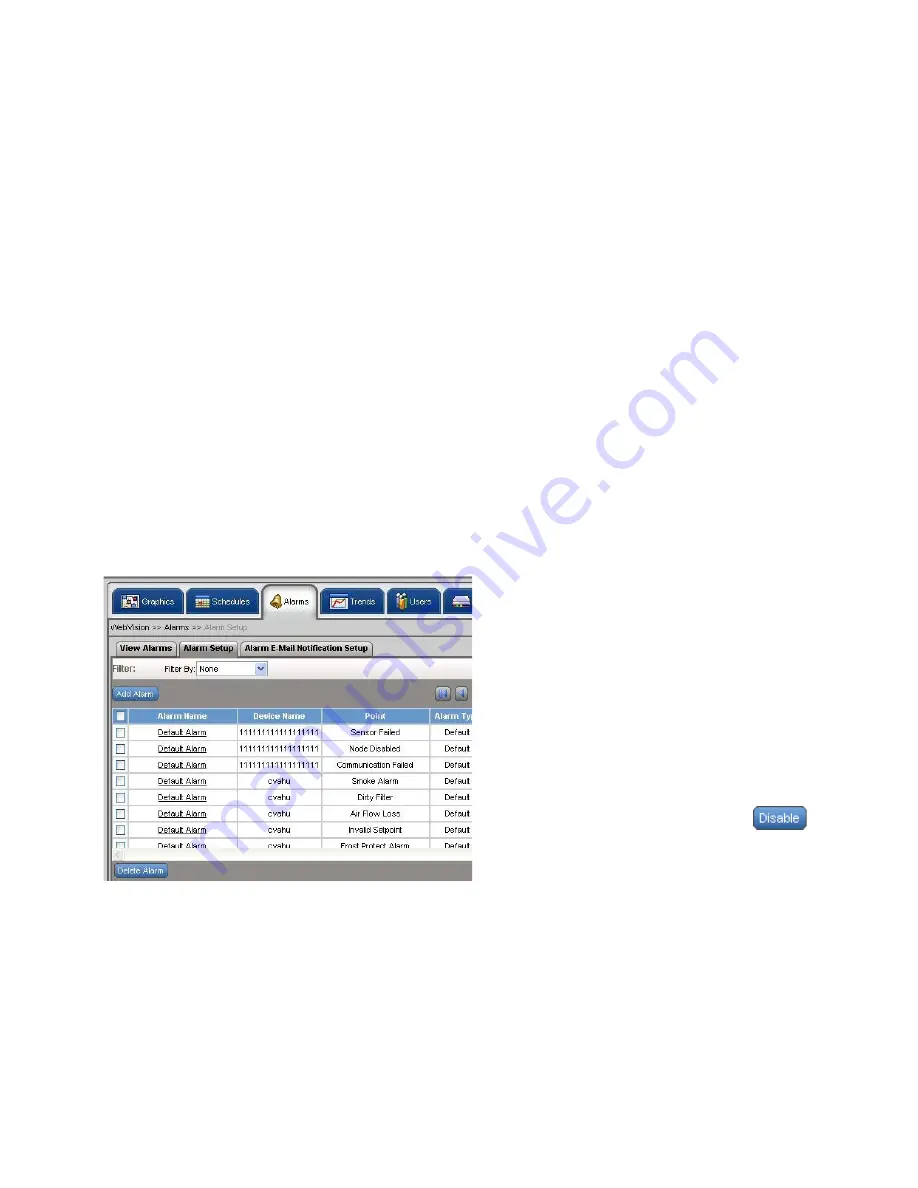
Fig. 17. Alarm Setup page.
3.
Click
Add Alarm
. The
Add Alarm
page appears.
4.
Enter the Alarm Name and select the desired Points:
•
Alarm Name
– The name of the alarm.
• Select Points:
•
Channel
– The selected channel.
•
Device
– The selected device.
•
Point
– The selected point.
•
Select Point
– Click Select Point. The
Select
Point
dialog box is displayed. Select a Channel,
Device, and Point from the corresponding drop
down list. The selected values are reflected in
the Alarm Setup screen. Type a Display Name
for the point.
NOTE: The alarm condition depends on the type of selected
point. If it is a numeric point, you must provide Alarm
High Limit and Alarm Low Limit. If it is a discrete
value (Enumerated or Boolean) point, then select an
alarm value in the possible point value list in the
combo box.
Example: For Occupancy State, you can select alarm value as
Unoccupied in which case WebVision raises an alarm
whenever the point has Unoccupied as its value.
•
Select Alarm value
– This option is available for
enum and boolean values. Select the required
alarm value from the drop down list.
• Limits:
•
High Limit
– Select or type the higher limit of a
device beyond which an alarm is raised.
•
Low Limit
– Select or type the lower limit of the
device below which an alarm is raised.
NOTE: For numeric values, Limits are listed and for enum
and boolean values the Select Alarm Value is listed.
•
Description
– Description of the alarm.
•
Set Priority As
– Indicates the priority of the
alarm. Set 1 for low priority and 10 for High
priority. It can be Low, Medium, or High. Priority
is configured depending on the device's
configurations and settings
•
Enable
– Click Yes to enable the alarm along
with its configuration. Checking this option,
displays the alarm in the
View Alarms
page.
Click No to disable the alarm.
5.
Click
Save
to save the settings.
To edit an alarm configuration:
1.
Select an alarm from the alarm's list to edit it. The
selected alarm's details appear.
2.
Modify the required fields as described in step 4 of “To
3.
Click
Save
to save the settings.
NOTE: You can enable or disable an alarm from the Alarm
Setup screen. For example, click
from the
table on the
Alarm Setup
page to disable an alarm.
To delete an alarm:
1.
Click the
Alarms
tab. The
View Alarms
page appears.
2.
Select the check box corresponding to the alarm you
want to delete.
3.
Click
Delete Alarm
. A confirmation message appears.
4.
Click
OK
to confirm the deletion.
NOTES:
1.
Click
Cancel
to cancel the deletion.
2.
Only Acknowledged Alarms can be deleted.
TIP:
To delete all alarms at once, select the
Alarm Name
check box and click
Delete Alarm
.


