17
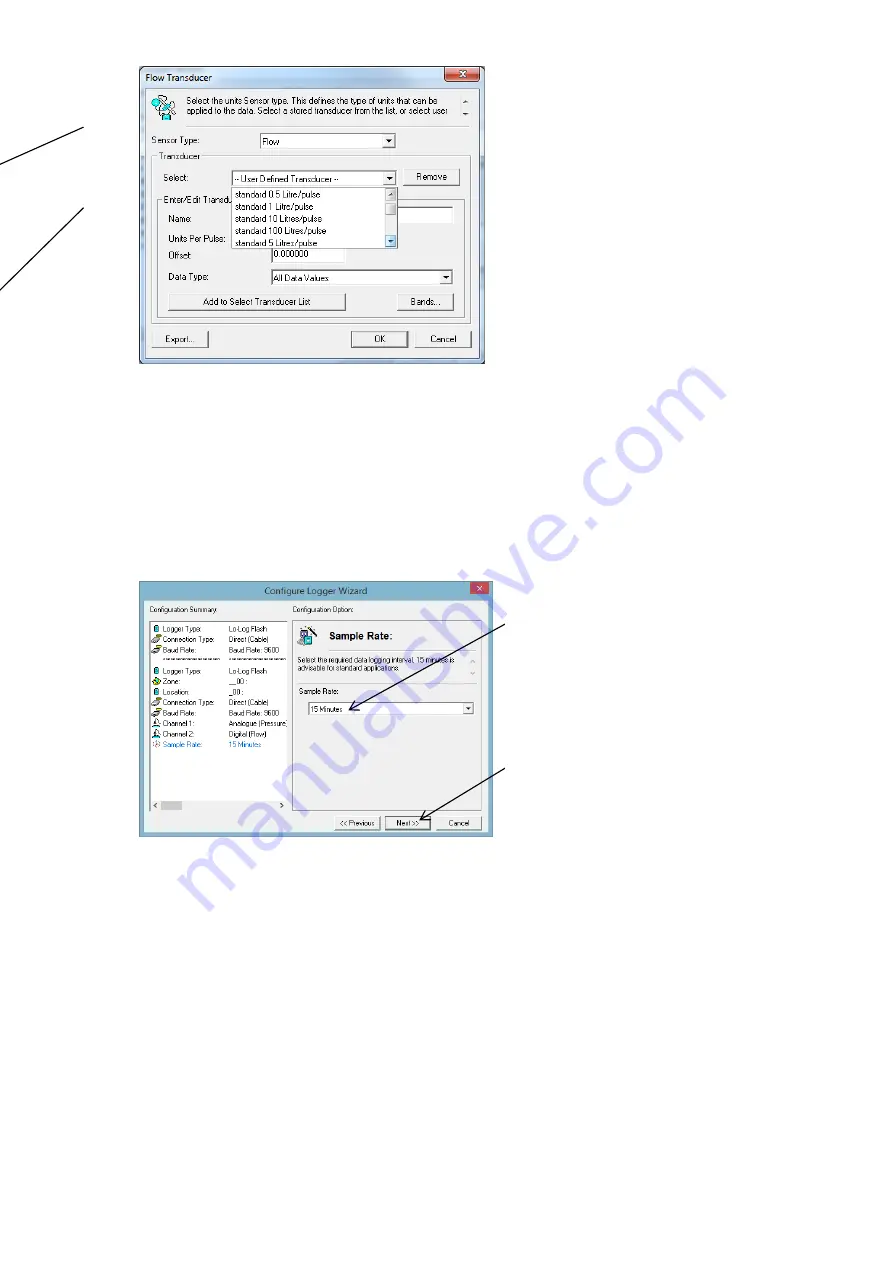
From the drop down list, choose the
pulse rate or sensor type that matches
the Pulse Unit that is fitted to your
meter.
Then click <<OK>> to store this setting
and return to the channel menu.
C
Click <<Next>>.
Note: You can also enter the pulse rate manually, simply click in the Unit Per Pulse
box and enter the value, take care over the decimal place.
Note: If you leave an unused channel Enabled (ON) you will simply see flatline data
on the viewing platform.
13. Next you need to specify the Sample Rate that you require.
A note about Sample Rates:
For a digital input (e.g. flow), the sample rate equates to the number of pulses
counted during the period set. So, if 900 pulses were counted over the 15m
sample rate set above, this equates to 1 pulse/sec and if you have set
10ltr/pulse in step 12, then the final result is 10litres/sec.
For an analogue input (e.g. pressure, depth, etc.) the logger takes a
background measurement every 30 seconds (or the sample rate, whichever is
smaller).
This background measurement is then averaged across the sample period
selected. So if you set a 15m
“Sample Rate” above, then the logger will record
the average of the 30 readings taken during the 15m period selected.
If you choose a sample rate faster than 30s, then the background sample
period with adjust automatically to match it,
however this will reduce battery
life.
In most cases the default setting
of 15 minutes will be sufficient,
however, if you wish to change
the rate, simply select a period
from 1m to 24hrs from the
dropdown menu.
Click <<Next>> to move on
Содержание LoLog 450 Series
Страница 9: ...8 ...
Страница 35: ...34 MilliAmp Input Circuit Logger mA input ciruit GND B VDD D 4 20mA transmitter ...


