


4–6
Maintaining Your Array
Hitachi Simple Modular Storage 100 User’s Guide
•
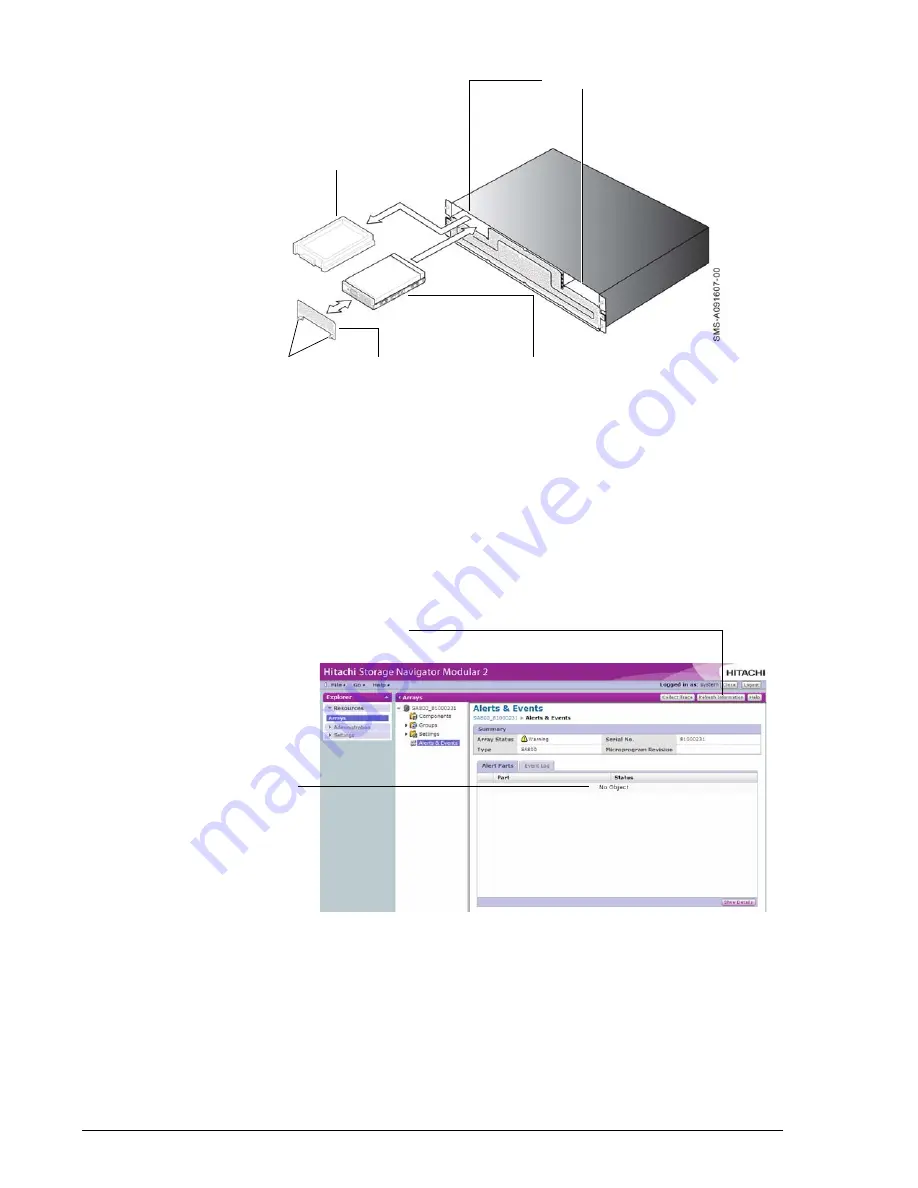
Figure 4-6: Installing the Spare Drives
9. Be sure the drive is installed securely in the slot.
10.Attach the repair slot cover, then secure it by tightening the two screws
you loosened in step 4.
11.Verify that the
Warning
LED goes OFF.
12.Replace the front panel bezel (see
Attaching the Front Panel Bezel on
).
13.Click the
Refresh Information
button to clear the Failed status and
verify that
No Object
appears in the Failed Part List (see s).
•
Figure 4-7: Confirming No Object Status
14.In the Arrays window, verify that the array status is
Normal
.
15.Remove the anti-static wristband.
Drive Slots
Dummy Drive
Screws
Repair Slot Cover
Spare Drive
Refresh Information Button
Click Here for
No Object
Содержание Simple Modular Storage 100
Страница 6: ...vi Hitachi Simple Modular Storage 100 User s Guide ...
Страница 14: ...xiv Preface Hitachi Simple Modular Storage 100 User s Guide ...
Страница 24: ...1 10 Introduction Hitachi Simple Modular Storage 100 User s Guide ...
Страница 34: ...2 10 Identifying Hardware Components Hitachi Simple Modular Storage 100 User s Guide ...
Страница 66: ...4 10 Maintaining Your Array Hitachi Simple Modular Storage 100 User s Guide ...
Страница 78: ...5 12 Troubleshooting Hitachi Simple Modular Storage 100 User s Guide ...
Страница 82: ...A 4 Hitachi Simple Modular Storage 100 User s Guide ...
Страница 96: ...Glossary 8 Hitachi Simple Modular Storage 100 User s Guide A B C D E F G H I J K L M N O P Q R S T U V W X Y Z ...
Страница 99: ...1 Hitachi Simple Modular Storage 100 User s Guide ...


