background image

Pipe Joints Thermal Insulation:

Wrap the pipes joints with thermal insulation 
materials and then wrap with a vinyl tape.

Thermal insulation

wrapped with vinyl type

Pipes Thermal Insulation:

a. Place the drain hose  under the pipes.

b. Insulation material uses polythene 
    foam over 6mm in thickness.

Note: Drain hose is prepared by user.

Drain pipe should point downward 
for easy drain flow. Do not arrange 
the drain pipe twisted, sticking out 
or wave around, do not immerse 
the end of it in water.

If an extension drain hose is connected to the drain 
pipe, make sure to thermal insulated when passing 
along the indoor unit.

When the pipes is directed to the right, pipes, power
Cord and drain pipe should be thermal insulated and
fixed onto the back of the unit with a pipe fixer.

Small 
pipe

Large pipe

Thermal insulation tube

Power cord

Drain hose
(prepared by user)

A. Insert the pipe fixer to the slot. B. Press to hook the pipe fixer 

    onto the base.

Base

Base

Base

Pipe fixer

Pipe fixer

Hook here

Insert here

drain
hose

drain
hose

large
pipe

large
pipe

small
pipe

small
pipe

(just a schematic)

Piping Connection:

If you don't hear the exhaust noise, 
please contact with the merchant.

a.Before unscrewing the big and the 
   small sealing caps, press the small 
   sealing cap with the finger until the 
   exhaust noise stops, and then 
   loosen the finger.
b.Connect indoor unit pipes with 
    two wrenches. Pay special attention
    to the allowed torque as shown 
    below to prevent the pipes, 
    connectorsand flare nuts from being 
    deformed and damaged.
c. Pre-tighten them with fingers at 
    first, then use the wrenches.

Pipe size

Model

Liquid Side (

1/4 inch) 

φ

6mm or 

5k~12K,13k~18K,21

K

~24

12K , 13K~18K

#

18K , 21K~36K

#

#

18K , 21K~36K

5K~13K

        15~20N·m

        17mm         0.5mm

        0.6mm

        0.6mm

        0.6mm

        0.6mm

        22mm

        24mm

        22mm

        27mm

        30~35N·m

        30~35N·m

        50~55N·m

        60~65N·m

Liquid Side (

3/8 inch)

φ

9.53mm or 

Gas Side (

 inch)

φ

12mm or 1/2

Gas Side (

3/8 inch)

φ

9.53mm or 

Gas Side (

5/8 inch)

φ

16mm or 

Torque Nut width Min.thickness

        1.0mm

36K

#

        32mm

Gas Side (

3/4 inch)

φ

19mm or 

        70~75N·m

Note: Piping connection should be conducted on outdoor 
          side !

For


Inverter 

appliance

For


ON-OFF appliance

#

#

#

#

Note: The unit of 12K ,18K ,24K ,36K  is bigger than the unit of 
          12K,18K,24K,36K.

Pipe size

Model

Liquid Side (

1/4 inch) 

φ

6mm or 

5 12K,13 18K,21 24K

~

~

~

12 ,14,15,18K

#

K

#

18K ,22,24K ,28,30,36K

#

18K ,22,24,28,30,36K

#

36K

#

5~10K,12K

        15~20N·m

        17mm

        0.5mm

        0.6mm

        0.6mm

        0.6mm

        0.6mm

        22mm

        24mm

        22mm

        27mm

        30~35N·m

        30~35N·m

        50~55N·m

        60~65N·m

Liquid Side (

3/8 inch)

φ

9.53mm or 

Gas Side (

 inch)

φ

12mm or 1/2

Gas Side (

3/8 inch)

φ

9.53mm or 

Gas Side (

5/8 inch)

φ

16mm or 

Torque Nut width Min.thickness

        1.0mm

        32mm

        70~75N·m

Gas Side (

3/4 inch)

φ

19mm or 

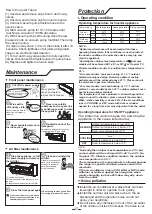
4.  Connecting of the Cable

Outdoor Unit

Indoor Unit

1) Remove the access door from the unit by 
loosening the screw. Connect the wires to the 
terminals on the control board individually as 
follows.  

Connect the power cord to the indoor unit by 
connecting the wires to the terminals on the control
board individuallyin accordance with  the outdoor  
unit connection.

2) Secure the power cord onto the control 
with cable clamp.  

board 

.
3) Reinstall the access door to the original position 
with the screw. 
4) Use a recognized circuit breaker for 24K model
 between the power source and the unit. A 
disconnecting device to adequately disconnect all 
supply lines must be fitted.

Note: For some models, it is necessary to remove the 
cabinet to connect  to the  indoor unit terminal.

Access door
Terminal(inside)

Outdoor unit

The figures in this manual are based on the external
view of a standard model. Consequently, the shape
 may differ from that of the air conditioner you have
selected.

Chassis

Cabinet

Front panel

 
Terminal (inside)

Indoor unit


Caution:

1. Never fail to have an individual power circuit specifically 
for the air conditioner. As for the method of wiring, refer to 

the circuit diagram posted on the inside of the access door.
2. Comfirm that the cable thickness is as specified in the 
power source specification.

3. Check the wires and make sure that they are all tightly 
fastened after cable connection.
4. Be sure to install an earth leakage circuit breaker in wet or 
moist areas.  

15

#

#

#

Note: The unit of 12K ,18K  and 36K  is bigger than the unit of 12K,
18K and 36K

.

Содержание RAC-AJ10PCASM

Страница 1: ...MODEL RAK AJ10PCASM RAC AJ10PCASM RAK AJ13PCASM RAC AJ13PCASM RAK AJ18PCASM RAC AJ18PCASM RAK AJ24PCASM RAC AJ24PCASM HI2022480HA INSTALLATION OPERATION MANUAL ...

Страница 2: ... installation 14 17 Select the installation locations 14 Maintenance 16 16 17 Troubleshooting Protection 8 1 Safety instructions Remote controller instructions 15 16 16 Connecting of the cable Outdoor unit installation 16 Air purging Wiring diagram Remote controller operating instructions See remote controller instructions Contents ...

Страница 3: ...will be further specified in following pages Signal transmit Dry indicator Fan only indicator Heating indicator Cooling indicator Higher fan speed High fan speed Medium fan speed Low fan speed Lower fan speed Display temperature Display set timer Display current time Auto fan speed Smart indicator ON OFF Used to adjust the room temperature and the timer also real time Sleep indicator 16 15 MUTE BU...

Страница 4: ...r aim the remote controller to the signal receptor The remote controller will operate the air conditioner at a distance of up to 7m when pointing at signal receptor of indoor unit Remote controller Remote controller Signal receptor CAUTIONS For appropriate signal transmission between remote controller and indoor unit keep the signal receiver away from the following items Direct sunlight or other s...

Страница 5: ...emperature setting by 1 Range of available set temperature HEATING COOLING Turning on SWING SMART TIMER ON TIMER OFF CLOCK SLEEP operation modes will be specified in the following pages and SUPER Press ON OFF button when the appliance receives the signal the RUN indicator of the indoor unit lights up Changing modes during operation sometimes the unit does not response at once Wait 3 minutes Wait 3...

Страница 6: ...heat pump models Airflow direction control Vertical airflow control with the remote controller Using remote controller to set various angles of flow or specific angle as you like Swinging airflow Pressing button once the vertical adjustment louver will swing up and down automatically Desired direction airflow Pressing the button again when the louvers swing to a suitable angle as desired Horizonta...

Страница 7: ...R ON button when you go out in the morning to achieve a comfortable room temperature at the time you get home You can also set timer off at night to enjoy a good sleep Operation instructions How to set TIMER ON Increase Decrease i CLOCK button You can adjust the real time by pressing CLOCK button then using and buttons to get the correct time press CLOCK button again the real time is set When your...

Страница 8: ...SLEEP button cancel SLEEP mode SLEEP mode For some models such as G1Q series Set temperature will rise by 2 if the appliance operates in cooling at most mode for 2 hour constantly then keeps steady Set temperature will decrease by 2 at most if the appliance operates in heating mode for 2 hours constantly then keeps steady TURBO mode mode can be set when the appliance is in operation or energized T...

Страница 9: ...ON OFF MODE TEMP FAN SPEED SLEEP QUIET or ECONOMY button to cancel ECONOMY mode buttons are not available in mode Note PRESS PRESS The temperature sensor built in remote controller is activated It can sense its surrounding temperature and transmit the signal back the unit the unit can adjust the temperature so as to provide maximum comfort Note Advice to put the remote controller in the place wher...

Страница 10: ...en supervision or instruction concerning use of the appliance in a safe way and understand the hazards involved Children shall not play with the appliance Cleaning and user maintenance shall not be made by children without supervision 16 The batteries in remote controller must be recycled or disposed of properly Disposal of Scrap Batteries Please discard the batteries as sorted municipal waste at ...

Страница 11: ...rect power supply inaccordance with the rating plate requirement Otherwise serious faults or hazard may occur or a fire maybe break out Keep the power supply circuit breaker or plug from dirt Connect the power supply cord to it firmly and correctly lest an electric shock or a fire break out due to insufficient contact OFF ON It is harmful to your health if the cool air reaches you for a long time ...

Страница 12: ...nufacturer s maintenance and service guidelines shall be followed If in doubt consult the manufacturer s technical department for assistance The following checks shall be applied to installations using flammable refrigerants The charge size is in accordance with the room size within which the refrigerant containing parts are installed The ventilation machinery and outlets are operating adequately ...

Страница 13: ...uipment shall be set at a percentage of the LFL of the refrigerant and shall be calibrated to the refrigerant employed and the appropriate percentage of gas 25 maximum is confirmed Leak detection fluids are suitable for use with most refrigerants but the use of detergents containing chlorine shall be avoided as the chlorine may react with the refrigerant and corrode the copper pipe work If a leak ...

Страница 14: ...closed off k Recovered refrigerant shall not be charged into another refrigeration system unless it has been cleaned and checked 15 Labelling Equipment shall be labelled stating that it has been de commissioned and emptied of refrigerant The label shall be dated and signed Ensure that there are labels on the equipment stating the equipment contain flammable refrigerant 16 Recovery When removing re...

Страница 15: ...k shall be kept to a 2 a room with a floor area largerthan 10 m The pipe work shall be complianced with national gas regulations The maximum refrigerant charge amount is 2 5 kg The specific refrigerant charge is based on the nameplate of the outdoor unit Mechanical connectors used indoors shall comply with ISO 14903 When mechanical connectors are reused indoors sealing parts shall be renewed When ...

Страница 16: ...less than 5m Height should Model 5K 18K 5 15 Max allowed pipe length without additional refrigerant m Limit of length m pipe 21K 25K 28K 36K 5 15 5 15 5 20 Limit of Elevation Difference H m Required amount of additional refrigerant g m 5 30 5 40 Indoor unit installation 1 Installing the Mounting Plate Decide an installing location for the mounting plate according to the indoor unit location and pi...

Страница 17: ...m or 70 75N m Note Piping connection should be conducted on outdoor side For Inverter appliance For ON OFF appliance Note The unit of 12K 18K 24K 36K is bigger than the unit of 12K 18K 24K 36K Pipe size Model Liquid Side 1 4 inch φ6mm or 5 12K 13 18K 21 24K 12 14 15 18K K 18K 22 24K 28 30 36K 18K 22 24 28 30 36K 36K 5 10K 12K 15 20N m 17mm 0 5mm 0 6mm 0 6mm 0 6mm 0 6mm 22mm 24mm 22mm 27mm 30 35N m...

Страница 18: ...r 18K 30K 2 1 5 2 5mm X3 H05VV F 2 1 5 2 5mm X4 H07RN F H07RN F 2 5 X3 2 4 0mm To outdoor 24K 36K H05RN F H07RN F 14K 24K H05RN F 2 0 75mm X2 Heat pump Optional 18K 30K H07RN F 1 5 X5 2 mm To outdoor H05RN F 2 0 75mm X4 24K 36K H05RN F 2 0 75mm X2 Heat pump H05RN F H07RN F 2 1 0mm X4 2 0 75mm X4 H05RN F 2 0 75mm X2 Heat pump Optional Wiring diagram Warning Before obtaining access to terminals all ...

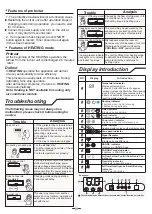
Страница 19: ...ure max 32 27 min 21 7 Outdoor temperature max note 24 min note note 15 Drying operation 32 18 43 21 NOTE Optimum performance will be achieved within these operating temperature If air conditioner is used outside of the above conditions the protective device may trip and stop the appliance Normally the outdoor max temperature is 43 but some models will be achieved 46 48 or 50 For Tropical T3 Clima...

Страница 20: ...ation 3 minutes will delay Peculiar odor This odor may come from another source such as furniture cigarette etc which issucked in the unit and blows out with the air A sound of flowing water Caused by the flow of refrigerant in the air conditioner not a trouble Defrosting sound in heating mode Cracking sound is heard The sound may be generated by the expansion or contraction of the front panel due...

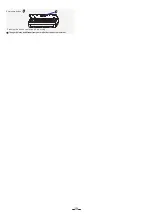
Страница 21: ...Emergency button A Pressing this button can let the AC run or stop A The symbol may be different from your model but the button is similar 19 ...

Страница 22: ...ithout notice in order that Hitachi Johnson Controls Air Conditioning Inc may bring the latest innovations to their customers 2022 Hitachi Johnson Controls Air Conditioning Inc 2022 05 Version A Printed in China Hitachi Johnson Controls Air Conditioning Inc ...

Отзывы: