5-18
5.11 Print Head Replacement Procedure
Print head replacement procedure is almost the same as for model PXR-D.
See the “4.10 Print head replacement procedure”.
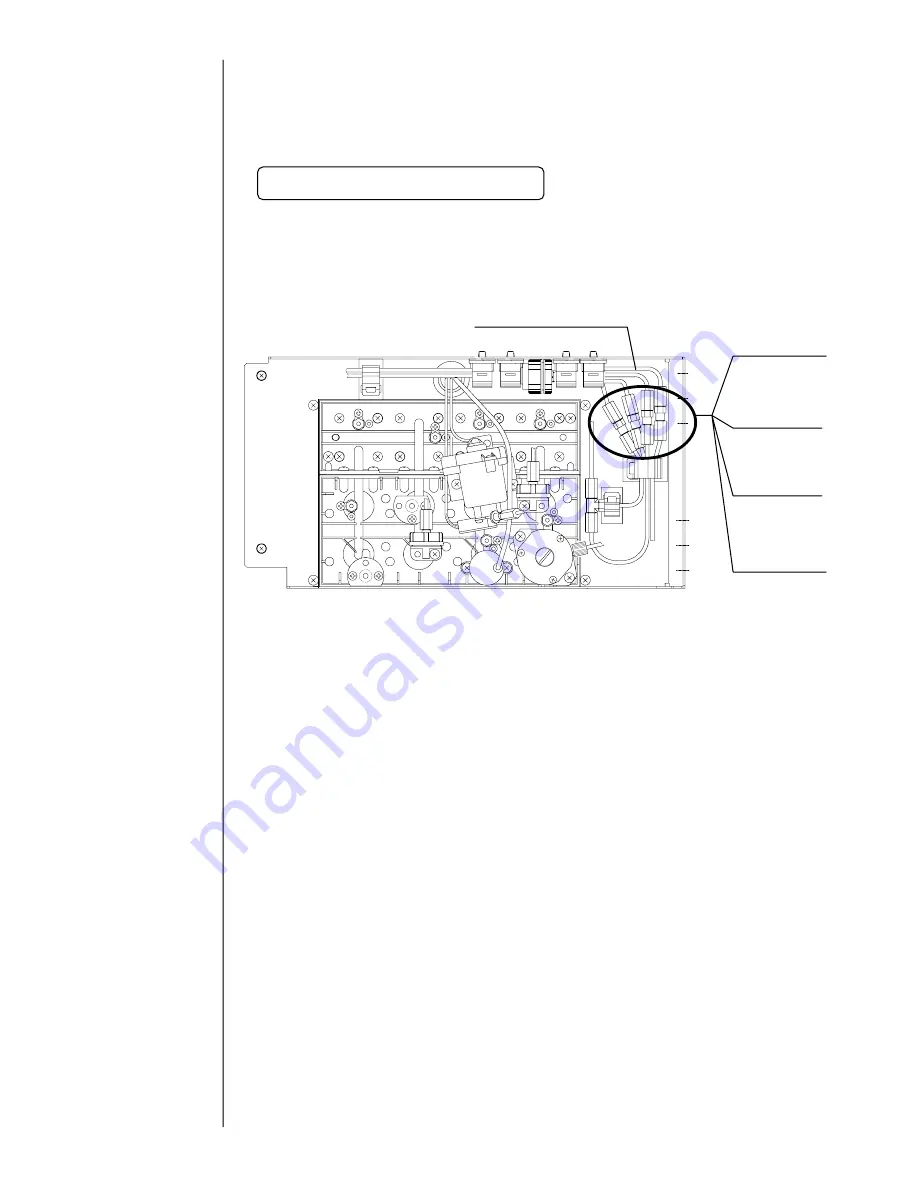
Note that position of pipe connection to print head is different from PX-D type.
(Loosen the tube lock and pull out the tube.)
"Caution": Put wiping paper at the end of the tube to provide for an ink drip.
5.12 Troubleshooting Procedure for the Circulation System
See the “4.11 Troubleshooting Procedure for the Circulation System”
5.13 Repairing Method When the Circulation Route Is Dry or Sticks
See the “4.12 Repairing Method When the Circulation Route Is Dry or Sticks”
Circulation line
(
Pipe symbol : J
)
Recovery line
(
Pipe symbol : A
)
Supply line
(
Pipe symbol : E
)
Makeup line
(
Pipe symbol : R
)
Print head side tube
Different points from the model PXR-D
Содержание PXR
Страница 1: ...Service Manual HITACHI Printer Model PXR Revision December 2008 Version C ...
Страница 80: ...3 17 3 17 Circuit diagram of EZJ95 ...
Страница 214: ...8 1 8 Attached Drawing 8 1 Circulation System Diagram 8 1 1 Circulation System Diagram PXR D PXR H ...
Страница 215: ...8 2 8 1 2 Circulation system diagram PXR P ...
Страница 216: ...8 2 Air system diagram PXR P 8 3 ...
Страница 217: ...8 4 8 3 Electrical Connection Diagram 8 3 1 Electrical Connection Diagram PXR D ...
Страница 218: ...8 5 8 3 2 Electrical Connection Diagram PXR H ...
Страница 219: ...8 3 3 Electrical connection diagram PXR P 8 6 ...


