2-1-2
Reference Notes
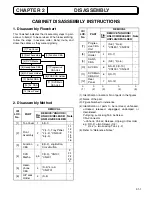
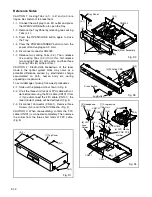
CAUTION 1: Locking Tabs (L-1), (L-2) and (L-3) are
fragile. Be careful not to break them.
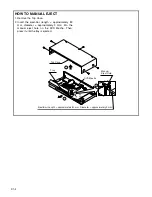
1-1. Connect the wall plug to an AC outlet and press
the OPEN/CLOSE button to open the Tray.
1-2. Remove the Tray Panel by releasing two Locking
Tabs (L-1).
1-3. Press the OPEN/CLOSE button again to close
the Tray.
1-4. Press the POWER/STANDBY button to turn the
power off and unplug an AC cord.
1-5. Disconnect connector CN2002.
1-7. Release two Locking Tabs (L-2). Then, release
five Locking Tabs (L-3) (to do this, first release
two Locking Tabs (A) at the side, and then three
Locking Tabs (B) at the bottom.)
CAUTION 2: Electrostatic breakdown of the laser
diode in the optical system block may occur as a
potential difference caused by electrostatic charge
accumulated on cloth, human body etc, during
unpacking or repair work.
To avoid damage of pickup follow next procedures.
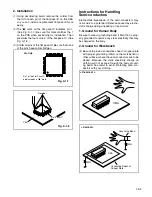
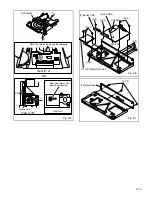
2-1. Slide out the pickup unit as shown in Fig. 5.
2-2. Short the three short lands of FPC cable with sol-
der before removing the FFC cable (CN101) from
it. If you disconnect the FFC cable (CN101), the
laser diode of pickup will be destroyed. (Fig. 5)
2-3. Disconnect Connector (CN401). Remove three
Screws (S-3) and lift the DVD Mecha. (Fig. 4)
CAUTION 3: When reassembling, confirm the FFC
cable (CN101) is connected completely. Then remove
the solder from the three short lands of FPC cable.
(Fig. 5)
(S-1)
(S-1)
[1] Top Cover
(S-1)
Fig. D1
[2] Front Assembly
Tray Panel
(A)
(A)
(L-3)
(L-2)
(L-1)
(L-1)
(B)
CN2002
Fig. D2
[3] Function CBA
Jog Button
Cross Button
(S-2)
Fig. D3
[4] DVD Mecha
[5] Headphone
CBA
[6] H/P
Jack
Holder
[8] PRS PCB
Holder
(S-3)
CN2701
CN1801
CN1802
(L-4)
(L-5)
(L-5)
(S-3)
CN101
CN401
(S-5)
(S-6)
(S-7)
(S-7)
[7] Progressive
CBA Unit
(S-4)
Fig. D4
Содержание DV-P725U
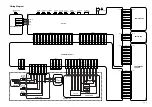
Страница 35: ...4 1 4 DVD Main 1 4 Schematic Diagram ...
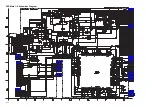
Страница 36: ...4 1 5 DVD Main 2 4 Schematic Diagram ...
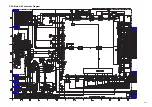
Страница 37: ...4 1 6 DVD Main 3 4 Schematic Diagram ...
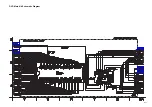
Страница 38: ...4 1 7 DVD Main 4 4 Schematic Diagram ...
Страница 40: ...4 1 9 AV 2 3 Headphone Schematic Diagram ...
Страница 43: ...4 1 12 Progressive Schematic Diagram ...
Страница 44: ...4 1 13 Function CBA Top View Function CBA Bottom View Headphone CBA Top View Headphone CBA Bottom View ...
Страница 57: ...DV P725U DV P725U DV P725U No 9205E TK Digital Media Division Tokai ...

