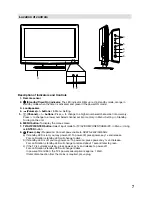
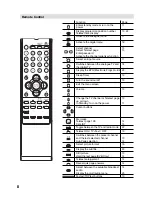
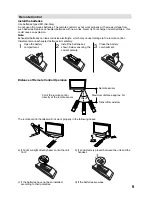


21
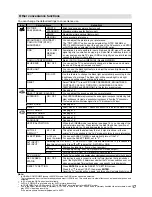
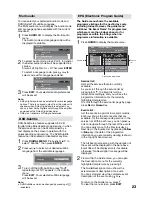
Display Setup
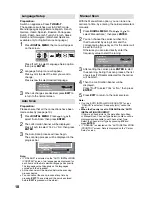
1
Press
DIGITAL MENU
. Press / or / to
select ‘Display Setup’, then press
ENTER
.
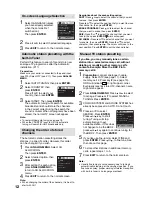
2
Display Setup menu will appear.
Press or to select the item you want to
change.
Then you can change each setting by pressing
or .
Banner
timeout
1 Sec,
2 Sec….
7 Sec
Select how long the service
banner information appears
on screen.
Banner
position
Top
Select whether the service
banner information appears
on top or bottom of the
screen.
Bottom
3
After all the changes are made, press
EXIT
to
return to the normal screen.
Time Setup
If the time displayed on the Channel banner differs
from the actual time, it can be corrected.
1
Press
DIGITAL MENU
. Press / or / to
select ‘Time Setup’, then press
ENTER
.
2
Time Setup menu will appear.
If the time displayed on the Channel banner
differs from the actual time, adjust the time
offset with the or button until the correct
time is shown.
Note:
Normally, this would be done by selecting “Auto”.
•
3
After all the changes are made, press
EXIT
to
return to the normal screen.
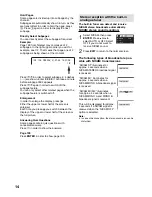
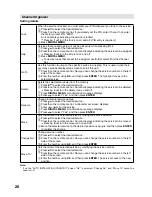
Password Setup (Parental lock)
This feature allows you to have a parental control
of the service viewing as per your preference.
Once a service is protected with a password, it
cannot be viewed unless the correct password is
provided.
1
Press
DIGITAL MENU
. Press / or / to
select ‘Password Setup’, then press
ENTER
.
2
‘Enter Password’ will appear. Press ‘
0 0 0
0
’ using the
Number Buttons
. (This is the
default password.)
3
Press or to select ‘Parental Lock’, then
press or to select desired parental rating
(see note). Then press
EXIT
to return to the
normal screen.
4
You can also change the password using the
next option.
Press or to select ‘Change password’.
Then enter your chosen new password (be
sure to remember this password). After you
have entered the new password for the fi rst
time, you need to enter the same password
again for confi rmation. The Information banner
will then appear.
Press
EXIT
to return to the normal screen.
While toggling between channels, if a service
which has a parental rating is selected then you
will be asked to enter the correct password to
view that channel. If the channel you are currently
watching supports a parental rating then the rating
will also be displayed in the Channel banner menu
(see page 22).
Note:
There are 15 age-based ratings, ranging from ‘4’
(years old) to ‘18’ (years old) and ‘None’. Eg. If the
Parental Lock is set to ‘8’ (years old), only the services
which have the parental rating of ‘8’ (years old) or
under will be viewable without entering the Password.
You will be prompted to enter the password, when you
set new parental rating.
You can set the new parental rating only when you
enter the password correctly, otherwise the old
parental code will be retained.
•
•
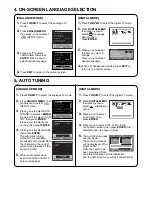
Version
You can check the software and hardware
versions.
1
Press
DIGITAL MENU
. Press / or / to
select ‘Version’, then press
ENTER
.
The hardware and software versions are
displayed.
Software Upgrade
Software Upgrade allows you to download the latest
software available on the Engineering channel.
1
Press
DIGITAL MENU
. Press / or /
to
select ‘Software upgrade’, then press
ENTER
.
2
If a software upgrade is available from an
Over- Air-Download (OAD) then the message
‘S/W available, do you want to download?’
will be displayed - you can then select ‘Yes’ or
‘No’ by pressing or , then press
ENTER
.
3
If you select the option ‘Yes’ then the
Software Upgrade process will be initiated.
It will take about 20 minutes and after this
process is complete, the TV will be rebooted
automatically.
If you select the option ‘No’ you can continue
to watch TV programmes as before.
4
Press
EXIT
to return to the normal screen.
Note:
Do not disconnect the AC cord when the software
upgrade is in progress, as this may cause the upgrade
to fail. At this time you cannot use any of the buttons.
When the unit searches for a software upgrade signal,
the message ‘Please wait...’ will be displayed.
•
•


