


www.hissmekano.se
Manual Viksam 3.0 version 2
–
October 2022
7
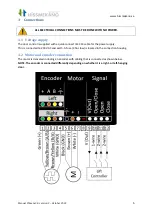
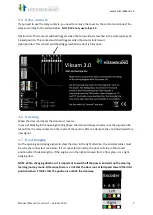
3.5
Relay contacts
If you need to use the relay contacts, you need to remove the cover on the control and connect the
relays according to the picture below.
NOTE: We only use relays 1-3.
Obstruction: This contact switches/triggers when the torque limit is reached in the close/open cycle.
Closed position: This contact switches/triggers when the door is fully closed.
Open position: This contact switches/triggers when the door is fully open.
3.6
Blocking
When the door is blocked, the door must reverse.
In case of blocking in the opening/closing phase, the door will always reverse, but the signal can be
taken from the relay contacts on the inside of the control. After 3 attempts, the control will wait for a
new signal.
3.7
Door hanging
For the opening and closing signals to steer the door in the right direction, the encoder cables must
be correctly connected, see below. If it is connected correctly, the door will stop in the closed
position after the learning trip. If the engine is on the right side seen from a floor plan, it is a right-
hanging door.
NOTE. When changing direction, it is important to switch off the power and start up the steering
learning journey mode. Otherwise, there is a risk that the door runs at full speed toward the limit
positions when it thinks that the position is outside the doorway.
Содержание Viksam 3.0
Страница 1: ...Viksam 3 0...
Страница 10: ...www hissmekano se Manual Viksam 3 0 version 2 October 2022 9 5 Troubleshooting...


