


www.hissmekano.se
Manual Viksam 3.0 version 2
–
October 2022
3
2
Installation
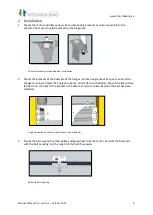
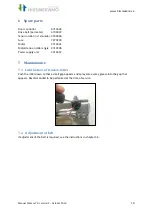
1.
Mount the motor and idler pulley with corresponding brackets as close as possible to the
pilaster. The motor should be placed on the hinge side.
The picture shows left opening door installation
2.
Mount the brackets at the backside of the hanger rail. Each angle needs 4x square nuts and 4x
hexagonal screws. Adjust the angles to approx. 10mm from each pilaster. Mount the idler pulley
furthest into the track of the bracket to be able to tension it outwards when the belt has been
attached.
Angles mounted on the rail with distance to each pilaster
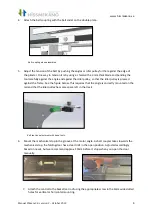
3.
Mount the belt around the idler pulley and gearwheel from the motor. Connect the belt ends
with the belt coupling. Cut the length of the belt if necessary.
Belt with belt coupling
Содержание Viksam 3.0
Страница 1: ...Viksam 3 0...
Страница 10: ...www hissmekano se Manual Viksam 3 0 version 2 October 2022 9 5 Troubleshooting...


