background image

CASE CLEANING

Cases are designed to facilitate cleaning.  All surfaces pitch to 
a deep-drawn drain trough that angles toward the front-center 
of the case where the waste outlet is located for easy access.
 
The coil is covered to prevent waste fluids from entering, but 
it is easily accessible for cleaning: simply remove the two 
coil-cover fasteners, then lift and remove the coil cover.  With 
the coil cover removed, be certain to exercise extreme caution 
when working in the case - the coil has many sharp edges that 
can result in serious injuries.  When cleaning is complete, be 
certain that both the plenum and coil cover are properly closed 
in order to avoid air leaks.

FANS

The fan blades are 8” in diameter.  

It is important that the 

blade pitch be maintained as specified.  Do not attempt a 
field modification by altering the blades.

Fan motors may be changed with an easy two-step process 
that does not require lifting up the plenum, thereby, avoiding 
the necessity to unload the entire product display to make a 
change: 

1. 

Unplug the fan motor, easily accessible outside the ple-
num.

2. 

Remove the six fasteners, then lift out the entire fan bas-
ket.

U

SE

 & M

AINTENANCE


D A N G E R

SHOCK HAZARD

Always disconnect power to case when servicing or 
cleaning.  Failure to do so may result in serious injury 
or death.

CLEANING PROCEDURES

• 

A periodic cleaning schedule should be established to 
maintain proper sanitation, insure maximum operating ef-
ficiency,  and  avoid the corrosive action of food fluids on 
metal parts that are left on for long periods of time.  We 
recommend cleaning once a week.

• 

To avoid shock hazard, be sure all electrical power is turned 
off before cleaning.  In some installations, more than one 
disconnect switch may have to be turned off to completely 
de-energize the case.

• 

Check waste outlet to insure it is not clogged before start-
ing the cleaning process and avoid introducing water faster 
than the  case drain can carry it away.

• 

Avoid spraying cleaning solutions directly on fans or elec-
trical connections.

• 

Allow cases to be turned off long enough to clean any frost 
or ice from coil and flue areas.

• 

Use mild detergent and warm water.  When necessary, wa-
ter and baking soda solution will help remove case odors.  
Avoid abrasive scouring powders or pads.

• 

Remove front panels and clean underneath the case with a 
broom and a long handled mop.

• 

Use warm water and a disinfecting cleaning solution when 
cleaning underneath the cases. 


W A R N I N G

Exercise extreme caution when working in a case with 
the coil cover removed.  The coil contains many sharp 
edges that can result in severe cuts to the hands and 
arms.

FAN ASSEMBLY

FAN
MOTOR
PLUG

FAN
BASKET

COVER
SCREW

11

Содержание OWZA

Страница 1: ...a Dimensions 2 3 General Information 4 Installation 5 6 Refrigeration Piping 7 Plumbing 8 Electrical Connections 9 Air Flow Defrost Temp Control 10 Use Maintenance 11 Parts Ordering 12 Appendix A Domestic Wiring Diagrams Appendix B Export Wiring Diagrams Appendix C Controller Information Appendix D User Set Points ...

Страница 2: ...ii ...

Страница 3: ...ning messages will inform you of what the potential hazard is how to reduce the risk of death injury or damage and what may happen if the instructions are not properly followed D A N G E R DANGER indicates an immediate threat of death or serious injury if all instructions are not followed care fully W A R N I N G WARNING indicates a possible threat of death or seri ous injury if all instructions a...

Страница 4: ...Outlet psig Superheat Set Point bulb Fo Discharge Air Fo Return Air Fo Discharge Air Velocity 5 FPM OWZA 8 med temp 9 3 60 8 6 8 25 7 33 3 200 OWZA 8 low temp 13 5 16 3 6 8 17 3 200 5 Average discharge air velocity at peak of defrost System Requirements Model Volts Phase Hz Plug Style Cord Length OWZA 8 230 1 60 L14 30P 10 1 For export cases a NEMA L6 30 electrical plug is used Condensing Unit Dat...

Страница 5: ...m 96 in 243 8 cm 8 CASE 1 1 2 in 3 8 cm 42 5 8 in 108 2 cm C L 43 in 109 2 cm 13 1 8 in 33 3 cm 8 7 8 in 22 6 cm 33 11 16 in 85 6 cm 7 7 8 in 20 0 cm 29 5 8 in 75 3 cm 43 1 4 in 109 9 cm 42 9 16 in 108 1 cm 51 5 16 in 130 3 cm 38 1 2 in 97 8 cm 12 7 8 in 32 7 cm COIL PLENUM 6 THERMOPANE GLASS FRONT 3 ...

Страница 6: ...expect peak performance attractive fits and finish and long case life We are always interested in your suggestions for improvements e g case design technical documents etc Please feel free to contact our Marketing Services group at the toll free number listed below Thank you for choosing Hill PHOENIX and we wish you the very best in outstanding food merchandising HILL PHOENIX 1925 Ruffin Mill Rd C...

Страница 7: ... cases 2 Using chalk lines or a laser transit mark the floor where the cases are to be located for the entire lineup The lines should coincide with the outside edges of the base frame 3 Leveling is necessary to ensure proper case alignment and to avoid potential damage Locate the highest point on the positioning line as a reference for determining the proper height of the shim pack levelers A lase...

Страница 8: ... through the air cooled condenser to aid heat transfer Dual Pressure Control A device that protects the compressor from low charge and high pressure Split Evaporator The component of the refrigeration system that absorbs heat from the air by boiling liquid refrigerant to vapor Evaporator Fans Fans that circulate air through the case and force air through the evaporator to aid heat transfer Filter ...

Страница 9: ...Fan Plenum 1 4 Access Valve Flow Direction Service Valve Compressor Condenser Fan Receiver Filter Drier Dual Pressure Control Condenser TVX TVX 1 4 Access Valve Condenser Compressor Service Valve Condenser Fan Service Valve Service Valve Receiver Flow Direction Filter Drier 7 ...

Страница 10: ...imply remove the front kick plate Should any future maintenance issues arise it is important to note the outlet is specially molded with PVC material and the P trap is constructed of PVC Care should be given to make certain that all connections are water tight and are sealed with appro priate PVC primer and PVC cement Be certain that the case is properly leveled to ensure proper drainage P TRAP DR...

Страница 11: ...erature preference low temperature operation only uses the left hand controller while medium temperature opera ELECTRICAL CONNECTIONS NEMA L6 30 PLUG TWIST LOCK BREAKER SWITCH MODEL OWZA tion utilizes on the right hand controller The case is turned ON OFF via an electric breaker that is located on the electrical junction box in the left hand side of the case behind the front kick plate NOTE Dixell...

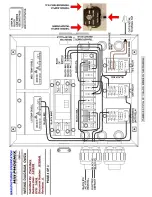
Страница 12: ... on remov Electric defrost termination sensor bulb Electric defrost termination probe Temperature control sensor bulb Discharge air probe 1 DISCHARGE AIR 2 LOAD LIMIT 3 AIR CURTAIN 4 RETURN AIR ing the front kick plate and lower front panel see the trim out section of this manual on page 5 It is important to consult the control setting guidelines shown on page 2 before setting the defrost schedule...

Страница 13: ...or cleaning Failure to do so may result in serious injury or death CLEANING PROCEDURES A periodic cleaning schedule should be established to maintain proper sanitation insure maximum operating ef ficiency and avoid the corrosive action of food fluids on metal parts that are left on for long periods of time We recommend cleaning once a week To avoid shock hazard be sure all electrical power is turn...

Страница 14: ...s intended Length of the part if applicable Color of part if painted or color of polymer part Whether part is for left or right hand application Quantity Serial plate is located on the right hand side of the rear baffle inside the product area 3 If the parts are to be returned for credit ask the Parts Department to furnish you with a Return Material Authorization Number PARTS ORDERING 12 ...

Страница 15: ...APPENDIX A DOMESTIC WIRING DIAGRAM ...

Страница 16: ......

Страница 17: ......

Страница 18: ......

Страница 19: ......

Страница 20: ...APPENDIX B EXPORT WIRING DIAGRAM ...

Страница 21: ......

Страница 22: ......

Страница 23: ......

Страница 24: ......

Страница 25: ...APPENDIX C CONTROLLER INFORMATION ...

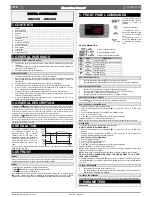
Страница 26: ...point if the temperature increases and reaches set point plus differential the compressor is started and then turned off when the temperature reaches the set point value again In case of fault in the thermostat probe the start and stop of the compressor are timed through parameters Cy and Cn 5 DEFROST XR03CX Defrost is performed through a simple stop of the compressor Parameter id controls the int...

Страница 27: ...1 Thermostat probe display read only d2 Evaporator probe display read only Only XR03CX Pt Parameter code table rL Software release 8 DIGITAL INPUTS The free voltage digital input is programmable in different configurations by the iF parameter DOOR SWITCH iF do It signals the door status and the corresponding relay output status through the dC parameter no normal any change Fn Fan OFF CP Compressor...

Страница 28: ...99 C 99 F ot First probe calibration 9 9 9 9 C 18 18 F 0 0 P2 Second probe presence Only XR04CX n Y y oE Second probe calibration Only XR04CX 9 9 9 9 C 18 18 F 0 0 od Outputs activation delay at start up 0 99 min 0 AC Anti short cycle delay 0 50 min 1 Cy Compressor ON time faulty probe 0 99 min 15 Cn Compressor OFF time faulty probe 0 99 min 30 CH Kind of Action Only XR03CX cL Ht cL DISPLAY CF Mea...

Страница 29: ...APPENDIX D USER SET POINTS ...

Страница 30: ......

Страница 31: ...sales tax or upgrading 5 When the operation is impaired due to improper installation 6 When installation and startup forms are not properly complete or returned within two weeks after startup THIS PLAN DOES NOT COVER CONSEQUENTIAL DAMAGES Manufacturer shall not be liable under any circumstanc es for any consequential damages including loss of profit additional labor cost loss of refrigerant or foo...

Страница 32: ...wing must be performed PRIOR to cleaning To avoid electrical shock be sure all electric power is turned off before cleaning In some installations more than one switch may have to be turned off to complete ly de energize the case Do not spray cleaning solution or water directly on fan motors or any electrical connections All lighting receptacles must be dried off prior to inser tion and re energizi...

Отзывы: