100 / 179
The reproduction, distribution and utilization of this document as well as the communication of its contents to others without
express authorization is prohibited. Offenders will be held liable for the payment of damages.
All rights reserved in the event of the grant of patent, utility model or design.
21.04.2020
Version 1.18.0
Configuration
APS-90, APS-180 and APS-90-Outdoor-PoE
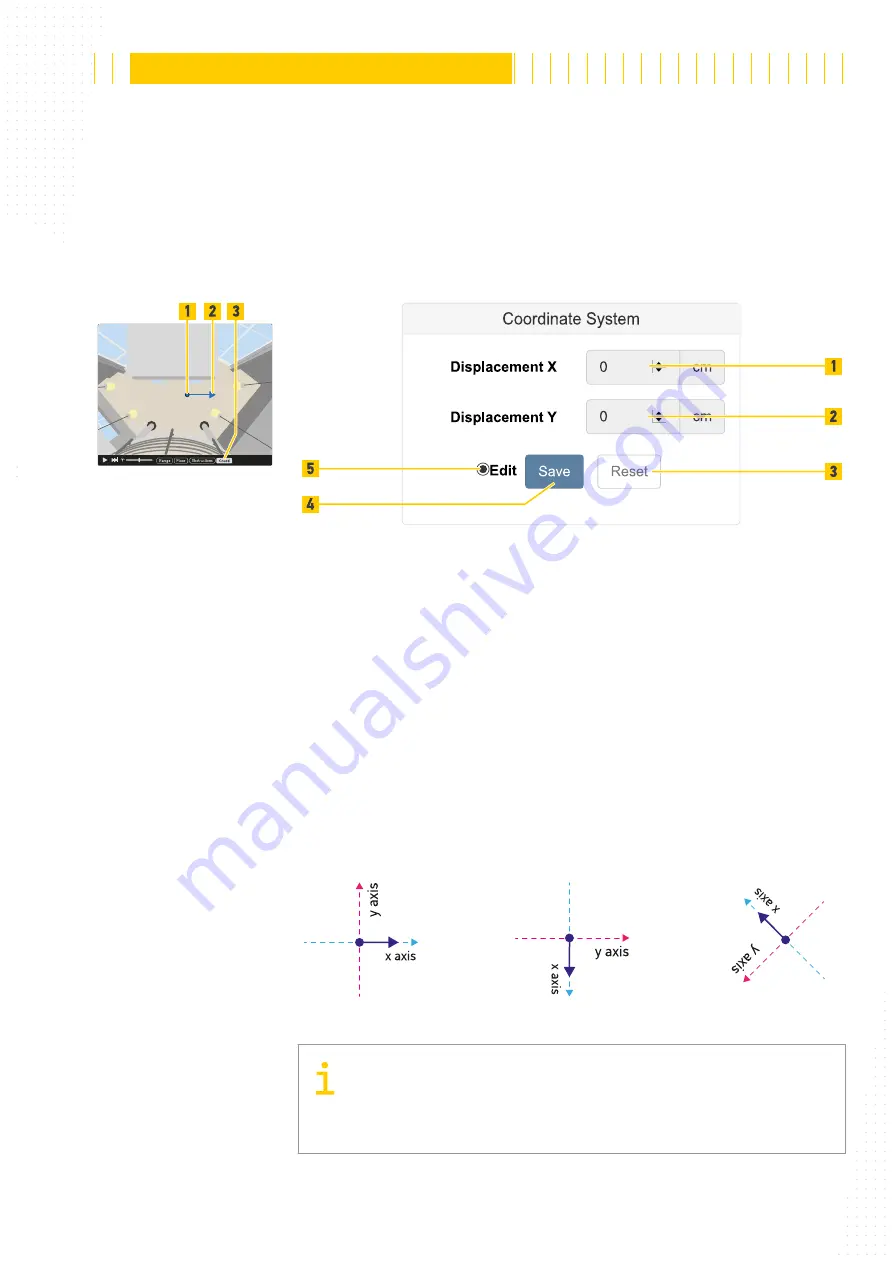
Fig. 87: Live view with
coordinate system
6.4.5
Coordinate System
The feature "Object List" reports the position of people and objects.
By default the coordinate system axis is right below the sensor, with the positive x-axis to
the right and positive y-axis to the top of the camera view respectively.
Fig. 88: Coordinate System
■
To define the coordinate system activate the
Edit
■
To see the position and direction of the x-axis click the
Coord
■
Place the blue dot (Fig. 87 /1) at floor level (drag and drop) to a known position of your
coordinate system - or to the center of the default coordinate system.
■
Specify the displacement (offset) (Fig. 88 /1 and 2) of the blue dot to your coordinate
system - or if this is the center of the coordinate system specify it as 0 (zero) point.
■
Rotate (drag and drop) the shown positiv x-axis arrow (Fig. 87 /2).
■
To go back to the last saved settings click the
Reset
■
To save all the settings in the device click the
Save
Fig. 89: Examples of coordinate system rotations
Only one axis rotation needs to be specified, because we use a Cartesian
coordinate system, where x- and y-axis are at floor level and the z-axis
is used as height information. Rotating the x-axis at the floor also


