4
To see operational and troubleshooting information and videos,
go to www.hzsupport.com
210228-01
IMPORTANT:
• If wall mounted, make sure the fixture is mounted with the
sensor below the lamp head.
• If eave mounted, mount the fixture with sensor facing away
from the house wall. Rotate the sensor so the RESET button
(see Figure 8) faces the ground.
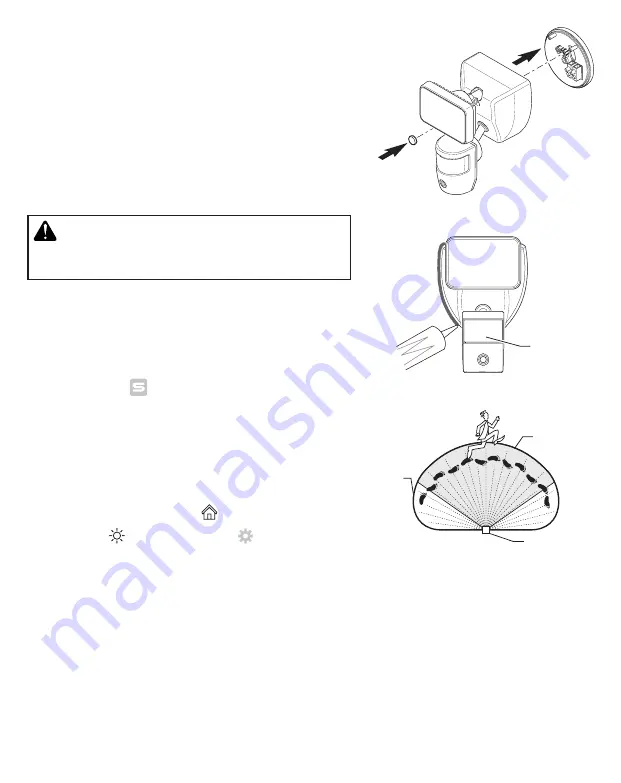
4. Push the plastic plug firmly into the mounting bolt hole on the
light fixture (see Figure 5).
5. Caulk around mounting plate and mounting surface with silicone
weather sealant (see Figure 6).
TESTING AND ADJUSTMENTS
Figure 6
Figure 7
Figure 5
CAUTION: To avoid water damage and risk of electrical
shock, rotate the motion sensor so the RESET button faces
the ground when the installation is complete.
1. Turn on the circuit breaker and light switch.
Note:
The motion sensor has a 1 minute warm up period before
it will detect motion. When first turned on wait for the red LED
indicator to start blinking slowly (1 minute).
2. Go to the App Store
SM
and search for the “SECUR360” app or
Google Play™ and search for “HeathZenith” and download the
SECUR360 app
. See the enclosed instruction sheet, “Con-
necting to your new SECUR360 device”, for more details.
3. Once step 2 is complete, open the SECUR360 app and log into
the account.
4.
IMPORTANT:
This light has two detection zones – the motion
sensing detection zone and the camera detection zone. Use the
live video from step 4 and the motion sensor to set up your light
and camera.
5. Click on the home screen icon
Home
> click on the light > click
“Light” icon > click “Light Setting” > click “Test”.
6. Click on the back arrow “<” in the upper left of the screen to view
a live video feed.
7. Walk through the coverage area noting where you are when the
lights turn on. Also, the LED indicator behind the motion sen-
sor lens will glow blue when motion is detected (see Figure 7).
Note:
The blue LED will turn off 30 seconds after all motion has
stopped.
8. If needed, gently grasp the motion sensor and move it from side
to side or up and down to the best position to pick up motion
and to view the desired area using the camera.
9. If needed, gently grasp the lamp head and move it from side to
side or up and down to adjust the light coverage area.
LED Indicator
Motion Sensor
and Camera
Motion
Detection
Zone
Camera Zone


