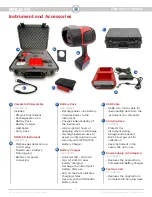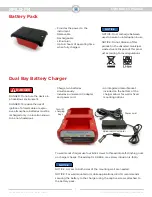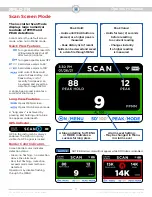
background image

Operator’s Manual

10

RMLD-FR

Doc No. 16086 Rev A, RMLD-FR Operator Manual 

© 2021 Heath Consultants Incorporated. All rights reserved.

What if the instrument 

failed the Self Test?

The cause is most often due to:

- instrument not properly  

positioned in the case

- case was moved during test

- laser wavelength has drifted

- battery level is too low

Ensure sufficient battery 

charge before attempting  

Self Test procedure. 

Make sure the instrument  

is in its proper position, 


all the way down, and flat.  

After rechecking the above, 

repeat the Self Test procedure.

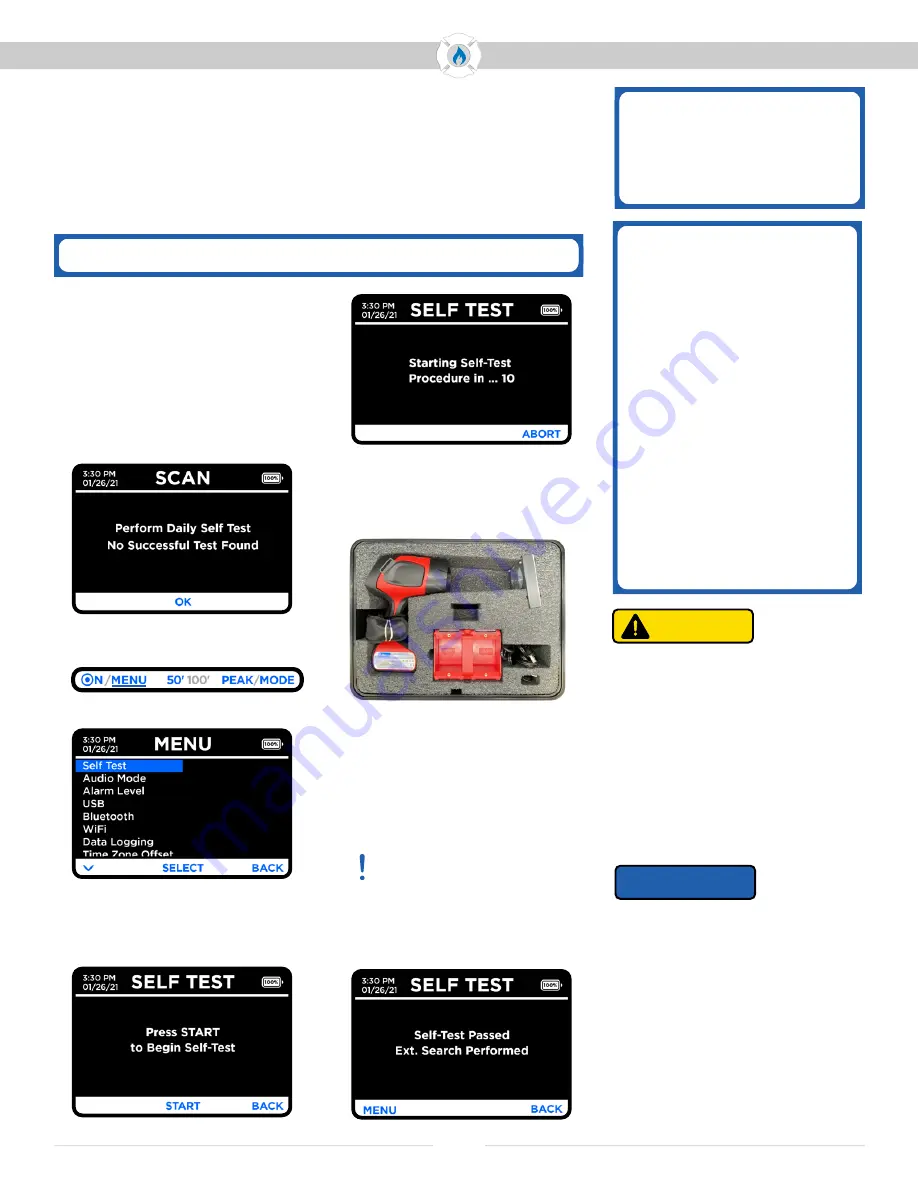
The instrument has a built-in function to perform a Self Test  

of the laser wavelength. Perform the Self Test daily before 

scanning to ensure the instrument is operational.  

A Self Test log file is recorded and stored on the instrument. 


To access the stored files, refer to pages 18-20.

Self Test


Self Test takes 1-3 minutes

No yearly factory  

calibration required unless 

instrument repeatedly fails 

the Self Test or presents  

other problems.

CAUTION: Should the instrument 
not pass after several attempts, 

do not use the instrument for scan 
work until the problem is corrected. 

CAUTION: Do not attempt to 


repair the instrument. Should the 

instrument not work properly, 


or indicate a fault or warning, 


refer to the troubleshooting  
section of this manual.

NOTICE: Laser wavelength drift 

is a normal characteristic of the 
RMLD-FR. The rate of drift is  

normally low and will not affect 

the Self Test if performed on a  
regular basis. Scan work conducted 
with an instrument which has drifted 
and was not Self Tested may need 
to be redone. If instrument does not 
successfully perform a Self Test  

after three attempts, contact 

HEATH for assistance. 

CAUTION

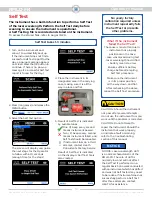
1.  Turn on the instrument and  

allow it to successfully boot up. 

If the instrument does not find a 

successful Self Test report for the 

day, a pop-up message appears 

on screen. Press the OK button to 
continue. (There is no pop-up 
message if a successful Self Test 
report is found for the day.) 

2. Press (long press) and release the 

MENU button. 


3. Select the Self Test option. 

The screen will display and guide 

the next steps for the Operator


to follow within 10 seconds 
(enough time for the steps).

4. Place the instrument in its  

designated area in the carrying 

case, making sure it is all the 
way in place and flat.

5. Result of Self Test is indicated  

by audible tones:

One (1) beep every second 
means instrument passed.
Two (2) beeps every second 

means instrument failed, and 

Self Test should be repeated.
If instrument fails on a third 

attempt, contact Heath 


Consultants Factory Service.

    Result of Self Test is indicated  

on the display. A Self Test file is 

also created.

NOTICE

P

P

X

Содержание RMLD-FR

Страница 1: ...Operator s Manual RMLD FR ...

Страница 2: ...een Mode Image 12 Quick Press Features 12 Long Press Features 12 GPS Indicators 12 Border Color Indicators 12 Working with the Menu Items 13 17 Self Test 13 Audio Mode 13 DMD Digital Methane Detection 13 Audio Warning Indications 13 Alarm Level 14 Factory Default Settings 14 Custom Alarm Pre Sets 14 USB 14 Command Mode 14 File Mode 14 Bluetooth BLE 14 WiFi 15 Access Point AP Mode 15 File Access 15...

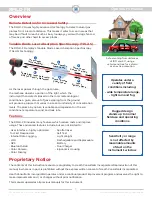
Страница 3: ...conditions temperature wind and leak rate Features The RMLD FR includes many features which reduce costs and improve usage These advanced features include but are not limited to User Interface highly optimized for First Responders Internal Data Logging WiFi GPS Bluetooth BLE Color Camera Color Display Spotter laser Self Test Light Weight Rechargeable and Replaceable Battery Dual Charger Ergonomic ...

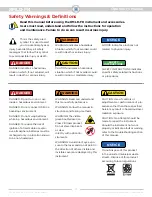
Страница 4: ...environment DANGER Do not connect USB in a hazardous environment DANGER Do not swap batteries while in a hazardous environment DANGER To reduce the risk of ignition of a flammable or explo sive atmosphere batteries must be recharged only in a location known to be non hazardous WARNING Read and understand this manual fully before use WARNING Follow the manual in structions and testing methods WARNI...

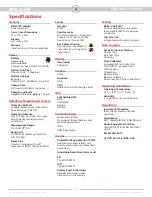
Страница 5: ...e into beam or view directly with optical instrument Display Resolution 320x240 Camera Color Aperture f 2 6 FOV 94DEG at 6 0mm image circle GPS Compatible With GPS GLONASS Beidou Galilieo Communication Bluetooth 4 2 BLE to support future features and mobile applications WiFi USB Dual Mode Alarms Digital Methane Detection DMD Audible tone and visible color border when detection threshold exceeded A...

Страница 6: ...e between uses to assure no interruption in use Use only with HPN 105753 Battery Charger Battery Charger HPN 105753 Universal 100 240 VAC Two 2 slots for dual battery charging Recharge the instrument s battery after use LED on the front indicates charging status Use only with HPN 106005 Battery Pack USB Cable USB2 A to micro cable for downloading data from the instrument to a computer Carrying Cas...

Страница 7: ... mount charger use four 8 32 screws to thread into self clinching nuts on charger chassis Thread dept is 0 060in max screw intrusion is 150in NOTICE Access to both sides of the mounting wall are needed NOTICE For wall mounted or mobile applications HEATH recommends securing the battery to the charger using the captive screws attached to the battery pack NOTICE DANGER Do not use the device in a haz...

Страница 8: ... a flammable or explosive atmosphere the battery must be recharged only in a location known to be non hazardous WARNING Only use the HEATH supplied RMLD FR battery charger to recharge the instrument Use of any other charger may cause severe damage to the battery or electrical circuits CAUTION To prevent damage to the battery or electrical circuits always plug the charger into a surge protected out...

Страница 9: ...utton when two 2 functions are available shown below A blue line under the second function indicates a successful long press activation Turn On Off the Instrument Simple 3 Button Control Navigate through screens and control features of the RMLD FR using three 3 buttons which are located below the screen Press and hold the middle button for 3 seconds to turn the instrument on off WARNING The visibl...

Страница 10: ...ult or warning refer to the troubleshooting section of this manual NOTICE Laser wavelength drift is a normal characteristic of the RMLD FR The rate of drift is normally low and will not affect the Self Test if performed on a regular basis Scan work conducted with an instrument which has drifted and was not Self Tested may need to be redone If instrument does not successfully perform a Self Test af...

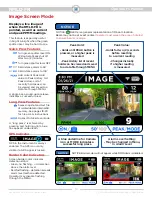
Страница 11: ...es Turn green spotter laser ON Will automatically shut off after two 2 minutes Turn green spotter laser OFF Set distance alarm to 50 Set distance alarm to 100 Add current Peak Hold value to Peak History List Peak History List of recently held peaks can be viewed and saved to a data file through MENU A single beep sound indicates a successful short press Long Press Features Opens MENU screen Opens ...

Страница 12: ... long press is achieved by pressing and holding until a blue line appears underneath GPS Indicator GPS in the instrument is always enabled The GPS icon is only visible if a GPS signal is locked Border Color Indicators Screen border color indicates detection status Green no flashing no detection above the alarm level Red fast flashing detection exceeds alarm level methane detected Operator may disa...

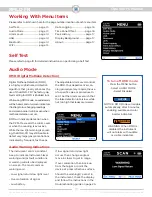
Страница 13: ...ions indicated by frequent fast beeps The adjustable Alarm Level controls the DMD Your department s scan ning procedure may require the use of a specific value or procedure to set it Set the Alarm Level such that the false detection rate is low while not too high that leaks are missed Please refer to page 10 for detailed instrucitons on performing a Self Test Audio Warning Indications The instrume...

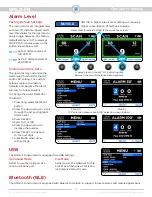
Страница 14: ... higher concentration of methane to alarm Step 2 4 Step 5 7 USB The RMLD FR instrument is equipped two USB settings Command Mode Select to use the USB port as a communications port File Mode Select to use the USB port for file access as a flash drive This is the instrument s default mode Factory Default Settings The instrument is pre programmed with two 2 distance based alarm level thresholds for ...

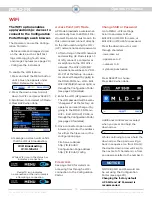
Страница 15: ...word The WiFi password will be set as changeme2 at the factory An operator can see change it by going to the RMLD FR Menu WiFi Edit WiFi AP PASS or through the Configuration Portal see page 20 for details 3 Once connected open a web browser and enter the address for either the file server or the configuration page File Server address http 10 123 45 1 Configuration Page address http 10 123 45 1 con...

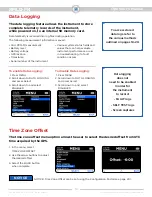
Страница 16: ...g if a fault condition occurs To enable Data Logging 1 Press MENU 2 Scroll down to DATA LOGGING and press Select 3 Scroll down to and select ENABLED To disable Data Logging 1 Press MENU 2 Scroll down to DATA LOGGING and press Select 3 Scroll down to and select DISABLED Data logging does not need to be enabled in order for the instrument to record FAULT logs SELF TEST logs Screen captures To access...

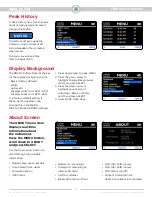
Страница 17: ...h Consultants Incorporated Display Background Peak History The RMLD FR offers three 3 choices for the display background color Black factory default White Automatic Displays white from 8AM 8PM Displays black from 8PM 8AM The factory default setting is Black but the operator can change this in the MENU DISPLAY BACKGROUND settings 1 Press long press to open MENU 2 Press the down arrow to highlight D...

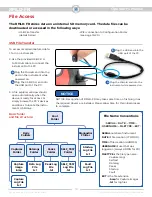
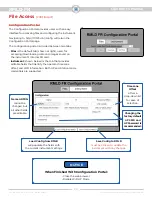
Страница 18: ...ELF_TEST Folder Data Log File txt Peak Log File txt Basic folder and file structure File Access The RMLD FR stores data on an internal SD memory card The data files can be downloaded or accessed in the following ways USB File Transfer details below WiFi connection to Configuration Portal see page 19 20 Plug the Micro B end into the instrument while powered on a b Plug the USB end into the USB port...

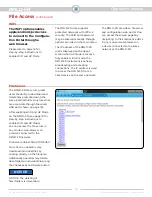
Страница 19: ...ce on the same network The RMLD FR provides a file server and configuration web portal One can access these web pages by navigating to their respective URLs in any modern web browser on a device connected to the same network as the RMLD FR File Server The RMLD FR file server grants users the ability to download and delete files presented using the same internal folder structures that are accessibl...

Страница 20: ...ved on the instrument s internal SD card Instrument shown below is the tab that provides editable fields that identify the operator timezone offset and WiFi information Both AP and Station mode credentials are supported File Access continued Timezone Offset offers a drop down list for ease of selection Name ADMIN cannot be changed but all other fields are editable Save Config to RMLD must be click...

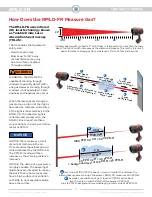
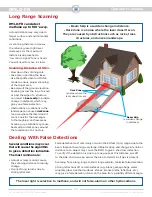
Страница 21: ...eases as the distance increases This is why it is much easier to detect natural gas from a distance of 10 to 15 feet and beyond NOTICE There is always a small amount of methane in the air This natural methane background is also measured by the RMLD FR The PPM M reading will then increase as the scanning distance increases NOTICE The nature of a gas plume is highly variable The above right illustra...

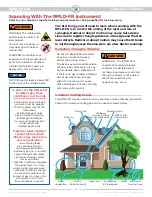
Страница 22: ...e stenciled etc If there is no gas reading indicated do not assume there is no gas within the structure ie houses office buildings Continue scanning common venting points WARNING The visible green Spotter laser is a Class 2 II laser product Do not stare into beam or view directly with optical instruments WARNING Avoid direct eye exposure to the laser and do not point in the direction of others Vis...

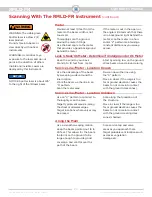
Страница 23: ...if the range is too far or ground elevation causes the beam to not come into contact with the ground dark zones Service Line Meter Location Unknown Use an X pattern or similar to thoroughly scan the area Target typical vent areas i e along the street or sidewalk edges Target locations where valves may be placed Scan along the foundation of the structure Move in closer if the range is too far or gr...

Страница 24: ...ng With False Detections Several conditions may occur that will cause the algorithm to give a detection indication The most common are Abrupt or jerky motions cause the scanning distance to rapidly change Overly strong returns due to strong reflectors False detection most commonly occurs in the 50 feet 15 m range due to the beam footprint becoming very large Abrupt motion and change in terrain or ...

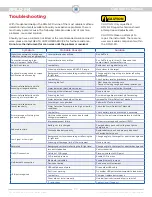
Страница 25: ...t motions while scanning Alarm detection threshold set too low Increase the Alarm Detection Threshold Excessive false detection or loss of sensitivity Laser output not optimized Perform Self Test procedure Alarm Detection Threshold is too high or low for conditions Check the Alarm Detection Threshold Error message or Warning icon on continuously Low battery Check battery level and recharge if nece...

Страница 26: ... occurs in shipment unless due to improper packing or failures which result from accident misuse abuse neglect mishandling misapplication alteration modification or service by anyone other than a Heath warranty repair location Batteries and damage from battery leakage and all expendable items such as filters and tubing are ex cluded from this warranty Heath s responsibility is expressly limited to...

Страница 27: ... find online at https heathus com assets uploads Primary Instrument Repair Form Fillable pdf Complete the form by providing all information requested such as full shipping and billing addresses instrument or product name model number and serial numbers brief description of the problem you are experiencing the person and phone number to be contacted for additional information and approvals 2 Packag...

Отзывы: