

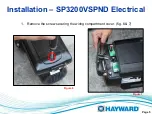
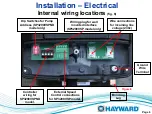
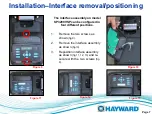
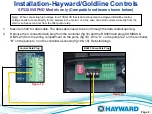

Installation
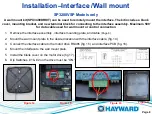
–Interface /Wall mount
SP3200VSP Models only
A wall mount kit (SPX3400DRKIT) can be used to remotely mount the interface. The kit includes a blank
cover, mounting bracket,
and new terminal block for connecting to the interface assembly. Maximum 500’
for data cable used for wall mount or control connection.
Figure 15
Figure 16
Figure 14
Page 8
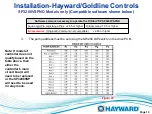
1.
Remove the interface assembly , interface mounting plate, and cable
(Page 8).
2.
Mount the wall mount plate in the desired location with the interface cable. (fig. 14)
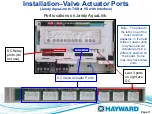
3.
Connect the interface cable to the motor drive RS485 (fig. 15) and interface PCB (fig. 16).
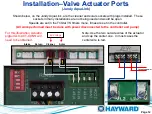
4.
Mount the interface to the wall mount plate.
5.
Install the blank cover on the motor drive (fig 17).
6.
Dip Switches #1 & #2 on the drive must be “ON.”
Figure 17


