CD PLAYBACK
25
ENGLISH
CD Playback
Many functions of the DMC 250 operate the
same way for CD playback as for DVD play;
however, there are some important differences.
When a CD is loaded, the DMC 250 will auto-
matically display the Contents menu. Status
banners are not available during CD play.
A greater variety of playback options are
available during CD play, including Random play
and programmed playlists.
These and other features unique to CD play are
described in this section.
CD Playback
Many functions of the DMC 250 operate the
same way for CD playback as for DVD play;
however, there are some important differences.
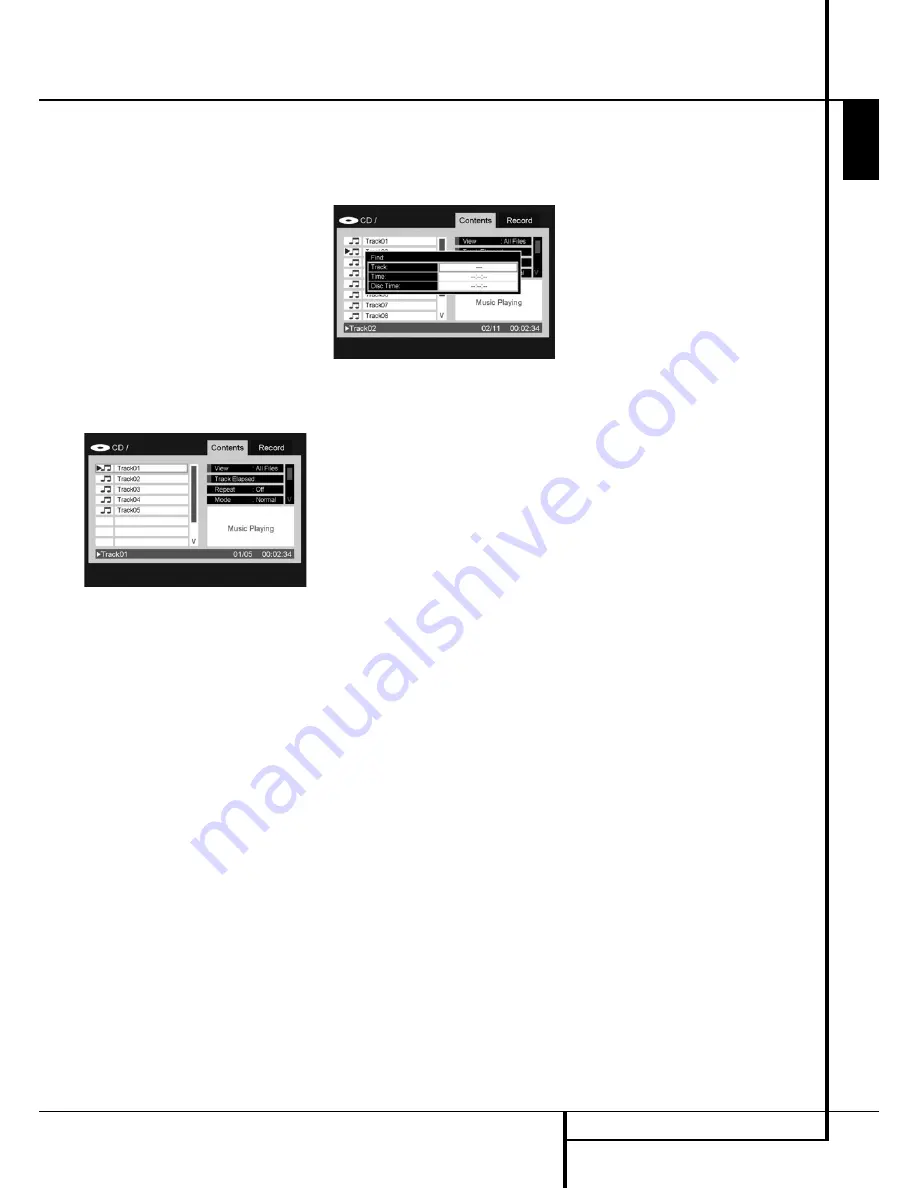
When a CD is loaded, the DMC 250 will auto-
matically begin playing. The Contents Menu will
appear on screen (see Figure 7 - CD Contents
Menu).
Figure 7 – CD Contents Menu
The disc type is indicated in the upper left cor-
ner. For discs containing file folders, such as
compressed-audio or image files you create on
your PC, the hierarchy of folders is listed here as
well.
The main display area is divided into two
columns. The left column lists the tracks,
highlighting the current track. For discs
containing more than eight tracks, the list
scrolls. The current track is also listed at the
bottom of the screen. A play mode icon indicates
the current playback status (the disc is stopped
in this case).
Tracks
Select a track for playback in one of several
ways:
1. Use the Navigation Buttons to highlight the
desired track and press the Enter Button to
begin play.
2. Use the Numeric Keys to enter the desired
track number. Play will begin immediately.
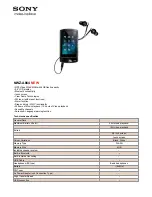
3. Press the Find Button to display the Find
Menu (see Figure 7a Find Menu (CD Playing)).
With the Track cell highlighted, use the Numeric
Keys to enter the desired track number, and play
will begin immediately.
Figure 7a – Find Menu (CD Playing)
4. During playback, you may move one by one
through the tracks at any time by pressing the
Skip Reverse (Previous)/Skip Forward (Next)
Buttons. When you press the Previous or Skip
Reverse Button once, the player will return to
the start of the current track. Additional presses
of either button will step back through the
available tracks, one at a time.
View:
This setting allows you to select which
files stored on a disc you wish to access. For
commercial audio CDs, this command is not
available, as only audio tracks are stored on the
disc.
Time Display:
This setting controls the time
display that appears in the lower right corner of
the screen and on the DMC 250’s front panel.
Select from:
•
Track Elapsed:
Displays the elapsed time of
the current track.
•
Track Remain:
Counts down the remaining
time for the current track.
•
Disc Elapsed:
Displays the elapsed time for
all tracks played thus far on the disc.
•
Disc Remain:
Counts down the remaining
time to play the rest of the tracks on the disc.
Repeat Play:
This setting controls whether the
tracks are repeated.
•
Track:
Repeats the track currently playing
until play is manually stopped. The “Repeat”
Indicators will light in the front-panel display.
•
All:
Repeats all tracks on the disc until play is
manually stopped.
The “Repeat” and “All” Indicators will light in
the front-panel display.
•
Off:
Normal playback of the current track
followed by all remaining tracks on the disc,
unless the Random or Programmed play
functions have been selected.
Mode:
This setting controls the Random play
and Intro Scan playback options.
•
Random:
In Random play mode the DMC
250 selects the order in which the tracks will
play until all tracks on the disc have been
played.
•
Intro:
This setting activates the Intro Scan play
mode. The DMC 250 plays the first ten sec-
onds of each track before skipping to the next
track, continuing until all tracks on the disc
have been played.
•
Normal:
Tracks are played normally, unless
Repeat or Programmed play has been
activated.
Edit Mode:
This setting allows you to program
play lists. The Control Commands following it are
not available unless the Edit Mode line is set to
On. When Edit Mode is On, playback is stopped.
To resume playback, set Edit Mode to Off.
Program/Browser View:
The Browser View
displays the disc’s contents as shown in
Figure 7b (Source Selection Button). If a play list
has been programmed, you may select the
Program View to see the list by pressing the
Enter Button with the Program View line
highlighted.
Select All:
This setting is used to select all
tracks in the current view. When you press the
Enter Button, a check mark will appear to the
right of each track and this command will
change to De-Select All, which may be used to
reverse the Select All command and removes the
check marks. This command is not available
unless play has been stopped and the Edit Mode
line has been set to “On”.
Add to Program/Clear Program:
The Add to
Program command is used to add tracks to a
programmed play list. It is not available unless
play has been stopped, the Edit Mode line has
been set to “On” and one or more tracks have
been selected by highlighting them and pressing
the Enter Button, or using the Select All com-
mand. Selected tracks are indicated with a check
mark on screen. The Add to Program command
is only visible in the Browser View. When the
Program View is activated, the Add to Program
command is replaced by the Clear Program com-
mand, which removes selected tracks from the
programmed play list.
Delete:
This command is used with the
solid-state media only to permanently remove
selected tracks or folders from the media. Its
requirements are that play has been stopped,
the Edit Mode line has been set to “On”, and
tracks have been selected by highlighting them
and pressing the Enter Button or using the
Select All command. Selected tracks are indicat-
ed with a check mark on screen. Use caution
when deleting items from media, as they are
not recoverable.