DISC PLAYER/RADIO MENU
35
ENGLISH
Disc Player/Radio Menu
Information Displays
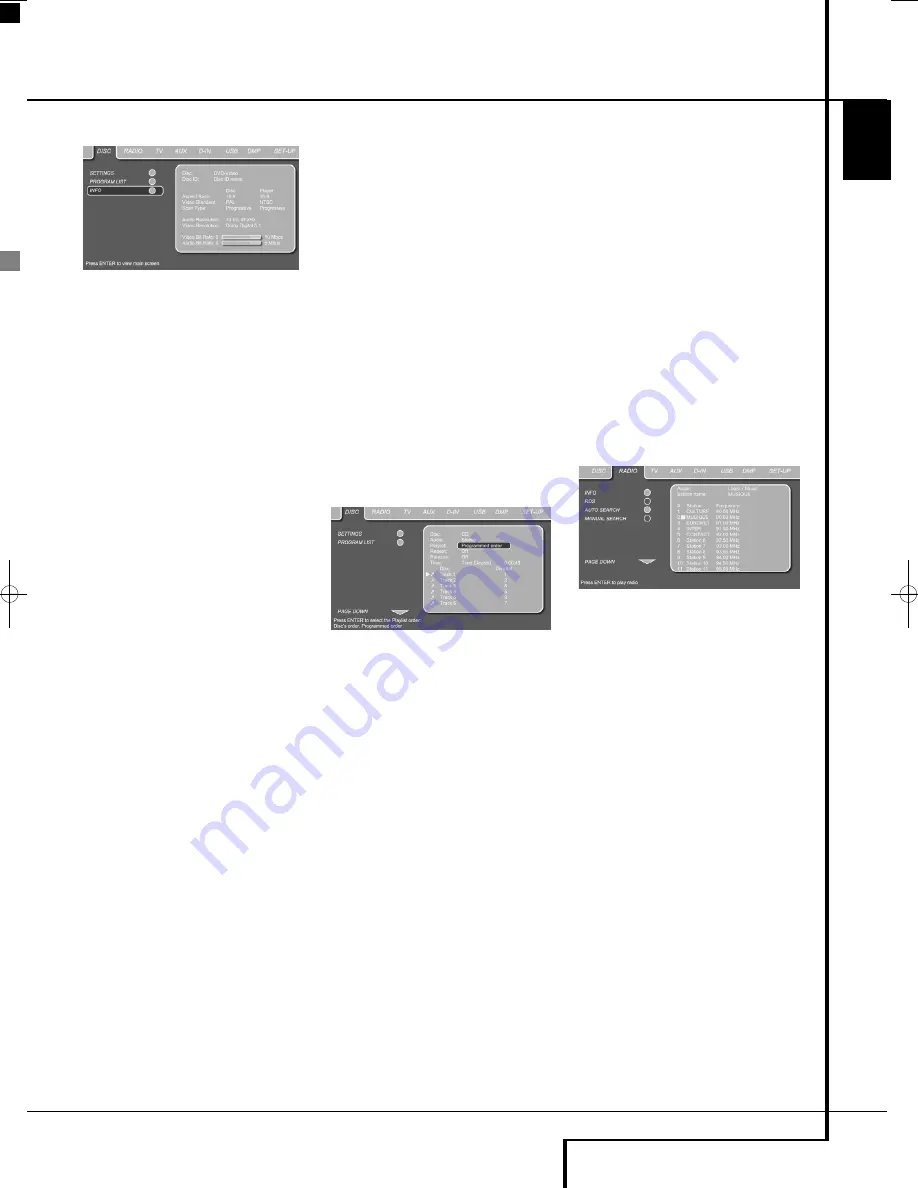
Figure 10
In DVD and MP3 mode, activating the INFO
(DVD) or ID3 INFO (MP3) Submenu will show
information about the player and the disc cur-
rently playing. The first lines will show Disc Type
and Disc ID. Below you can compare the Aspect
Ratio, Video Standard and Scan Type available on
the disc with the actual output of your player or
ID3 info for MP3 files.
In the lower part of the screen, the Audio
Resolution and Audio Format are shown, (DVD
only) and at the bottom a graphical presentation
of the Video Bit Rate (DVD only) and the Audio
Bit Rate of the disc currently playing.
You also have a direct access to the Information
Display by pressing the INFO Button
on the
remote control.
Programmed Play
In STOP mode, the Disc List can be used to create
your own program list for DVD, CD, MP3, WMA
or JPEG discs. Move the cursor to the right of the
menu, into the Disc List. If the disc list is not
active, move the cursor to the PROGRAM LIST
icon on the left to activate. Move the cursor to
the Disc List, and select Clear Program to clear
the current list. Once the disc list is clear move
the cursor up or down to the first track you
would like to program and press ENTER
6
. The
cursor will move to the options in the Lower
Menu Line. You can either add the selected track
(or picture) to the playlist or give it the number
you would like it to have in your playlist, or clear
the track from the list. Move the cursor down to
the next track you would like to program and
continue until your playlist is complete. Once
completed press PLAY on the remote control to
start normal playback or, move the cursor up to
the Playlist setting and select Programmed order
from the options or simply press the PLAYLIST
Button
N
on the remote and press PLAY to
start the program playback.
Figure 11
If you have a disc that contains both MP3 files
and JPEG images, you can choose to run these
simultaneously, mixing the MP3 audio with your
own images. The time interval can be chosen in
the Picture Setting.
Also you can have the image files follow the
audio signal: at the end of each audio track, the
next JPEG image will be shown. To activate this
feature select Follow Audio Track in the Picture
Setting.
With such discs, you can also either listen to the
MP3 audio or watch the JPEG video files only. In
order to do so, in stop mode, click on the LIST
MUSIC FILES or LIST PICTURES icons on the left
part of the screen to select or deselect the
desired format. Once done, the tracklist will only
show the MP3 or JPEG files.
Radio Menu
The FM Tuner in the Digital Lounge system can
be used to listen to the Radio. Before listening to
the radio stations, you need to preset your
favorite stations. The easiest way to do so is with
the OSD screen on your monitor.
1. Press the
Radio
button
K
on the remote
control to turn the DVD Receiver on and select
Radio as the source. Make sure your screen is
switched on to be able to make the initial
Radio setup with the use of the OSD menu. If
the screen is not already on, switch it on by
pressing the
Screen Power On
Button
,
if the receiver's OSD is not visible press the
Radio
Button
K
again.
2. The TV monitor will show the RADIO Menu, as
shown below. You can also select the RADIO
Menu with the ARROW
9
keys on the
remote control. Once the RADIO tab is high-
lighted, press ENTER
6
to access the RADIO
Menu.
Figure 12
The RADIO Menu shows the selected Audio
mode, the name of a station currently played (as
long as RDS is available) and a Station list listing
the 30 stations with their preset, station name
and frequency.
Note:
The stations can be preset auto matically
or manually. The Manual Preset mode is
described first. The Auto Preset mode is described
later in this manual.
3. The INFO, RDS and AUTO Tune functions are
switched on by default, shown by the light
blue icons, to make the process of tuning your
favorite stations as easy as possible. Move the
cursor to the end of the first station line in the
menu. The fre quency will be highlighted and a
brief explanation will appear in the Upper
Menu Line on the bottom of the menu.
NOTE:
The INFO, RDS and AUTO Tune functions
can be switched off by moving the cursor button
to the icon at the left side of the menu and
pressing the Enter Button on the remote control
so that it turns dark blue.
0019CSK - Digital Lounge 232EX_240HD ENG v1(12).qxp:0019CSK - DigitalLounge 250HD UK v6 12/06/08 12:02 Side 35 (Sort/Black plad
Содержание Digital Lounge 232 EX/240 HD
Страница 1: ...ENGLISH Harman Kardon Digital Lounge 232 EX 240 HD OWNER S MANUAL ...
Страница 49: ...49 ENGLISH ...


