


15
Technical Support: 800-266-2222, option 2
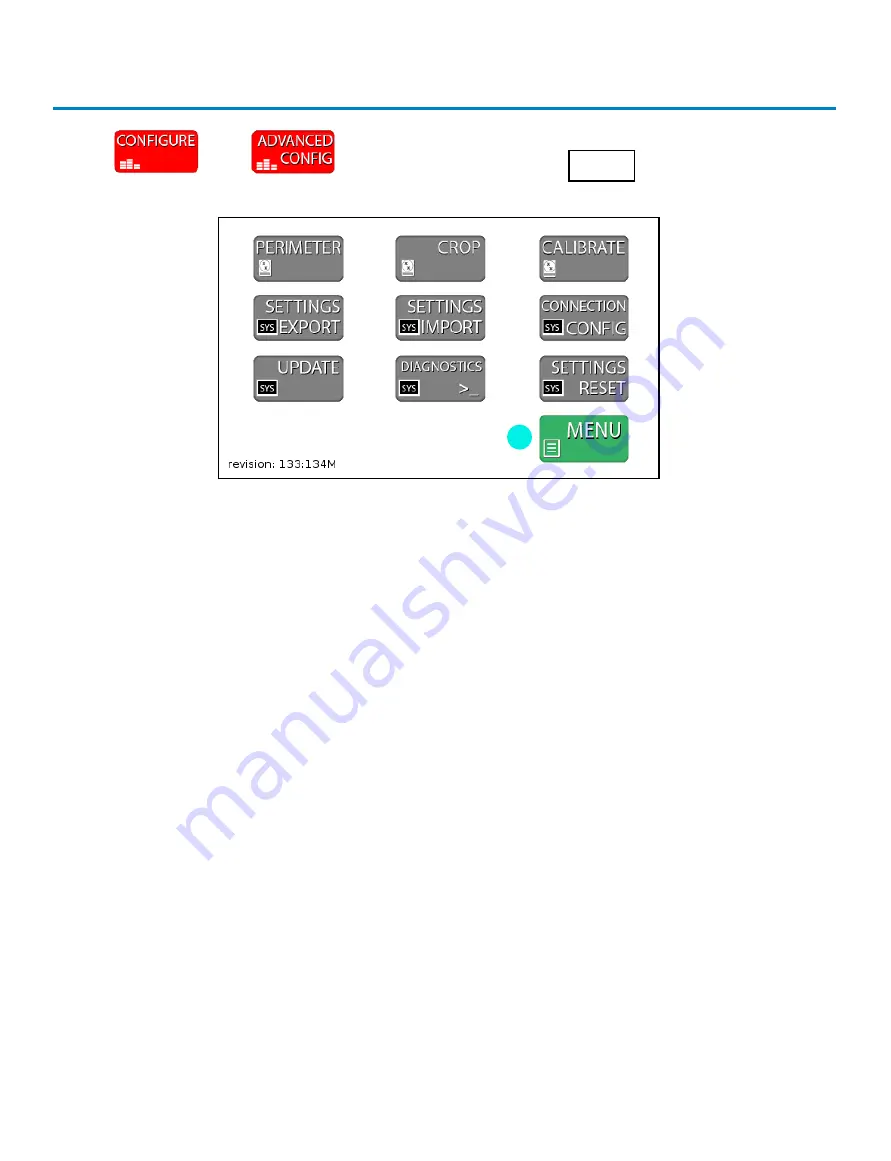
Press then and then enter the code
0855
to enter the
Advanced Configuration screen.
Advanced Configuration
1. PERIMETER
- Used to adjust the settings for perimeter detection. This is set during
the factory calibration and should not require adjustment.
2. CROP
- Used to adjust the settings for cropping the image. This is set during the
factory calibration and should not require adjustment.
3. CALIBRATE
- Enters the CALIBRATE Screen. The CALIBRATE Screen is where the
operator can calibrate the colony detection settings.
4. SETTINGS EXPORT Button
– Used to save the Calibration data and system settings
to a USB drive. This can then be used to calibrate an additional unit with the
SETTINGS IMPORT Button.
5. SETTINGS IMPORT Button
– Used to save new Calibration data and system settings
to the unit from a USB drive. Settings can be updated easily with the SETTINGS
IMPORT Button
6. CONNECTION CONFIG Button
– Used to connect the Thermal Printer and HDRP
or LIMS systems. Once these devices are connected, use this menu to detect and
update the communication settings.
7. UPDATE Button
– If the system requires a Firmware Update via USB drive, this
button is used to load the new firmware onto the unit.
8. DIAGNOSTICS Button
- For factory use only.
9. SETTINGS RESET Button
– Resets to the original factory settings.
10. MENU Button
- Returns user to CONFIGURE screen.
2
5
8
3
6
9
1
4
7
10
Содержание The Wizard CompactDry Reader
Страница 1: ...Operating Instructions ...


