40
Setup and installation
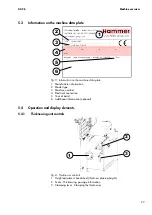
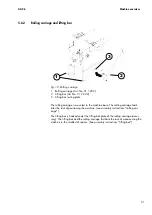
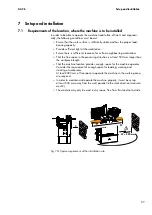
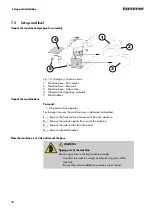
4 Hexagon socket screw and ribbed nut (8x)
5 Hexagon screw, washer and nut (6x)
Screw the machine base on whilst the machine is on its side
During the assembly of the machine frame, loosely connect all parts first. Finally,
tighten all screws.
1.
Screw the side sections to the rear wall using the hexagon socket screws
and ribbed nuts (4x).
2.
Screw the front section to the side sections using the hexagon socket screws
and ribbed nuts (4x).
3.
Screw the complete base to the machine chassis using the hexagon socket
screws, washers and nuts to the machine chassis (6x).
4.
Tighten all of the screw connections tightly.
5.
Several people should be used to carefully lift the machine backup.
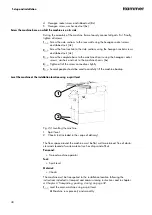
Level the machine at the installation location using a spirit level
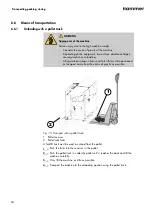
1
2
Fig. 22: Levelling the machine
1 Spirit level
2 Chocks (not included in the scope of delivery)
The floor space around the machine must be flat, well maintained, free of obsta-
cles and cleared of waste material such as chips and offcuts.
Personnel:
●
Trained machine operator
Tool:
●
Spirit level
Material:
●
Chocks
The machine must be transported to the installation location following the
instructions included in transport and commissioning instructions and in chapter
Chapter 6 ‘Transporting, packing, storing’ on page 32
1.
Level the main machine using a spirit level.
🡆
Machine runs precisely and smoothly.
Содержание A2-26
Страница 6: ...6 Table of contents 12 3 Spare parts list 86 12 4 Circuit diagram 92 ...
Страница 67: ...67 A2 26 Maintenance 10 Maintenance ...
Страница 92: ...92 Attachment 12 4 Circuit diagram ...
Страница 93: ......


