background image

17

„ftp://IP_address_of_the_router/”. 

For example (default): “ftp://192.168.2.1/”

You must now enter your user data in the window that appears. Depending on the user data entered, the FTP folder created for 
that user will open. 
You can add, copy or delete fi les, depending on your authorisation.
If an error message appears that informs you that the folder could not be found or the connection could not be established, 
check that the path, user name and password you entered are correct.
In order to be able to fi nd the folder again later, we recommend you save it under favourites in your browser.

6. Tools

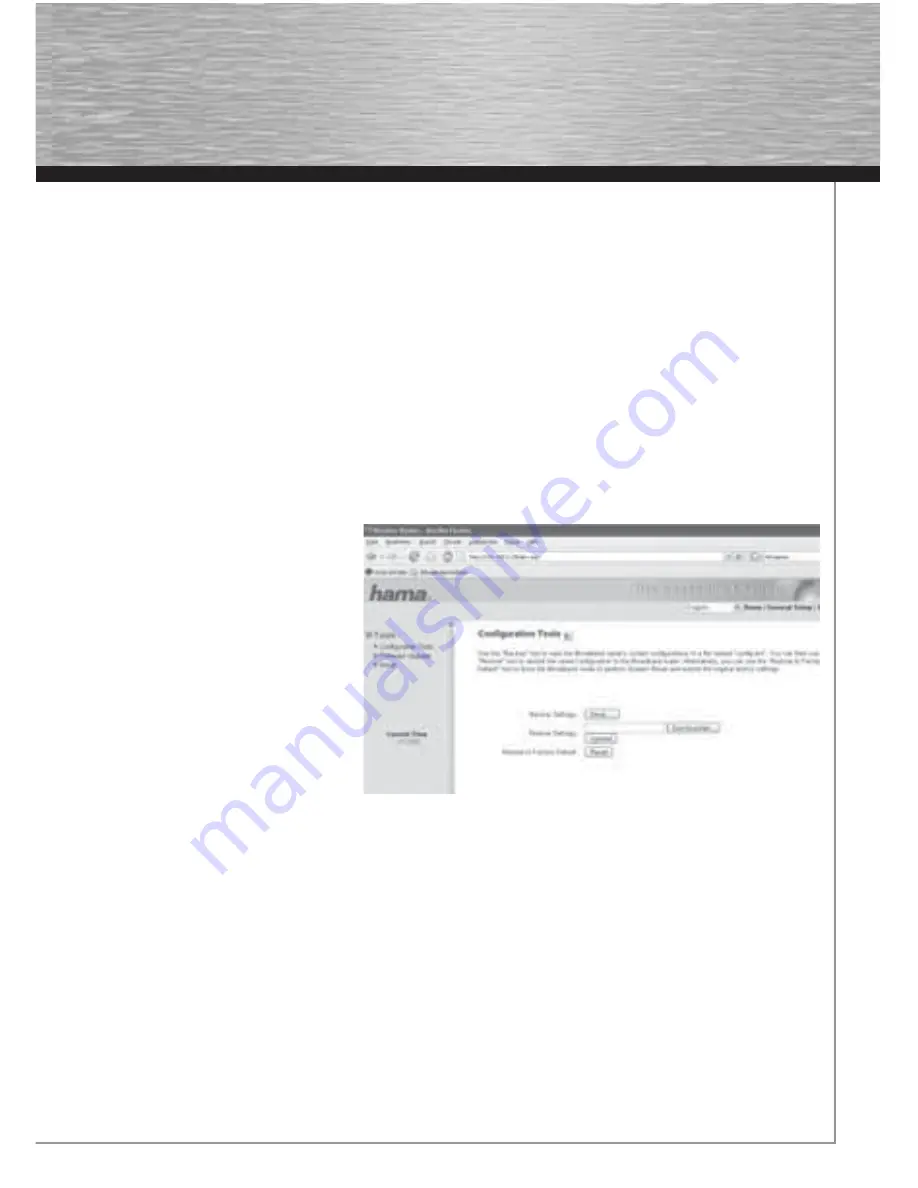
The Hama Wireless LAN router provides you with various tools to help you confi gure and use the device.

6.1 Confi guration Tools

From the start view which can be accessed by clicking 

Home

, select 

Tools

 in the menu at the top right, and then 

Confi guration Tools


in the menu on the left.

This page allows you to save all confi guration options of the router. Click 

Save

 to do so. Then select the target folder. You should also 

set a fi le name which allows you to identify the fi le 
clearly. Click 

Save

 after your selection. The settings are now saved. If you want to restore the saved settings at a later time, click 

Browse

 and then select the confi guration fi le 

required. 
Click 

Upload

 to load the fi le. The router takes a 

few seconds to load the fi le and then to restart. 
The selected LAN confi guration is valid after 
restarting. To reset the router to the default set-
tings, click 

Reset (Restore to Factory Default)

Click 

OK

 at the next prompt. All settings are 

reset to the default settings.

6.2 Firmware Update

From the start view which can be accessed by 
clicking 

Home

, select 

Tools

 in the menu at the top right, and then 

Firmware Upgrade

 in the menu on the left. To do so, click 

Next

 in the 

next window.

Click 

Browse

 to select the new fi rmware fi le in the next window. Click 

Apply

 after you select the fi le The new fi rmware is loaded and 

the router is restarted.

Warning! 

  Earlier settings are lost when new fi rmware is loaded.

6.3 Re-starting the Router

From the start view which can be accessed by clicking 

Home

, select 

Tools

 in the menu at the top right and then 

Reset

 in the menu on 

the left.

The router is restarted when you click 

Apply

 in this window and confi rm the subsequent prompt by clicking 

OK

. Settings you have 

made are not lost.

7. Status Information

From the start view which can be accessed by clicking 

Home

, select 

Status

 in the menu at the top right.

The menu on the left contains various sub-menus via which you can view detailed information, such as 

Internet Connection, Device 

Содержание Wireless LAN Router NAS

Страница 1: ...1 3 2 3 2 WPA WPA2 Encryption Page 11 3 3 Changing the Log in Data Page 12 3 4 LAN Settings Page 12 4 Connecting a USB printer to the network Page 12 4 1 Configuring the router Page 13 4 2 Installing a new printer on your PC Page 13 5 Connecting a USB storage medium to the network Page 14 5 1 Configuring the router Page 14 5 1 1Formatting the storage medium Page 14 5 1 2Creating changing deleting ...

Страница 2: ...note that closing the browser does not automatically disconnect from the internet Many programs send queries to the internet or receive data from it without this being clearly visible For the router these queries are just as valid as opening a browser for example If you want to ensure that there is no active connection to the internet you should switch off the device or disconnect it from the mode...

Страница 3: ...nection network adapter via which your PC is connected to the router e g LAN connection When you right click the corresponding connection a menu is displayed in which you select Properties Select the Internet Protocol TCP IP entry in the list and click Properties Select Optain an IP address automatically and Optain DNS server address automatically Confirm by clicking OK and again in the subse quen...

Страница 4: ... the Setup Wizard Please start the Setup Wizard after logging in by clicking Quick Setup Time Zone For Set Time Zone choose the appropriate time zone e g GMT sGreenwich Mean Time Dublin Edinburgh Lisbon London for England The remaining settings can be left as they are Click Next to continue Broadband Type Next you are prompted to specify the WAN connection type Your service provider will provide y...

Страница 5: ...ction is cut off when inactive Values between 1 and 1000 can be set Click OK to confirm your entries You must then restart the router for the settings to take effect Click Apply in the next window to save the settings The router takes approx 30 seconds to restart After the restart the router is configured so that you can access the internet via the connected computers You can also edit these setti...

Страница 6: ...t window if you want to operate a wireless network without encryption The router is then restarted The wireless network is available after you restart 3 2 1 2 Operation as an AP Bridge Point to Point Selecting this under Band allows you to specify whether the device runs ion the 2 4 Ghz band in accordance with the 802 11b 11Mbps 802 11g 54Mbps standards or works in combination with 802 11b and 802...

Страница 7: ... bandwidth of the network is halved for each additional access point as the packets have to be sent twice This makes it a combination of the previous modes Selecting this under Band allows you to specify whether the device runs ion the 2 4 Ghz band in accordance with the 802 11b 11Mbps 802 11g 54Mbps standards or works in combination with 802 11b and 802 11g The ESSID is required for the client ne...

Страница 8: ...s also determines the length of the key Default Tx Key allows you to select one of four preset keys Select Key 1 for example and enter your key of choice with the required length Examples 64 bit Hex 10 characters 231074a6ef 64 bit ASCII 5 characters j31n 128 bit Hex 26 characters 231074a6b9773ce43f91a5bef3 128 bit ASCII 13 characters urlaub2006 0 Click Apply to save your settings You must then res...

Страница 9: ...ices cannot connect Next enter the RADIUS server IP address The RADIUS Server Port is preset to 1812 Enter the password for the RADIUS Server Click Apply to save your settings You must then restart the router for the settings to take effect To do so click Apply in the next window The wireless network with encryption is available after you restart 3 2 3 Setting the Encryption for Bridge Point to Po...

Страница 10: ...WPA WPA2 Encryption Wi Fi Protected Access WPA is an encrypti on method for WLAN WPA contains the WEP architecture but offers additional protection via dynamic codes which are based on the Temporal Key Integrity Protocol TKIP and also offers pre shared keys PSK or extensible authentication protocol EAP for user authentication However a radius server is required for this WPA2 is a de velopment of W...

Страница 11: ...ter you can change it in this entry field The corresponding Subnet Mask is entered in the field directly below this DHCP Server The integrated DHCP server allows IP addresses to be assigned to connected clients automatically Select Disabled if you assign the IP addresses ma nually in your network and therefore do not need a DHCP server Select Enabled if you want to use the DHCP server the Lease Ti...

Страница 12: ...e PC before it can be used To do this select Start and then Printers and Faxes in the menu Select Add a Printer Click Next to confirm In this window select Local printer The check box for Plug and Play printer should not be set Then click on Next In the next window select Create a new port and then Standard TCP IP Port for the type of port Then click on Next This will now open the Add Standard TCP...

Страница 13: ...nother reason Once the storage medium has been connected it has to be formatted to the FAT file system before it can be used 5 1 1 Formatting the storage medium Warning Formatting causes all existing data on the storage medium to be lost Select the Storage Tools menu item This page allows you to format the USB storage medium which is connected to USB port 1 Select the desired file system in the To...

Страница 14: ...on Submit User All users you have created are listed in the window on the left Select the desired user from the list and click Add to add it Authority Select whether the user is allowed to both read and write to the share or only read it Description Additional description optional Click Save to save your settings and to enter them in the table To make changes to the settings of a shared folder sel...

Страница 15: ...uthority Select whether the user is allowed to both read and write to the share or only read it Click Save to save your settings and to enter them in the table To make changes to the settings of a shared folder select it from the Select column and click Edit To remove a share select the folder from the Select column and click Delete Selected or delete all shared folders by clicking on Delete All U...

Страница 16: ...r time click Browse and then select the configuration file required Click Upload to load the file The router takes a few seconds to load the file and then to restart The selected LAN configuration is valid after restarting To reset the router to the default set tings click Reset Restore to Factory Default Click OK at the next prompt All settings are reset to the default settings 6 2 Firmware Updat...

Страница 17: ...t support new drivers or product information can be found at www hama com Support Hotline Hama Product Consulting Tel 49 0 9091 502 115 Fax 49 0 9091 502 272 E mail produktberatung hama de Note This product may only be used in Germany Austria Switzerland France England Belgium Spain Holland Denmark Hungary Poland Sweden Luxemburg Ireland Greece the Czech Republic Slovakia and Finland See www hama ...

Отзывы: