hs dock
Installation
54
Order h49 7144.907-333
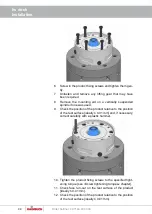
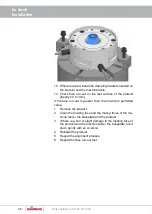
15. Check the position of product 2 relative to the position of
the product test surface [ideally ≤ 0.01 mm].
Whenever the face run-out and/or the position is greater than
the maximum permitted value:
1. Remove product 2.
2. Clean the locating face and the mating faces of product
1 and product 2.
3. If there is a burr or slight damage to the locating face of
product 1 and product 2, rub it down gently with an oil
stone.
4. Reinstall product 2.
5. Repeat the face run-out test.
6. Repeat the position check.
7.5.9 Installation of the product together with the installed clamping device
Usually, the clamping device is installed after the product has
been installed on the machine table / the base plate.
It is possible to install the product and clamping device to the
machine table / the base plate.
For this, the following conditions must be satisfied:
The fixing hole patterns of the product and the clamping
device must match up.
The screw size of the fixing screws for the product and
the clamping device must match up.
Choose the screw length of the fixing screws for this
combination in accordance with the build height.
The following steps are needed to install the product and
clamping device to the machine table / the base plate.
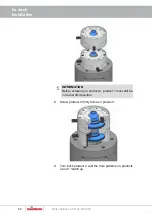
1. Prepare the product for installation on the machine table
/ the base plate [see »Preparation of the hydraulic port
variant of the product to the underside of the product«
chapter, or the »Preparation of the laterally mounted hy-
draulic port variant of the product« chapter as applica-
ble].
2. Install the clamping device on the product [see »Instal-
lation of the clamping device« chapter]. Attention must
be paid to the following points:
The actuating unit must be moved manually into
both limit stop positions.
The clamping device must be turned back to the fix-
ing bores on the actuating unit, not up to the fixing
threads in the actuating unit.
This dispenses with the screw connection for the
clamping device using clamping device fixing
screws. This takes place later, together with the ac-
tuating unit, using the fixing screws selected for this
combination.
This dispenses with the alignment and test process.

