23
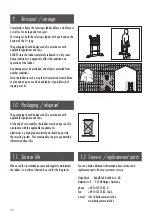
6.3 Collapsing and storing the ladder
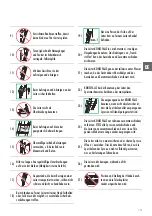
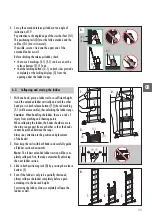
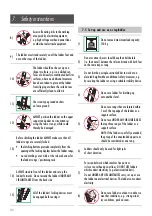
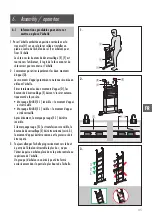
1. With one hand, grasp a ladder rail at a sufficient height,
stand the extended ladder vertically and with the other
hand press in both release buttons [F] (the red marking
[F-1] will become visible), thus unlocking the ladder rungs.
Caution:
When handling the ladder, there is a risk of
injury from pinching and shearing points.
When collapsing the ladder, the hands should me more
than two rungs apart from each other so that the hands
cannot be pinched between the rungs.
Always pay attention to the position and placement
of the hands!
2. Now clasp the rails with both hands and carefully guide
all ladder sections downwards.
Note:
The lowest extended ladder section will be com-
pletely collapsed first, thereby automatically unlocking
the next ladder section.
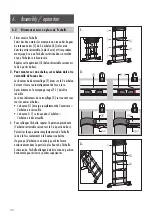
3. Slide in both positioning rails [D] by pressing the release
buttons [E].
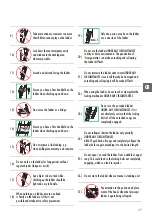
4. Even if the ladder is only to be partially shortened,
always collapse the ladder completely before again
extending it to the desired height.
For storing the ladder, always completely collapse the
ladder as well.
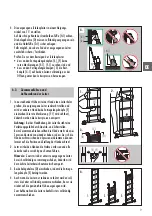
1.
2.
4.
3.
[D]
[H-1]
[D-1]
4.
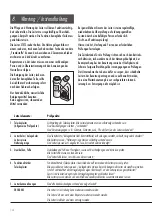
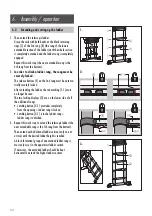
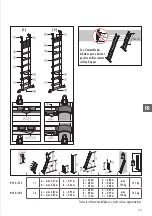
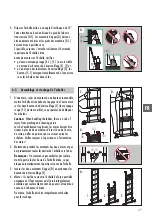
4. Set up the extended telescopic ladder at an angle of
inclination of 75°.
Pay attention to the angled edge of the crossbar feet [H-1].
The positioning rails [D] must be fully extended and the
rail feet [D-1] must sit securely.
If possible, secure / tie down the upper end of the
extended ladder as well.
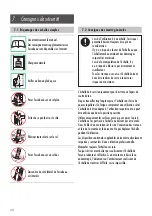
Before climbing the telescopic ladder, check
• that no red markings [E-1] [F-1] can be seen at the
release buttons [E], [F] and
• that the latching buttons [G-1] on both sides protrude
completely at the locking displays [G] from the
opening under the ladder rungs.
GB
Содержание 9113-111
Страница 2: ...2...
Страница 87: ...87 IT...

