2U14CS1ERA-SM
Service diagnosis
65
Domestic Air Conditioner
˄
A
˅
NO
YES
Yes
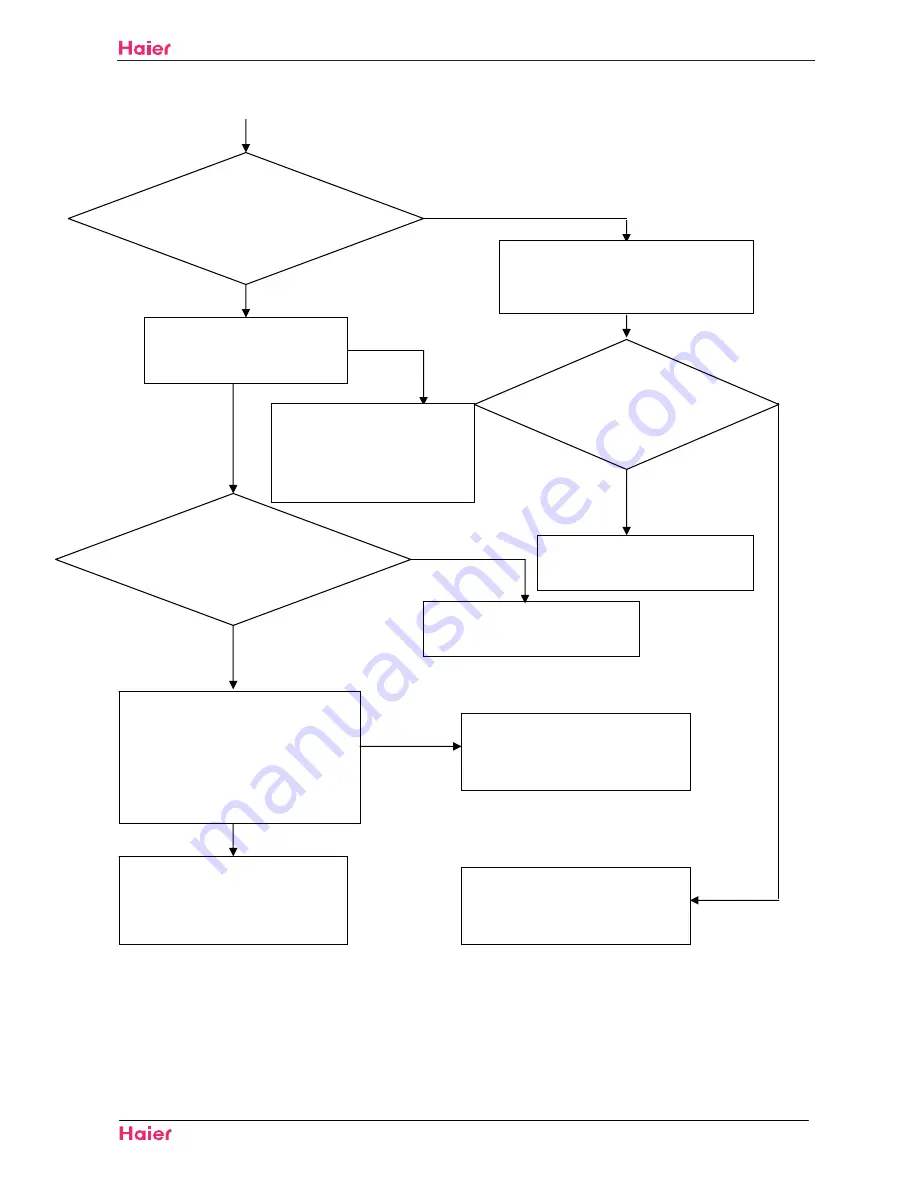
Check the status of LED1 on the
indoor mainboard. If the LED1
blinks interruptedly
˛
No
If the voltage is of a constant
value of 0V DCto5V DC
YES
measure the voltage between Jumpers 3 and
4 of IC1 on the indoor mainboard with a
multimeter.
NO
The outdoor mainboard is damaged;
Replace them with a new one.
If the LED1 is off within two minutes after the
machine is supplied with power, measure the
AC voltage between positions 1 and 3 on the
terminal of outdoor unit with a multimeter.
If 230VAC is available but 310DC not,
the power module is damaged, replace it
with a new one.
Test the outdoor power supply (230VAC
and +310VDC) with a multimeter.
The outdoor mainboard is damaged; replace
it with a new one.
The indoor mainboard is damaged; replace
it with a new one.
If the value varies between 0 and 80 VAC, the
outdoor mainboard is damaged, replace it
with a new one.
If the value is constant at about 30V, the
indoor mainboard is damaged, replace it with
a new one.
If both 230VAC and 310DC are
available,m12V(from7805)
is available.
Содержание 2U14CS1ERA
Страница 44: ...41 2U14CS1ERA SM ...
Страница 73: ...70 Domestic air conditioner WARNING CAUTION Installation 2U14CS1ERA SM ...
Страница 74: ...71 Domestic air conditioner Installation 2U14CS1ERA SM ...
Страница 77: ...Installation 2U14CS1ERA SM 74 Domestic air conditioner ...
Страница 78: ...Installation 2U14CS1ERA SM 75 Domestic air conditioner ...
Страница 79: ...Installation 2U14CS1ERA SM 76 Domestic air conditioner ...
Страница 82: ...Installation 2U14CS1ERA SM 79 Domestic air conditioner ...
Страница 86: ...83 Domestic air conditioner Removal of procedure 2U14CS1ERA SM ...
Страница 89: ...86 Domestic air conditioner Removal of procedure 2U14CS1ERA SM three two HOOKS ...
Страница 90: ...87 Domestic air conditioner Removal of procedure 2U14CS1ERA SM 3 horizontal flap flap flap flap flap ...
Страница 96: ... Domestic air conditioner Removal of procedure 2U14CS1ERA SM 8 ...
Страница 98: ...Domestic air conditioner Removal of procedure 2U14CS1ERA SM 9 ...
Страница 100: ... Domestic air conditioner Removal of procedure 2U14CS1ERA SM Loosen the csrews and pull the panel ...
Страница 102: ...99 Domestic air conditioner Removal of procedure 2U14CS1ERA SM 10 ...
Страница 103: ... Domestic air conditioner Removal of procedure 2U14CS1ERA SM 11 ...
Страница 104: ...101 Domestic air conditioner Removal of procedure 2U14CS1ERA SM 2 Loosen the fixing screws and remove the motor ...
Страница 105: ...Domestic air conditioner Removal of procedure 2U14CS1ERA SM 102 12 ...
Страница 106: ...103 Domestic air conditioner Removal of procedure 2U14CS1ERA SM and remove the reactor Loosen the screw ...
Страница 107: ...104 Domestic air conditioner Removal of procedure 2U14CS1ERA SM 13 Loosen the marked screws and pull out the backgurd ...
Страница 109: ...106 Domestic air conditioner Removal of procedure 2U14CS1ERA SM and remove the reactor Loosen the screw ...
Страница 110: ... SSHQGL 107 10 Appendix 10 1 Piping Diagrams 2U14CS1ERA SM ...
Страница 111: ...Domestic air conditioner Wring Diagram 108 10 2 Wiring Diagrams Indoor 2U14CS1ERA SM ...
Страница 116: ...W Hongjin Chen Huimin Li Peng Yang Bifei The end Sincere Forever Haier Group 88936935 2U14CS1ERA SM ...


