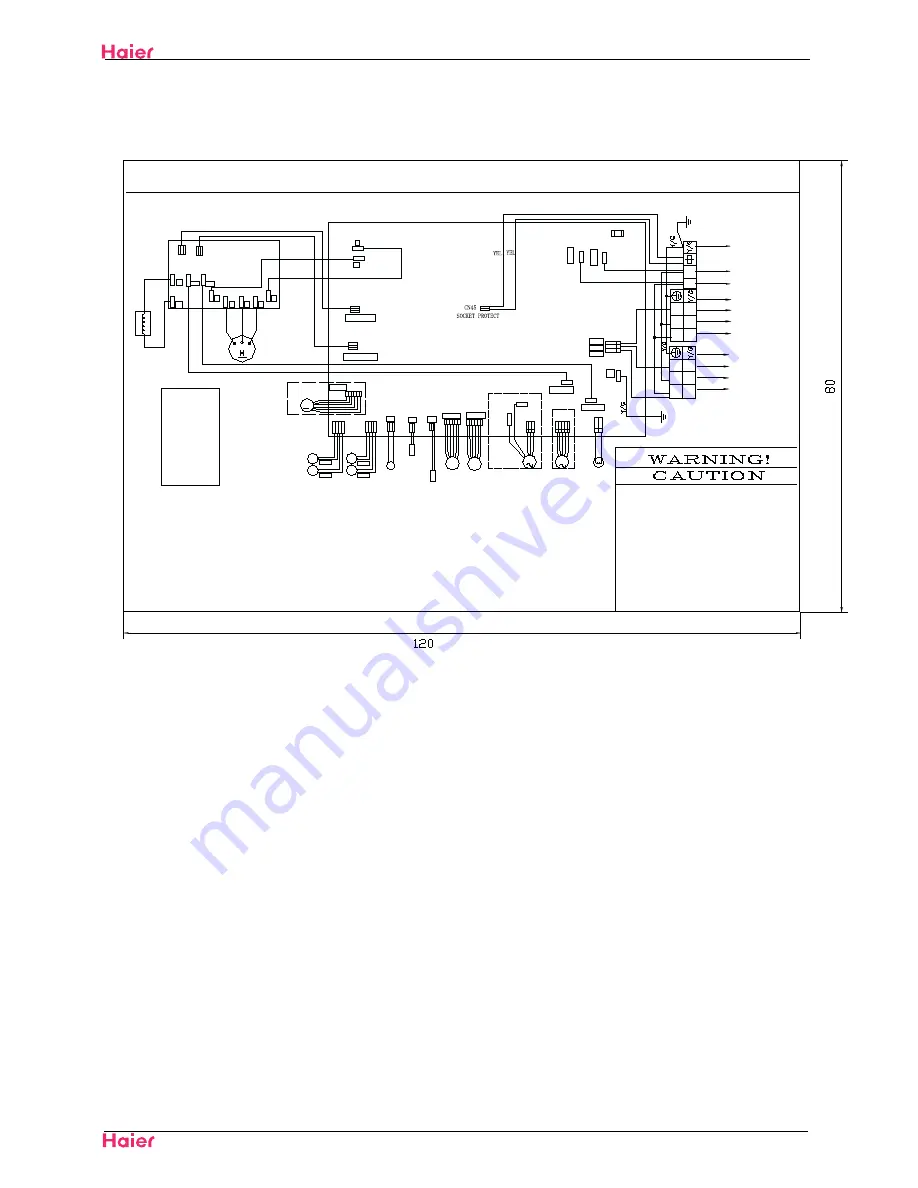
Domestic air conditioner
Wring Diagram
109
Outdoor
2U14CS1ERA-SM
:
:
02'8/(%2$5'
0$,13&%%2$5'
$&)$102725
%/2&.
5
:
%
&:
69
58
&2035(6625
%/
25
3
8
9
:
1
:
%
$&1
$&/
3)&5($&725
/
/,
&1
&1
&1
&1
&1
&1
&1
&1
&1
%/
%
%/
%
&1
&1
&1
1
&1
3
*1
'
*1
'
3
72,1'22581,7$
72,1'22581,7%
02'8/(32:(5
02'8/(&20
&1
&1
9$
)86(
$&
/
$&
1
&1
&1
:
5
%5
:
%
1
&20$
&20%
&1
%
:
%
:
32:(5
%
$
/
1
%5
%
:
:
%
5
7(50,1$/
3(
&1
'&)$102725
0
'&)$1
&1
&2035(6625',6&+$5*(
3,3(
7(036(1625
3,3(
7(036(1625
;*%
&*%
;*$
&*$
7&
&6
+:
&1
&1
&1
&1
%
%
9$/9($
9$/9(%
$
$
'()5267
$0%,(17
7(036(1625
7(036(1625
7(036(1625
&1
%
&1:
&15
(/(&75,&(;3$16,219$/9(
$
&1
&1
&1
0
0
$&)$102725
&1
:$<9$/9(
&1
$&/287
&1
&1
$&1287
DON'T TOUCH CAPACITOR,
EVEN AFTER PLUG-OFF ( DANGER
OF ELECTRIC SHOCK)
THE CAPACITOR RETAINS HIGH
VOLTAGE EVEN AFTER THE
PLUG-OFF.FOR YOUR SAFETY,BE SURE TO
WAIT AT LEAST 5 MINUTES.AFTER PLUG
OFF AND USE A TESTER TO CONFIRM THE
VOLTAGE BETWEEN CONNECTOR
&1
AND
&1
(ON MAIN PCB BOARD) IS LESS
THAN DC 10V BEFORE START SERVICING
OR LED2 EXTINGUISHED.
287'225:,5,1*',$*5$0
R e m a rks
˖
1 .th e d o tte d p a rts a re o p tio n a l fo r
d iffe re n t u n it.
2 .T h e co m p o n e n ts o f m a in p c b b o a rd is
fixe d fa cin g to th e co m p re sso r .
%5˖%52:1
5˖5('
%/˖%/8(
25˖25$1*(
:˖:+,7(
<*˖<(//2:
*5((1
%˖%/$&.
<(/˖<(//2:
Содержание 2U14CS1ERA
Страница 44: ...41 2U14CS1ERA SM ...
Страница 73: ...70 Domestic air conditioner WARNING CAUTION Installation 2U14CS1ERA SM ...
Страница 74: ...71 Domestic air conditioner Installation 2U14CS1ERA SM ...
Страница 77: ...Installation 2U14CS1ERA SM 74 Domestic air conditioner ...
Страница 78: ...Installation 2U14CS1ERA SM 75 Domestic air conditioner ...
Страница 79: ...Installation 2U14CS1ERA SM 76 Domestic air conditioner ...
Страница 82: ...Installation 2U14CS1ERA SM 79 Domestic air conditioner ...
Страница 86: ...83 Domestic air conditioner Removal of procedure 2U14CS1ERA SM ...
Страница 89: ...86 Domestic air conditioner Removal of procedure 2U14CS1ERA SM three two HOOKS ...
Страница 90: ...87 Domestic air conditioner Removal of procedure 2U14CS1ERA SM 3 horizontal flap flap flap flap flap ...
Страница 96: ... Domestic air conditioner Removal of procedure 2U14CS1ERA SM 8 ...
Страница 98: ...Domestic air conditioner Removal of procedure 2U14CS1ERA SM 9 ...
Страница 100: ... Domestic air conditioner Removal of procedure 2U14CS1ERA SM Loosen the csrews and pull the panel ...
Страница 102: ...99 Domestic air conditioner Removal of procedure 2U14CS1ERA SM 10 ...
Страница 103: ... Domestic air conditioner Removal of procedure 2U14CS1ERA SM 11 ...
Страница 104: ...101 Domestic air conditioner Removal of procedure 2U14CS1ERA SM 2 Loosen the fixing screws and remove the motor ...
Страница 105: ...Domestic air conditioner Removal of procedure 2U14CS1ERA SM 102 12 ...
Страница 106: ...103 Domestic air conditioner Removal of procedure 2U14CS1ERA SM and remove the reactor Loosen the screw ...
Страница 107: ...104 Domestic air conditioner Removal of procedure 2U14CS1ERA SM 13 Loosen the marked screws and pull out the backgurd ...
Страница 109: ...106 Domestic air conditioner Removal of procedure 2U14CS1ERA SM and remove the reactor Loosen the screw ...
Страница 110: ... SSHQGL 107 10 Appendix 10 1 Piping Diagrams 2U14CS1ERA SM ...
Страница 111: ...Domestic air conditioner Wring Diagram 108 10 2 Wiring Diagrams Indoor 2U14CS1ERA SM ...
Страница 116: ...W Hongjin Chen Huimin Li Peng Yang Bifei The end Sincere Forever Haier Group 88936935 2U14CS1ERA SM ...


