20
5.52.290.00.01.08
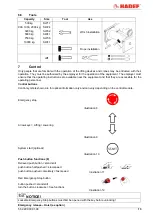
Make sure that 2-3 rope layers remain on the
drum in the lowest load position.
Adjustment for "lifting" is done analogous.
Afterwards drive carefully to the end positions to
check correct adjustment.
Illustration 21
Pictures may differ from the actual design.
12.6
Slack rope switch (as option)
12.6.1
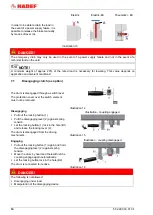
Adjustment
Illustration - horizontally
Other versions are possible.
Insert the wire rope (1) under the guiding
pulley (4) and tighten it by the load.
Release the locking screw at the eccentric (6).
Turn the eccentric until it gets contact to the
tappet of the limit switch (3).
Secure the eccentric (6) with the locking screw.
Switch on the winch in direction "Lowering"
and relieve the wire rope (1).
Repeat this procedure if necessary until the
best switching point is found.
1 wire rope
2 rope drum
3 Spindle limit switch
4 Guiding pulleys
5 roller lever
6 eccentric
7 switching shaft
Illustration 22
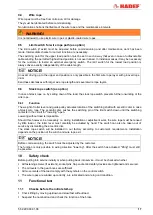
NOTICE!
Connection is, normally, effected in our factory, it is shown in the diagram.
12.6.2
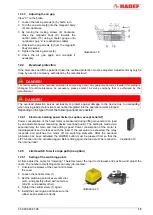
Setting for wire rope exit exceeding 45°
Further setting is necessary if the wire rope
exit exceeds 45°
Release the screw (1) slightly
Turn the square (2) until the roller puts
pressure on the wire rope.
Hold the square (2) and tighten the screw (1)
again.
Illustration 23
13
Inspection
13.1
General Overhaul for motor-driven units
The validated, national accident prevention regulations must be observed and the measures to reach "safe
working periods (S.W.P.)" according to FEM 9.755.
After the "theoretical working time D" has been elapsed, the owner/user must take motor driven devices out
of operation and effect a General Overhaul.
Further use of the equipment is only allowed after a licensed qualified person has proofed
that further use is possible without doubt
and
the conditions for further use have been determined
These conditions have to be written down in the test book.
The owner/user is responsible to make sure that these conditions are observed.

