Hach Ultra ORBISPHERE 511 Скачать руководство пользователя страница 2

Page 2

About this Guide

The information in this guide has been carefully
checked and is believed to be accurate. However,
Hach Ultra assumes no responsibility for any
inaccuracies that may be contained in this guide.
In no event will Hach Ultra be liable for direct,
indirect, special, incidental, or consequential
damages resulting from any defect or omission in
this guide, even if advised of the possibility of
such damages. In the interest of continued
product development, Hach Ultra reserves the
right to make improvements in this guide and the
products it describes at any time, without notice or
obligation.

Instrument Controls

The instrument front panel provides these user
interfaces:

A touch screen acting as display, touch 
pad and keyboard. 

A LED, showing when instrument is on.

A buzzer sounds each time the screen is 
touched, and when an event alarm is set. 
Sound level and type can be adjusted. 

Touch Screen 

The user interface on the front panel is a 320x240
pixels color display with touch screen. To make
navigation user friendly, the interface software is
Windows CE based, providing easy selection
through menus.
All the measurement, configuration, calibration
and "standard service" routines can be called by
pressing buttons and menus bar on screen.
Measurement display shows one measurement
slope per sensor in function (up to 3 lines for a 3
channel Orbisphere 51x). 

Special Keys on Portable Instruments

The sample mode start/stop button starts
the measurement process when in sample

mode. Pressing the button again manually
interrupts the process and an “aborted” message
is displayed in the numeric view.
The state of the battery is indicated at the bottom
of the measurement view. Pressing the battery
icon calls the “Batteries” state window.
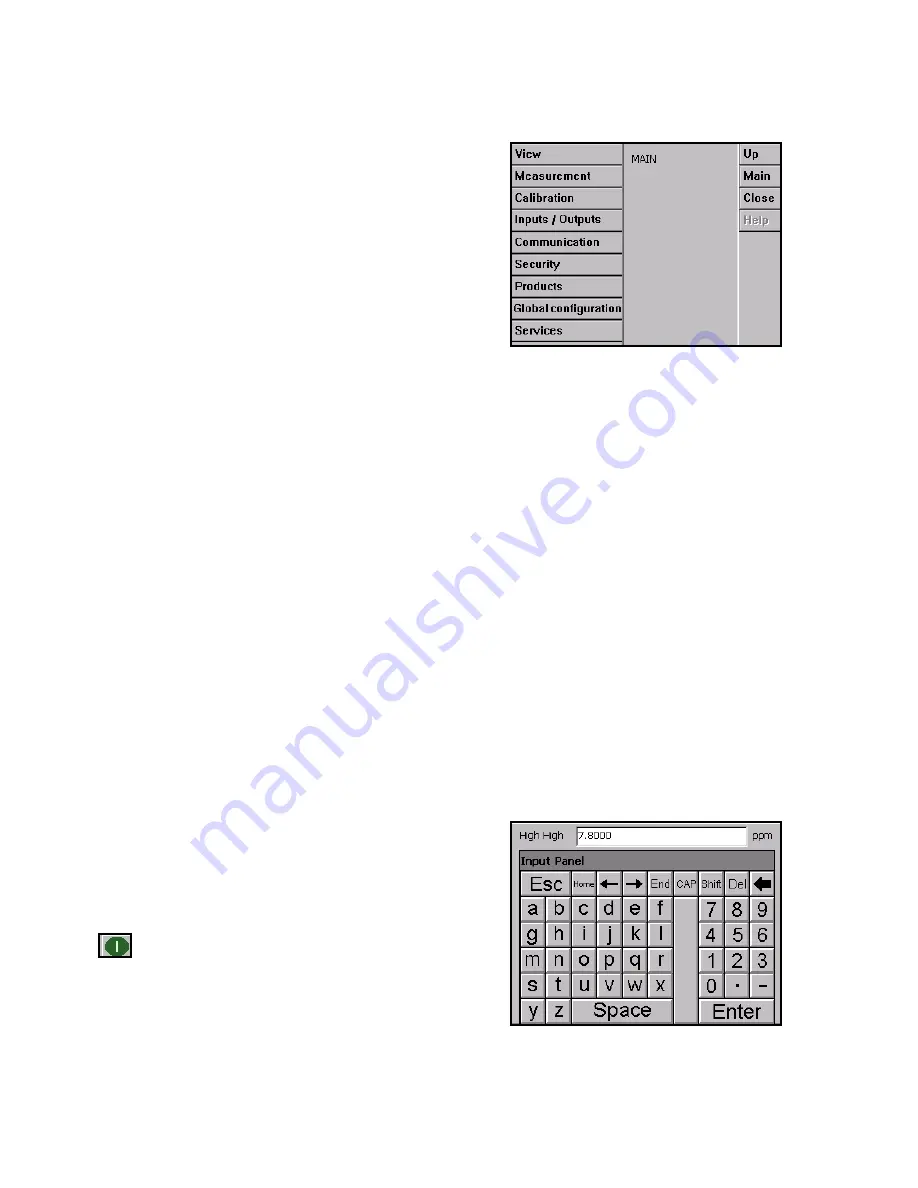
Menu Navigation

Pressing the “menu” button in the header bar calls
the main menu. The display is made of three
columns: 

Left column is the menus, or submenus 
(greyed out options are not available)

Center column shows a tree view of the 
actual position inside the menu structure

Right column has the following generic 
controls:

Up

 - Return to a previous menu

Main

 - Jump directly to the main menu

Close

 - Close the menu and return to 

the measurement view display

Help

 - Help topics relating to the 

current menu

Virtual Keyboard

When a text box (alphanumeric field) has to be
edited and is pressed, a virtual keyboard appears
on screen. It can be used as a PC keyboard
(pressing CAP give access to special keys). 

Once values have been entered, press the 

Enter

key to confirm and exit the virtual keyboard.

Operating Information

Содержание ORBISPHERE 511

Страница 1: ...Operator Quick Guide ORBISPHERE 510 511 512 Revision G 05 11 2008...

Страница 2: ...d service routines can be called by pressing buttons and menus bar on screen Measurement display shows one measurement slope per sensor in function up to 3 lines for a 3 channel Orbisphere 51x Special...

Страница 3: ...s measured and the channel configuration The statistical view offers statistical data that matches with Total Quality management tools Statistics is a tool to better analyze how a process behaves The...

Страница 4: ...concentration is smaller than that entered in Variation Time The stop criteria is met when the elapsed time reaches the Max time parameter The parameter Max time is the maximum time allowed to reach...

Страница 5: ...arms Set this to a minimum but enough to avoid alarms for non representative peaks beyond the set level Measurement Filter Configuration The filters are aimed at flattening the measurement curve in si...

Страница 6: ...actor Enable correction as appropriate If checked the percentage correction factor must be entered This value cannot be negative Note To manually set the TC sensor into a continuous purge mode press t...

Страница 7: ...from the non volatile memory Adjust the parameters for recording and storing measured data Two storage mode selections are available depending on the measurement mode selected Continuous measurement m...

Страница 8: ...ation of the Measured Gas Before initiating a calibration process the calibration parameters must be set by pressing on the Modify button Last calibration parameters are memorized so this step can be...

Страница 9: ...intenance Manual for details Verification Similar to the calibration procedure but for verification of the actual calibration values The result of the measurements made during the verification is not...

Страница 10: ...the Measured Gas Before initiating a calibration process the calibration parameters must be set by pressing on the Modify button The last calibration parameters are memorized so this step can be igno...

Страница 11: ...e variation indicates the variation during the last 3 measurements which is the stability of the measurements A variation as low as possible is needed for a precise calibration The display shows the a...

Страница 12: ...iate the H2 interference calibration Interference Calibration TC Sensor This calibration is available for TC sensors and is required when one of the interferences has been enabled The lower part of th...

Страница 13: ...point calibration recommended One point calibration By default the two point calibration is selected Two Point Calibration recommended Connect a certified absolute pressure gauge to the sample line a...

Страница 14: ...e information on this please refer to the manual s delivered with your sensor s Language Check the language as required and restart the instrument to apply the change The instrument will restart in th...

Страница 15: ...tration is below the Alarm LowLow limit Alarm low The gas concentration is below the Alarm Low limit Alarm high The gas concentration is above the Alarm High limit Alarm high high The gas concentratio...

Страница 16: ......

Отзывы: