Installation Manual
H3C WA2200 Series WLAN Access Points
Chapter 4 Installation of Outdoor APs
4-4
Note:
Before installation, remove dust inside and around all holes with a vacuum cleaner, and
then measure the distances between holes. If there is a large error, mark and drill holes
again.
Step
Operation
1
Put an anchor into each hole vertically.
2
Tap the flat end of the anchor with a rubber hammer until the anchor is flush
with the wall surface.
4) Fix the wall-mounting bracket
Step
Operation
1
Align the three holes in the wall-mounting bracket with the anchors and
insert three expansion screws through the installation holes into the
anchors.
2
Adjust the position of the wall-mounting bracket and tighten the expansion
screws.
5) Fix the AP
Step
Operation
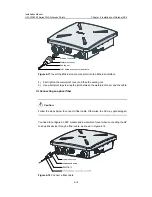
1
Method 1: Align the two installation holes in the AP with the corresponding
holes in the wall-mounting bracket and then use two screws to fix them.
Method 2: Insert a screw into each installation hole in the AP, but do not
tighten them. Then insert the screws into the corresponding holes in the
wall-mounting bracket.
2
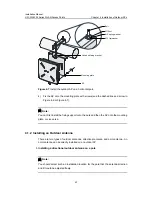
Tighten the screws so that the AP touches against the wall-mounting
bracket, as shown in Figure 4-4.


