Guild PDH26G Скачать руководство пользователя страница 8

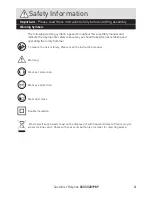
Customer Helpline 0333 3201989

8

Operating Instructions

into the handle. Slide the depth gauge until the distance between the depth gauge end 
and the drill bit end is equal to the depth of hole/screw you wish to make.. Release the 
locking button to tighten.
Note: Make sure that the toothed side of the depth gauge needs to be directed to the 
toothed side of hex hole in the handle as shown in the figure.

3. USING THE DUST COVER (SEE FIG C)
Use the dust cover to prevent dust from falling over the tool and on yourself when 
performing overhead drilling operations. Attach the dust cover to the bit as shown in Fig. 
C.

4. INSERTING AND REMOVING DRILL BIT IN SDS CHUCK
FITTING BITS (SEE FIG D)
Clean the bit shank and apply grease before installing the bit. Hold the rotary grip, pull 
back the locking sleeve and insert the bits into the bit holder. Turn the bit until it latches. 
Then release the locking sleeve. Check the locking by pulling on the tool.
If the bit or chuck is not located well, repeat the operation again.

REMOVING BITS (SEE FIG D)
Retract back the bit holder locking sleeve and pull out the bit.

WARNING! Your new Rotary Hammer generates powerful forces to get your job 
done quickly and effectively. These forces may cause inferior quality SDS bits 

to break and jam in the chuck. We therefore recommend that only high quality SDS 
bits be used with this tool.

C

D

bits

locking sleeve

bit holder

Содержание PDH26G

Страница 1: ...d rotary hammer These instructions contain important information that will help you get the best from your Guild rotary hammer ensuring it remains safe to operate If you need help or have damaged or m...

Страница 2: ...ion 3 In The Box 6 Accessories 6 Operating Instructions 7 Working Hints For Your Rotary Hammer 11 Maintenance 12 Trouble Shooting 12 Technical Data 13 Environmental Protection 14 Guarantee 14 Declarat...

Страница 3: ...ate the appropriate safety measures you should take when assembling and operating the rotary hammer To reduce the risk of injury Please read the instruction manual Warning Wear ear protection Wear eye...

Страница 4: ...the power tool Keep cord away from heat oil sharp edges or moving parts Damaged or entangled cords increase the risk of electric shock e When operating a power tool outdoors use an extension cord sui...

Страница 5: ...the hands of untrained users e Maintain power tools Check for misalignment or binding of moving parts breakage of parts and any other condition that may affect the power tool s operation If damaged h...

Страница 6: ...auge Hammer and chisel action selector Grease box cover 1 2 4 3 5 6 9 8 7 Accessories Auxiliary handle 1pc Dust cover 1pc Depth gauge 1pc Point chisel 14x250mm 1pc Flat chisel 14x250mm 1pc SDS drill b...

Страница 7: ...and rotate to the desired working position To clamp the auxiliary handle rotates the handle clockwise To loosen the auxiliary handle rotate the handle anti clockwise WARNING For your personal safety...

Страница 8: ...shown in Fig C 4 INSERTING AND REMOVING DRILL BIT IN SDS CHUCK FITTING BITS SEE FIG D Clean the bit shank and apply grease before installing the bit Hold the rotary grip pull back the locking sleeve...

Страница 9: ...lock button a and rotate the selector switch to make sign point to the triangle SEE FIG F1 Note You must press the selector switch lock button before adjusting the selector switch If the selector swit...

Страница 10: ...lock button a and then rotate the selector switch make sign pointing to the triangle SEE FIG H1 2 Turn the hammer or drilling action selector switch pointing to the hammer action position SEE FIG H2...

Страница 11: ...he pressure on the drill bit when it is about to break through This will prevent the drill from jamming When drilling a large hole first drill a pilot hole using a smaller drill bit Always apply press...

Страница 12: ...ICATION TOOL SEE FIG I The tool is grease lubricated A grease refill is only required during hammer work efficiency is low Open the grease box lid at the top of the hammer using the pin spanner provid...

Страница 13: ...kg The declared vibration total value may be used for comparing one tool with another and may also be used in a preliminary assessment of exposure WARNING The vibration emission value during actual u...

Страница 14: ...ctions and keep well lubricated where appropriate If the tool is to be used regularly then invest in anti vibration accessories Avoid using tools in temperatures of 100 C or less Plan your work schedu...

Страница 15: ...below IMPORTANT The wires in the mains lead are colored in accordance with the following code Blue Neutral Brown Live As the colors of the wires in the mains lead of this appliance may not correspond...

Страница 16: ......

Отзывы: